Bemærk
Adgang til denne side kræver godkendelse. Du kan prøve at logge på eller ændre mapper.
Adgang til denne side kræver godkendelse. Du kan prøve at ændre mapper.
The SharePoint Framework (SPFx) v1.20 release introduced a new option to use HTML to render the Viva Connection Adaptive Card Extension (ACE) Quick Views. This enables more advanced user experiences. You can even use whatever suitable JavaScript web framework you prefer (ie: React etc.) in your Quick View experiences.
Use BaseWebQuickView as the base class for an HTML Quick View.
Important
This walkthrough's code and screenshots target SPFx 1.20. Heft commands shown below apply only to SPFx 1.22 and later; use the Gulp toolchain for the original 1.20 project. Match all SPFx packages to your project's version. If you add React to an SPFx 1.24 HTML Quick View, use React 18 root ownership and disposal; the plain HTML example below doesn't mount React.
Scaffold an Adaptive Card Extension project
Create a new project directory for your project and change your current folder to that directory.
Create a new project by running the Yeoman SharePoint Generator from within the new directory you created:
yo @microsoft/sharepoint
When prompted, enter the following values (select the default option for all prompts omitted below):
- Which type of client-side component to create? Adaptive Card Extension
- Which template do you want to use? Generic Card Template
- What is your Adaptive Card Extension name? HTML Quick View
At this point, Yeoman installs the required dependencies and scaffolds the solution files. This process might take few minutes.
Test the ACE on a SharePoint page
Before digging into the code, run the scaffolded output and see what an Adaptive Card Extension looks like.
Serve the ACE locally and load it on a test SharePoint page using the SPFx developer toolbar. Set initialPage in config/serve.json to that page.
heft start
Once the local web server is running, open the test page with local manifests enabled and edit the page.
Open the Web Part Toolbox and select your ACE.
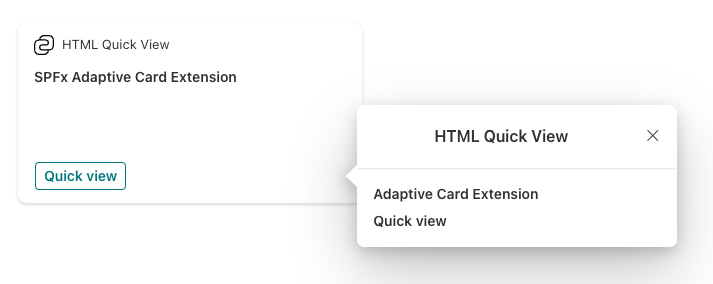
After adding the ACE, save the page and leave edit mode to interact with it. Select Quick View to open the default Adaptive Card implementation defined in src/adaptiveCardExtensions/htmlQuickView/quickView/template/QuickViewTemplate.json. The screenshots illustrate the original sample's UI:
With the ACE project created and working, let's now update to use an HTML rendering instead of using the included Adaptive Card.
Update the Quick View to use HTML
Start by adding the welcome light image from a default web part project:
Create a new folder assets within the existing quickView folder.
Add the welcome-light.png file to this folder.
Note
You can use any image in this tutorial, or you can find the image in the sample project accompanying this tutorial: Sample: HTML Quick View demo.
To be sure you won't use the default Adaptive Card template for the Quick View, delete the following file from the project: ./src/adaptiveCardExtensions/htmlQuickView/quickView/template/QuickViewTemplate.json
Add a stylesheet to the project
Now you'll make a few changes to the project to add a stylesheet to the project. This will simplify formatting the content in the HTML rendering that you'll add.
Install the SPFx Fluent UI core library into the project that we'll use to apply some styles to our project.
From the console, run the following command in the root of the project:
npm install @microsoft/sp-office-ui-fabric-core@{{REPLACE_VERSION}} --save-prod --save-exactImportant
Before running this command, check the version of the @microsoft/sp-core-library package in the project's package.json file. Replace the
{{REPLACE_VERSION}}in the previous command with the version of the @microsoft/sp-core-library. This is to ensure you're using the same version of all SPFx libraries in your project.
Add a new style sheet to the project, QuickView.module.scss in the same folder as the QuickView.ts file and add the following code that you'll use in the HTML rendering:
@import '~@microsoft/sp-office-ui-fabric-core/dist/sass/SPFabricCore.scss';

.helloWorld {
  overflow: hidden;
  padding: 1em;
  color: "[theme:bodyText, default: #323130]";
  color: var(--bodyText);
  &.teams {
    font-family: $ms-font-family-fallbacks;
  }
}

.welcome {
  text-align: center;
}

.welcomeImage {
  width: 100%;
  max-width: 420px;
}

.links {
  a {
    text-decoration: none;
    color: "[theme:link, default:#03787c]";
    color: var(--link); // note: CSS Custom Properties support is limited to modern browsers only

    &:hover {
      text-decoration: underline;
      color: "[theme:linkHovered, default: #014446]";
      color: var(--linkHovered); // note: CSS Custom Properties support is limited to modern browsers only
    }
  }
}
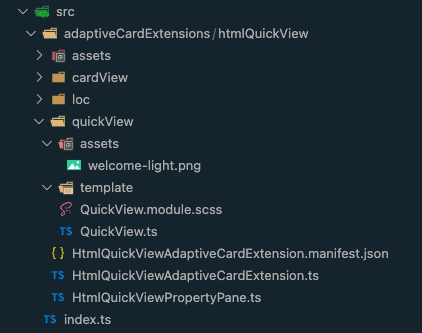
At this point, your ACE component should look similar to the following with the new files added and after removing the default Adaptive Card:
Update the Quick View to use HTML instead of an Adaptive Card in the rendering
The last step is to update the Quick View component to import the style sheet and use HTML for the rendering instead of the Adaptive Card.
Locate and open the ./src/adaptiveCardExtensions/htmlQuickView/quickView/QuickView.ts file.
Update the
importstatement for the ACE base component. Locate the following line at the top of the file:import { ISPFxAdaptiveCard, BaseAdaptiveCardQuickView } from '@microsoft/sp-adaptive-card-extension-base';Replace this line with the following line:
import { BaseWebQuickView } from '@microsoft/sp-adaptive-card-extension-base';Add the following two
importstatements after the existingimportstatements:import { escape } from '@microsoft/sp-lodash-subset'; import styles from './QuickView.module.scss';Locate the
QuickViewclass declaration and change the base class it extends from the following:export class QuickView extends BaseWebQuickView< IHtmlQuickViewAdaptiveCardExtensionProps, IHtmlQuickViewAdaptiveCardExtensionState, IQuickViewData > {... to the following:
export class QuickView extends BaseWebQuickView<
  IHtmlQuickViewAdaptiveCardExtensionProps,
  IHtmlQuickViewAdaptiveCardExtensionState
> {
Remove the existing
template()method from theQuickViewclass.Add the following
render()method to theQuickViewclass to render the Quick View using HTML:render(): void { this.domElement.innerHTML = ` <section class="${styles.helloWorld}"> <div class="${styles.welcome}"> <img alt="" src="${require('./assets/welcome-light.png')}" class="${styles.welcomeImage}" /> <h2>Well done, ${escape(this.context.pageContext.user.displayName)}!</h2> </div> <div> <h3>Welcome to HTML powered SPFx Quick Views!</h3> <p> Starting with SPFx 1.20, you can use any HTML in the ACE Quick Views to build engaging employee experiences! </p> <h4>Learn more about Viva Connections extensibility development:</h4> <ul class="${styles.links}"> <li><a href="https://aka.ms/spfx" target="_blank">Viva Connections Extensibility Overview</a></li> <li><a href="https://aka.ms/spfx" target="_blank">SharePoint Framework Overview</a></li> <li><a href="https://aka.ms/m365pnp" target="_blank">Microsoft 365 Developer Community</a></li> </ul> </div> </section>`; }
Test the new HTML enabled Quick View
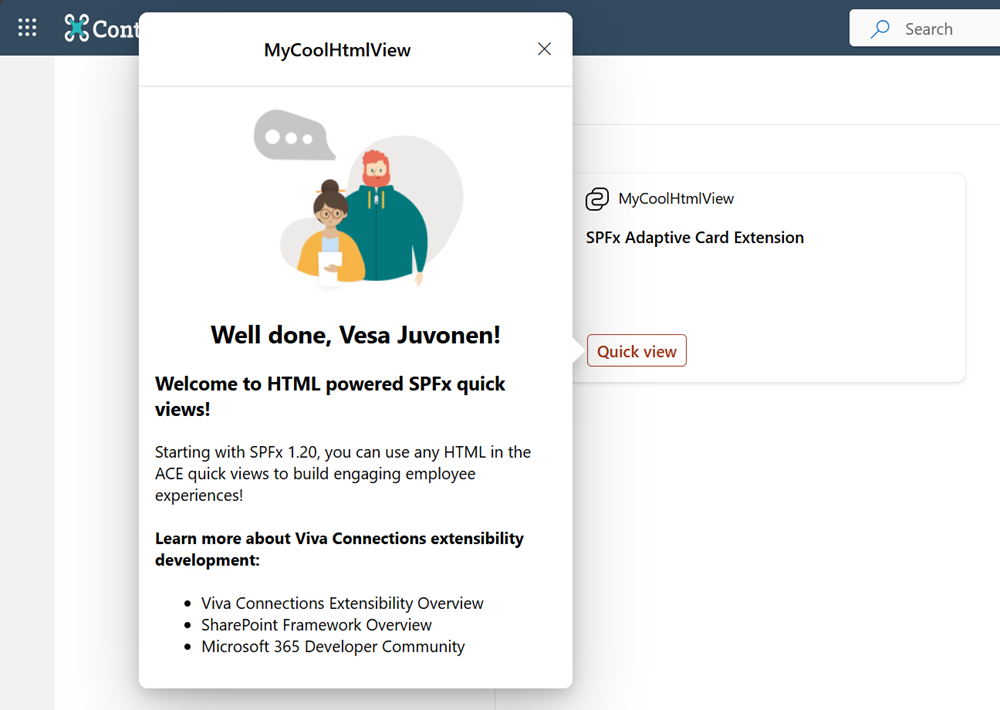
With all the changes applied, reload the test page with local manifests enabled and open the HTML Quick View: