Note
Access to this page requires authorization. You can try signing in or changing directories.
Access to this page requires authorization. You can try changing directories.
In this tutorial, use the Azure DocumentDB Migration Extension in Visual Studio Code to create and manage migration jobs from an on-premises or cloud instance of MongoDB to Azure DocumentDB. This extension provides a developer-friendly interface for performing migrations without service interruptions. The extension eliminates the need for extra infrastructure and offers secure connectivity, zero-cost usage, and granular control over which databases and collections to migrate.
This article focuses on using the extension's integrated workflow to simplify migration steps directly within Visual Studio Code. This approach is ideal for scenarios where you want a streamlined, managed experience with minimal complexity and maximum reliability.
Prerequisites
- An Azure subscription. If you don't have an Azure subscription, create a free account.
An existing Azure DocumentDB cluster
- If you don't have a cluster, create a new cluster
- Install the Azure DocumentDB Migration Extension on your machine. This installation automatically installs its prerequisite, the DocumentDB for Visual Studio Code extension.
Before starting the migration, prepare your Azure DocumentDB account and your existing MongoDB instance for migration.
MongoDB instance (source)
- Complete the premigration assessment to check for incompatibilities and warnings between your source instance and target account.
- Add a user with
readAnyDatabaseandclusterMonitorpermissions, unless one already exists. Use this credential while creating migration jobs in the extension.
Azure DocumentDB (target)
- Gather the Azure DocumentDB account's credentials.
- Ensure user has
createCollection,dropCollection,createIndex,insert, andlistCollectionspermissions.
Minimum required permissions
Use the following minimum roles to create and run migration jobs.
| Minimum role | Scope | Applies to connectivity mode | Purpose |
|---|---|---|---|
| Reader | Subscription | Public and private | List subscriptions and resource groups. Required for each migration job. |
| Azure Database Migration Service Contributor | Resource group | Public and private | Create Azure Database Migration Service (DMS). You don't need to create a new DMS for every migration. One DMS per region is enough. |
| Contributor | Subscription | Public and private | Register DMS in the subscription. This registration is a one-time activity and can be delegated to another user. |
| User Access Administrator | Virtual network | Private only | Assign the Network Contributor role to the DMS object principal. This assignment is a one-time activity per virtual network and can be delegated to another user. |
| Contributor | Azure DocumentDB | Public and private | Trigger the migration job. |
For provider registration details, see Register Microsoft.DataMigration resource provider in your subscription.
Important
Microsoft Entra ID authentication isn't currently supported in migration jobs. Use native DocumentDB authentication.
Perform the migration
For planning guidance on migration sizing, speed, and cutover, see Migration best practices.
Connect to source
- Open the DocumentDB for VS Code extension.
- Add the MongoDB server you want to migrate to the Document DB Connections list.
- Select Add New Connection.
- On the navigation bar, select Connection String.
- Paste your connection string:
mongodb://<YOUR_USERNAME>:<YOUR_PASSWORD>@localhost:10260/?tls=true&tlsAllowInvalidCertificates=true&authMechanism=SCRAM-SHA-256 - From the DocumentDB Connections, select the connection and expand it to connect.
Invoke the Migration Extension
You can invoke the Migration Extension from the DocumentDB Connections.
Right-click on an expanded (connected) connection.
Select Data Migration from the context menu.
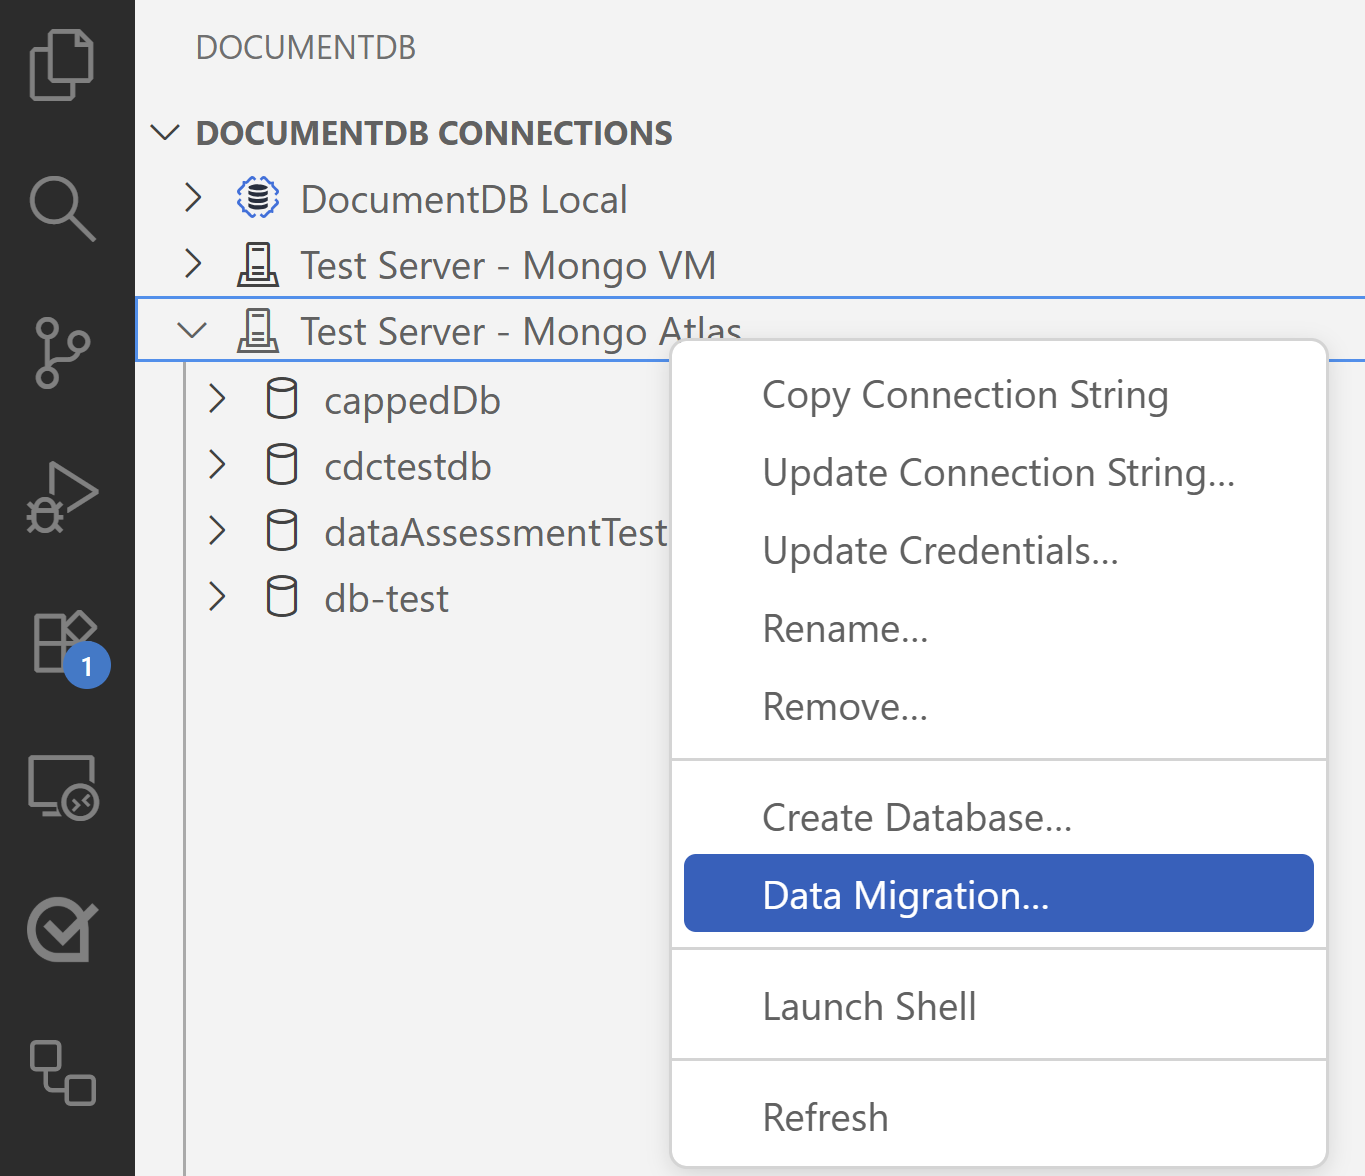
From the command palette, select Migration to Azure DocumentDB.
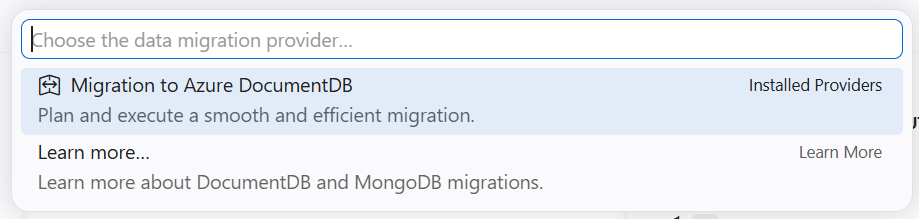
Then select Migrate to Azure DocumentDB.
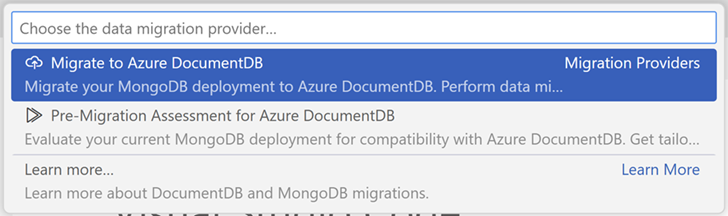
A migration wizard guides you through the process.
Create a migration job
Use a migration job to migrate a group of collections from the source to the destination Azure DocumentDB. The create migration job wizard has seven steps.
Step 1: Create job
In this step, enter the basic details for the job.
Job Name: Enter a user-friendly name to identify the migration job.
Migration Mode: Select the migration mode that's most appropriate for your use case.
- Online migration copies collection data and ensures updates are also replicated during the process. This method minimizes downtime, so you can keep operations running for business continuity. Use this option when ongoing operations are crucial, and reducing downtime is a priority.
- Offline migration captures a snapshot of the database at the beginning, offering a simpler and predictable approach. It works well when using a static copy of the database is acceptable, and real-time updates aren't essential.
Important
To ensure successful online migrations from MongoDB, you must enable ChangeStream on the source MongoDB server. Without ChangeStream, the migration process doesn't capture any modifications made to the data after the initial migration. Therefore, use the online migration mode only if ChangeStream is enabled on your source MongoDB server.
Connectivity: Depending on your organization's security mandate and network setup, choose from Public and Private.
- Use Public when the source and target servers are accessible over the internet through public IPs. It enables support for services that require external accessibility.
- Use Private when either the source or target servers are accessible exclusively through private IPs within a virtual network. It enhances security by eliminating exposure to the public internet.
Select Next to continue.

Step 2: Select target
Select an existing Azure DocumentDB account and provide its connection string.
Select the subscription, resource group, and Azure DocumentDB account from the dropdowns.
Enter the connection string to the Azure DocumentDB account.
Ensure the IP listed in the screen is allowed on the Azure DocumentDB firewall.
Select Next to continue.

Step 3: Select Database Migration Service(DMS)
Azure Database Migration Service is a service that migrates data to and from Azure data platforms by using cloud infrastructure for data transfer, instead of relying on local resources. Choose an existing Azure Database Migration Service instance from the dropdown or select Create DMS to create a new migration service.
Important
Make sure that the Microsoft.DataMigration resource provider is registered in your subscription. You only need to do it once per subscription.
Select Next to continue.

Step 4: Configure connectivity
This screen depends on the connectivity mode you chose in Step 1.
Use the following steps if you selected Public as the connectivity mode in the migration wizard:
Note the static IP addresses displayed in the wizard.
Add these IP addresses to the firewall allow list on your source MongoDB server.
Add these IP addresses to the Azure DocumentDB firewall.

Use the following steps if you selected Private as the connectivity mode in the migration wizard:
In Source connectivity path, select the topology that matches your environment:
If applicable, select whether the source and target use the same network:
- For Azure private endpoint scenarios, select The source and target share a common virtual network if both endpoints are in the same virtual network.
- For spoke proxy scenarios, select The same spoke virtual network will be used by the proxy and the target if the proxy and target private endpoint are in the same spoke virtual network.
In Private source connection, optionally provide a private connection string for DMS to use when connecting to the source. If you're using the TCP Proxy topology, the private connection string is required and must point to the proxy endpoint with
directConnection=true.In Virtual network or Virtual networks, select the subscription, resource group, virtual network, and subnet for the required network path. Depending on the selected topology, the wizard shows Source, Target, Common, or Spoke virtual network details.
In DMS configuration, select a CIDR range that doesn't overlap with your virtual networks or any reachable on-premises address space.
In Enable Virtual Network Integration, run the PowerShell command or commands shown in the wizard to assign the Network Contributor role to the DMS service principal for the relevant virtual network or networks. If you already completed this step for a previous migration on the same virtual network, you don't need to repeat it.
Select Virtual Network Integration Step has been completed, and then continue.
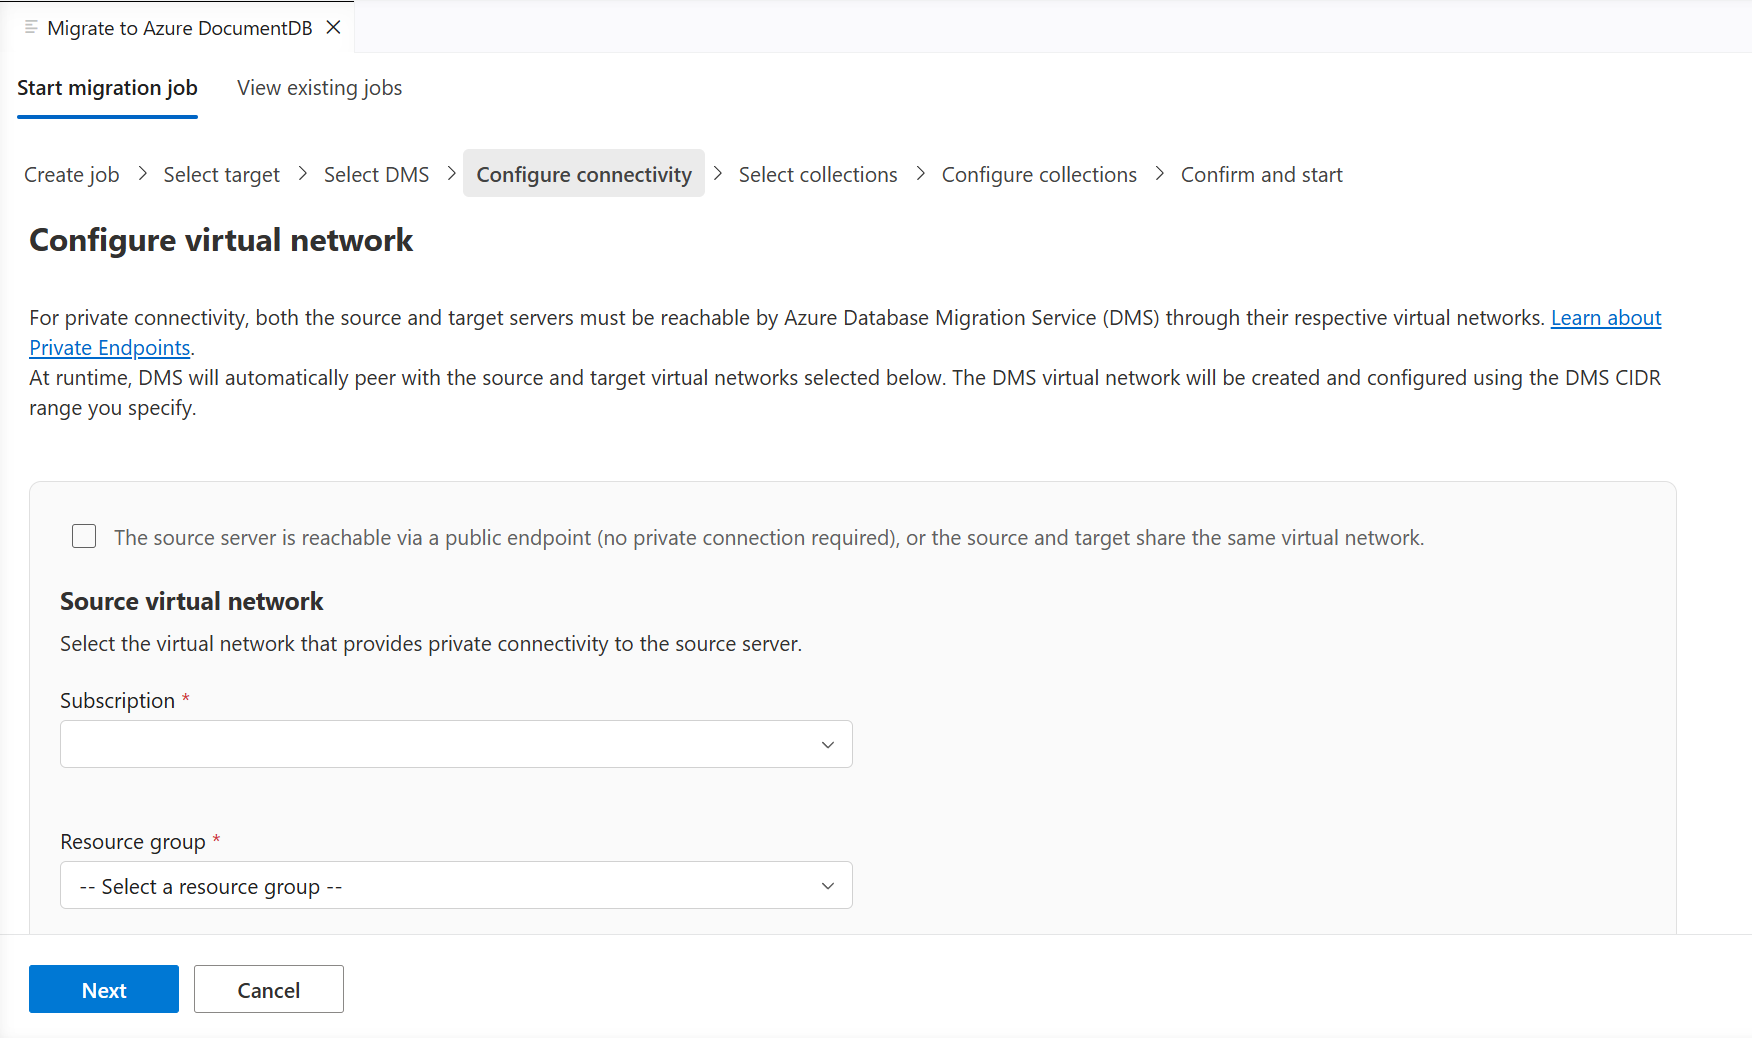
For more information, see Public connectivity, Private connectivity, and Troubleshoot connectivity.
Select Next to continue.
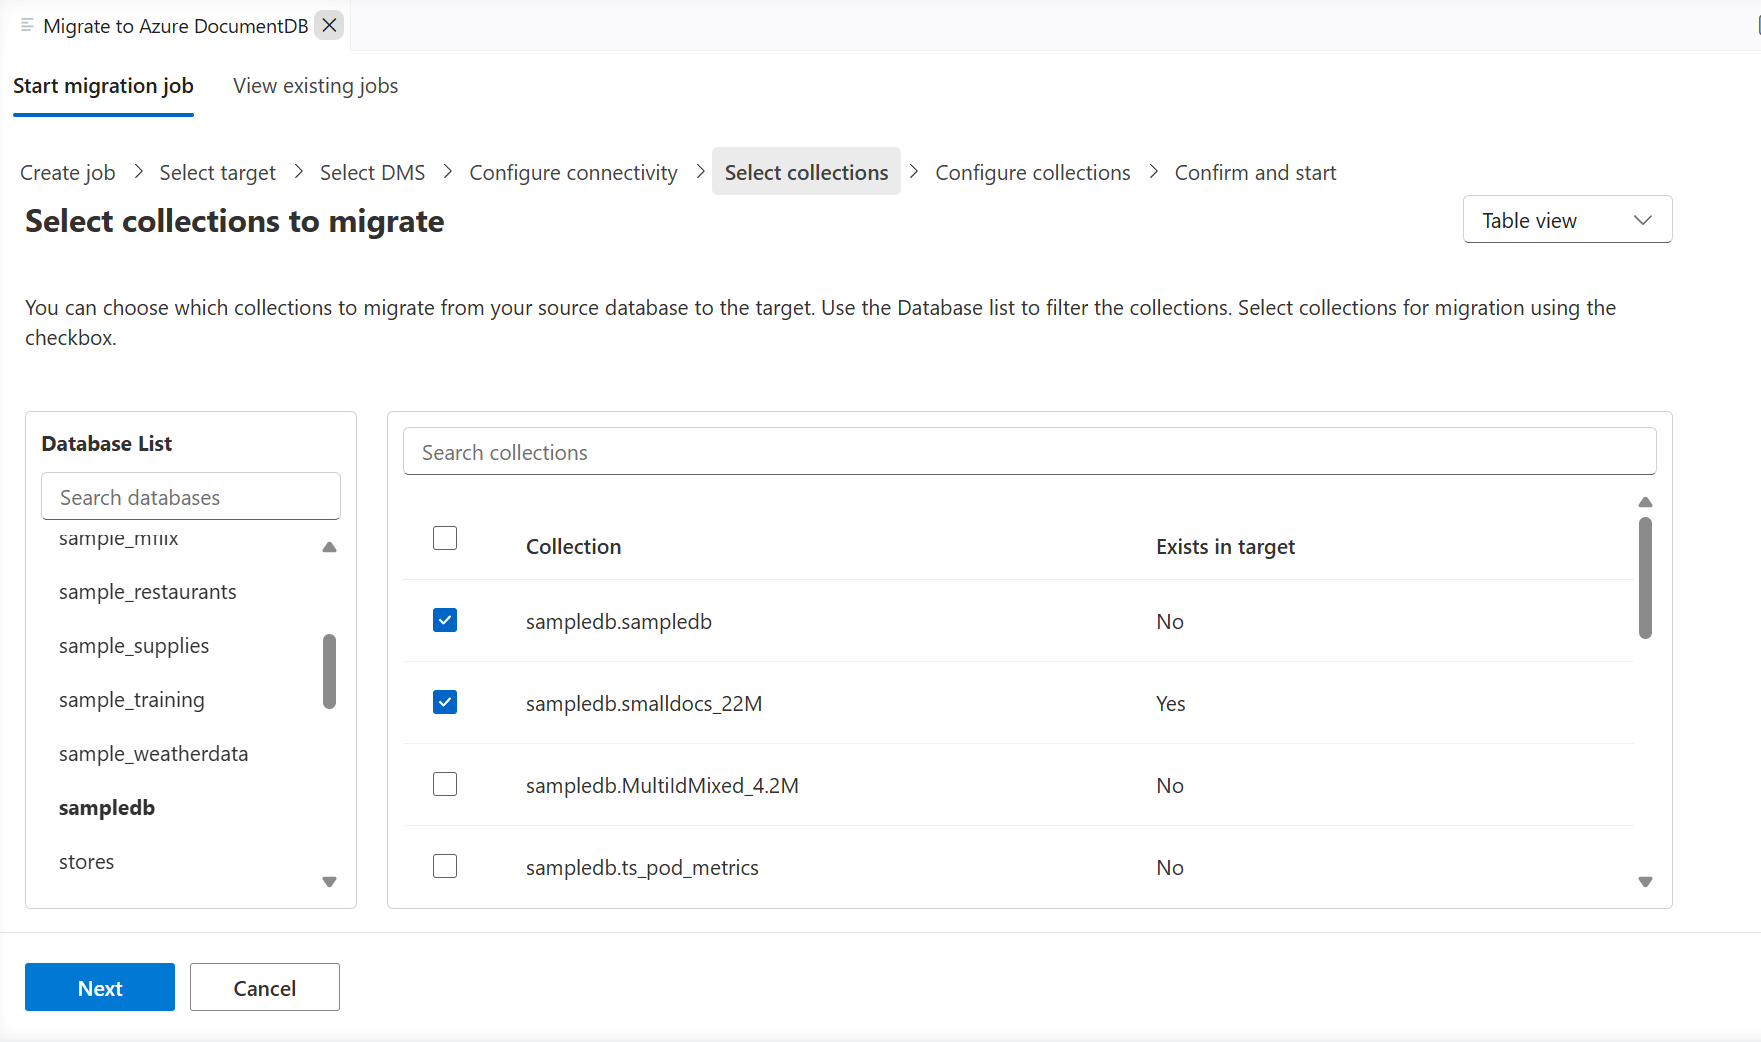
Step 5: Select collections
Select the collections to include in the migration job. Use the search options to choose from the list of collections. Collections that already exist in the target are automatically marked Yes in the Exists in Target column.
Tip
Make sure to select all collections you want to include as you can't add collections once the migration job is created.
Select Next to continue.
Step 6: Configure collections
Configure how each selected collection is migrated to the target. For each collection, set the following options:
- Overwrite target collection: Specify whether to overwrite a collection that already exists in the target. The Sharding and Indexing options apply only when you set Overwrite target collection to Yes.
- Sharding strategy: Choose whether to shard the target collection or leave it unsharded. When you shard the target collection, it uses the same shard key as the source collection.
- Indexing strategy: Choose how indexes are built on the target collection:
- Do not create indexes: Skip index creation.
- Copy indexes from source: Copy all indexes from the source collection. Unique indexes are copied before the initial data load, and nonunique indexes are copied after the initial data load.
Use the inline editor to configure these settings for individual collections, or select Bulk Update to apply the same settings to multiple collections.
Select Next to continue.

Step 7: Confirm and start
Review the migration job details before selecting Start Migration. If you need to update the details, use the Edit Details button.
After you create the migration job, you're automatically redirected to the View Existing Jobs page.
Tip
Azure Database Migration Service runs the data migration tasks. Therefore, you don't need to be connected to the source and target environments during the data migration. The dashboard updates the status at frequent intervals.
Monitor existing migration jobs
Use the View Existing Jobs tab to monitor the migration status of initialized jobs. The selected DMS determines the job list. Use the Change DMS button to change your selection.
The status automatically updates at frequent intervals. Offline jobs automatically complete once the selected collection snapshots are copied to target. However, you need to manually cut over the online migrations.
You can Pause a migration job to temporarily halt it at a logical point. When you're ready to continue, select Resume to pick up from where the job stopped.

To view the collection-wise status, select a row from the table.

Monitor online migrations
Online migrations, unlike offline migrations, don't automatically complete. Instead, they run continuously until you manually finalize them by selecting Cutover.
To complete the online migration, follow these steps in the given order:
The Cutover button is enabled once the initial data load finishes for all collections. At this stage, the job is in the replication phase, continuously copying updates from the source instance to the target instance to keep it up-to-date with the latest changes.
When ready to perform the migration cutover, stop all incoming transactions to the source collections you're migrating.
The Time Since Last Change shows the time gap between the last update and current time.
Monitor the replication changes in the table and wait until the Replication Changes Played metric stabilizes. A stable Replication Changes Played metric indicates that all updates from the source are successfully copied to the target.
Select Cutover when the replication gap is minimal for all collections and the Replication Changes Played metric is stable.

Wait for the migration job to complete, which indicates that all source changes are synchronized to the target.
Before declaring the migration complete, manually verify that the source and target are synchronized. At a minimum, compare the document count for each source and target collection.
Register Microsoft.DataMigration resource provider in your subscription
To register the Microsoft.DataMigration resource provider in your subscription, follow these steps:
Azure portal
Go to the Azure portal and navigate to your subscription.
In the left-hand menu, select Resource providers under Settings.
Search for Microsoft.DataMigration in the search box at the top.
If it's not registered, select it and select the Register button.
Azure CLI
Open the Azure Cloud Shell or your local terminal.
Run the following command to register the resource provider:
az provider register --namespace Microsoft.DataMigration
PowerShell
Open the Azure Cloud Shell or your local PowerShell.
Run the following command to register the resource provider:
Register-AzResourceProvider -ProviderNamespace "Microsoft.DataMigration"
FAQ
Why are views missing in the select collection screen step when Azure DocumentDB supports views?
Azure DocumentDB supports the creation of new views. However, the migration extension doesn't support migrating existing views.
After the migration finishes, you can always recreate the views.
Which collections and databases does the migration process skip when migrating from MongoDB to Azure DocumentDB?
The migration process considers the following databases and collections as internal for MongoDB:
| Category | Description |
|---|---|
| Databases | admin, local, system config |
| Collections | Any collection with prefix system. |
Does the migration job run locally on my machine?
The migration wizard in VS Code requires network connectivity from your local machine to both the source and target environments. The wizard uses this connectivity to enumerate databases and collections and to submit the migration job. After you submit the job, you can close VS Code or disconnect from the source and target environments.
Azure Database Migration Service (DMS) executes data migration entirely. DMS is an Azure-hosted service that manages all data movement. DMS doesn't rely on your local machine or VS Code for job execution, so local connectivity isn't required after job submission.
Can I rename databases and collections during migration?
The extension doesn't support database and collection renaming during migration.
How should I configure my source server firewalls to avoid connectivity problems?
The required network configuration depends on the selected connectivity mode:
- Public mode: Allow the IP addresses that the wizard displays on both the source and target firewalls to enable communication.
- Private mode: Enable virtual network integration so that the DMS servers can securely communicate with the source and target endpoints within the virtual network.
For detailed validation steps and troubleshooting, see Troubleshoot connectivity. Also refer to VS Code connectivity.
How many databases and collections can I migrate in a single migration?
You can include unlimited collections in a single migration.
How many migration jobs can I run simultaneously?
You can run multiple migration jobs when using public access. However, when using private access, a single virtual network supports only one active job at a time. To run multiple jobs with private access, use different virtual networks for each job.
What type of logs does the extension generate?
The extension records errors, warnings, and other diagnostic logs in the default log directory:
- Windows -
C:\Users\<username>\.dmamongo\logs\ - Linux -
~/.dmamongo/logs - macOS -
/Users/<username>/.dmamongo/logs