Note
Access to this page requires authorization. You can try signing in or changing directories.
Access to this page requires authorization. You can try changing directories.
This tutorial guides you through converting Oracle database schemas to Azure Database for PostgreSQL by using the Visual Studio Code PostgreSQL extension with Microsoft Foundry to generate and review PostgreSQL definitions.
It covers connecting to your Oracle source and Azure Database for PostgreSQL target, configuring Microsoft Foundry, running the Migration Wizard, and reviewing generated PostgreSQL artifacts. Before you begin, make sure that you have network access and credentials for both servers and a Microsoft Foundry deployment.
Here's what you can expect during the conversion:
- Schema discovery: The tool analyzes your Oracle schema objects.
- AI processing: Microsoft Foundry processes and converts compatible objects.
- Scratch-database checks: The tool attempts compilation and available static checks. Functional, data, and application validation remain separate.
- Object review: Use Conversion Object Explorer to inspect results and refine generated PostgreSQL definitions.
- Output generation: Successfully converted objects are saved as PostgreSQL files.
Prerequisites
This section describes the prerequisites for using the Oracle to Azure Database for PostgreSQL schema conversion feature in Visual Studio Code before starting a conversion.
System requirements
| Category | Details |
|---|---|
| Visual Studio Code version | 1.95.2 or later |
| GitHub Copilot subscription | Pro+, Business, Enterprise |
Operating system support
| Operating System | Support Details |
|---|---|
| Windows | x64 architecture only |
| Linux | x64 architecture |
| macOS | macOS 13+ |
Target Azure Database for PostgreSQL requirements
| Component | Version requirement |
|---|---|
| Azure Database for PostgreSQL | PostgreSQL version 15 or later |
| Scratch database | Azure Database for PostgreSQL flexible server |
AI model requirements
You need one of the following AI components configured:
| AI component | Model version |
|---|---|
| Microsoft Foundry | GPT-5.2 deployment |
Microsoft Foundry deployment configuration
In Microsoft Foundry, create a deployment that uses the gpt-5.2 model. The deployment name is the one you chose when you created the deployment; it doesn't have to match the model name.
The endpoint is your Microsoft Foundry resource URL. Microsoft Foundry resources expose several equivalent hostnames; any of the following formats is valid:
https://{your-resource}.services.ai.azure.comhttps://{your-resource}.openai.azure.comhttps://{your-resource}.cognitiveservices.azure.com
Replace {your-resource} with your Microsoft Foundry resource name (for example, oracletopg). If you need to call an inference route directly, the current preview path is /openai/responses?api-version=2025-04-01-preview.
For more information about endpoint formats and inference routes, see Endpoints for Microsoft Foundry Models.
Tip
To route Microsoft Foundry traffic through Azure API Management for centralized governance, throttling, and observability, configure an AI gateway in front of your Foundry resource and use the gateway URL as the endpoint. For more information, see Configure AI Gateway in your Foundry resources.
Required database privileges
Before you run schema conversion, verify source metadata access and scratch-database permissions with your database administrators. The Oracle account needs access to schema metadata and dictionary views, not application row data. The PostgreSQL account must be able to drop and recreate matching schemas and create objects for validation. Use a dedicated account where possible, and follow the principle of least privilege.
Source Oracle privileges
The following minimum privileges are required on the source Oracle database:
| Privilege | Purpose |
|---|---|
| CONNECT | Basic database connection |
| SELECT_CATALOG_ROLE | Access to data dictionary views |
| SELECT ANY DICTIONARY | Read system metadata and dictionary objects |
SELECT SYS.ARGUMENT$ |
Access to procedure and function argument information |
SELECT SYS.V_$RESOURCE_LIMIT |
Access to session and process utilization and limits through V$RESOURCE_LIMIT |
Scratch database privileges
Arrange the following access on the selected scratch database. Database-level CREATE doesn't grant permission to drop a schema owned by another role.
| Access | Purpose |
|---|---|
CONNECT on the database |
Connect for conversion and validation. |
CREATE on the database |
Create validation schemas. |
| Ownership of matching schemas, or an appropriately authorized role | Drop the matching schemas before recreating them. |
| Permission to create objects in the validation schemas | Create and compile converted definitions. |
| Extension-installation permissions, or administrator assistance | Install the extensions required for conversion and validation. |
Network requirements
- Outbound connectivity: Microsoft Foundry endpoints.
- Database connectivity: Both source Oracle and target Azure Database for PostgreSQL flexible server.
- HTTPS access: Visual Studio Code Extensions Marketplace and GitHub Copilot services.
- GitHub repository access: https://github.com/microsoft/pgsql-tools/.
Oracle Instant Client (for thick client mode)
The schema conversion tool connects to Oracle by using thin client mode by default, which requires no extra software. If your environment requires thick client mode, install Oracle Instant Client on the machine that runs Visual Studio Code. The tool reads your sqlnet.ora and tnsnames.ora configuration and switches to thick mode automatically when a setting requires it.
You can determine whether thick client mode is required by checking the Oracle network configuration files in your source environment. Look for the following parameters in the sqlnet.ora file (typically located in $ORACLE_HOME/network/admin/):
| Parameter | Indicates thick mode is required |
|---|---|
SQLNET.CRYPTO_CHECKSUM_CLIENT |
Set to REQUIRED or REQUESTED for native network encryption |
SQLNET.ENCRYPTION_CLIENT |
Set to REQUIRED or REQUESTED for native network encryption |
Microsoft Foundry authentication
Configure one of the following authentication methods for Microsoft Foundry:
| Authentication method | Requirements |
|---|---|
| API key | Microsoft Foundry endpoint URL and API key. |
| Microsoft Entra ID | Azure Account extension signed in, Foundry User role (formerly Azure AI User) assigned on the Microsoft Foundry resource. |
Migration process
This section walks through the conversion workflow. You install the extension, initialize a project, connect to Oracle, review Discovery, and configure the scratch database and Microsoft Foundry. Conversion attempts compilation and available static checks in the scratch database. You then review and refine the output, deploy it to a separate nonproduction database, and independently validate it before production use.
Step 1: Install the PostgreSQL Visual Studio Code extension
Open Visual Studio Code.
Go to the Extensions view (
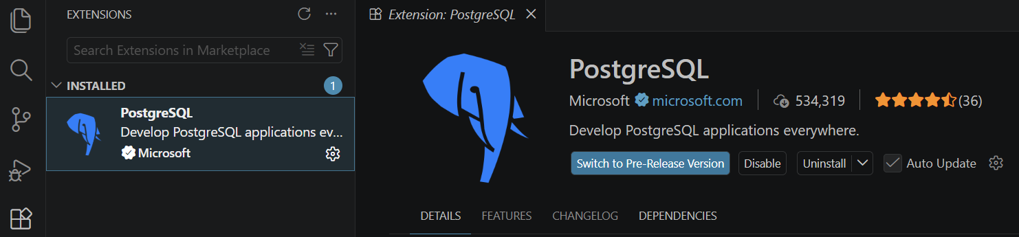
Ctrl+Shift+X).Search for PostgreSQL and install the PostgreSQL extension published by Microsoft.
Step 2: Create an Azure Database for PostgreSQL connection
In the PostgreSQL extension panel, create a connection to your Azure Database for PostgreSQL flexible server instance.
Enter the connection details (host, database, username, password).
Test and save the connection.


Step 3: Open a new workspace
Create a new folder on your local machine for the migration project.
Open the folder as a new workspace in Visual Studio Code.


Step 4: Initialize a migration project
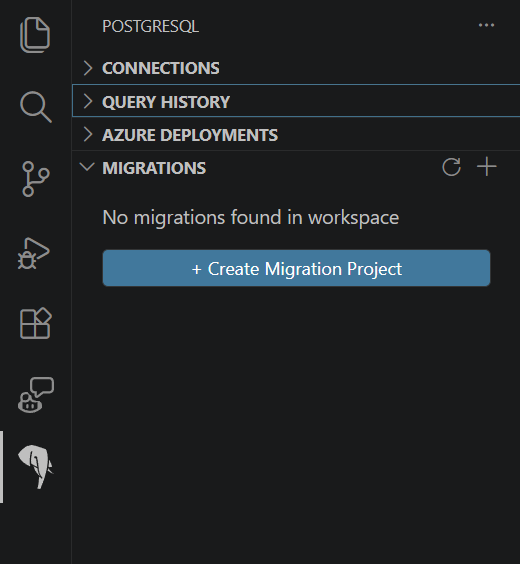
Open the PostgreSQL extension.
Go to the Migrations panel.
Select Create Migration Project.
Step 5: Configure project settings
In the Migration Wizard, enter your project name.
Select Next to continue.


Step 6: Configure the Oracle connection
Enter your Oracle connection details:
- Host or server name.
- Port number.
- Database or service name.
- Username and password.
The tool selects thin or thick client mode automatically from your
sqlnet.oraandtnsnames.orasettings; the UI doesn't expose a manual selector. Thin mode is used by default. If yoursqlnet.orarequires thick mode, make sure that Oracle Instant Client is installed and that its location is on thePATHenvironment variable before you continue. For more information, see Oracle Instant Client.Select Load Schemas. The tool tests the Oracle connection and, if successful, lists all user-defined schemas available in Oracle.
Select one or more schemas to convert to PostgreSQL.
Select Next: Discovery.


Step 7: Review Discovery results
Discovery shows the source inventory and planned extraction scope. No DDL is extracted at this stage. For an explanation of the summary counts and scope, see Discovery in the schema conversion overview.
Wait for Discovery to finish.
Under Source permissions, review each check, its purpose, and its result. Review unsuccessful checks with your Oracle database administrator. After resolving permission issues, select Refresh Discovery and review the updated results. For the required permissions, see Source Oracle privileges.
Review the Discovered, To be extracted, Excluded, and Invalid objects summary counts.
Expand Supported object types to review the To be extracted, Excluded, and Invalid objects counts by type. A supported type can still have excluded objects; these counts aren't conversion results.
Expand Not supported object types to review unsupported categories found on the source. For support details and PostgreSQL alternatives, see Schema conversion limitations.
Under Dependent schemas, review referenced schemas that you didn't select. Select Show diagram to view the references. The numbers on the connections represent dependency references, not counts of objects to extract or convert.
Review the separate notice about referenced Oracle system schemas that aren't migrated. Don't treat these references as additional application schemas selected for conversion.
If you need to change the schema selection, select Previous to return to Connect to Oracle, update Schemas, and select Next: Discovery again. Review the updated scope before continuing.
Select I have reviewed the objects, exclusions and dependent schemas.
Select Next: PostgreSQL Connection.


Step 8: Configure an Azure Database for PostgreSQL scratch database
Use an empty or dedicated, unused scratch database with no objects or data you need to preserve. For preparation guidance, see Prepare the scratch database.
Select the Azure Database for PostgreSQL connection that you defined in the PostgreSQL extension.
Select the target database from the dropdown list.
Select Verify Extensions. If the Recommended extensions are not installed warning appears, review the missing extensions. Follow the scratch-database preparation guidance to add the needed extensions to the server's allow list and install them in the selected database, then select Verify Extensions again. You can continue with the warning, but objects that depend on missing extensions might require manual changes.
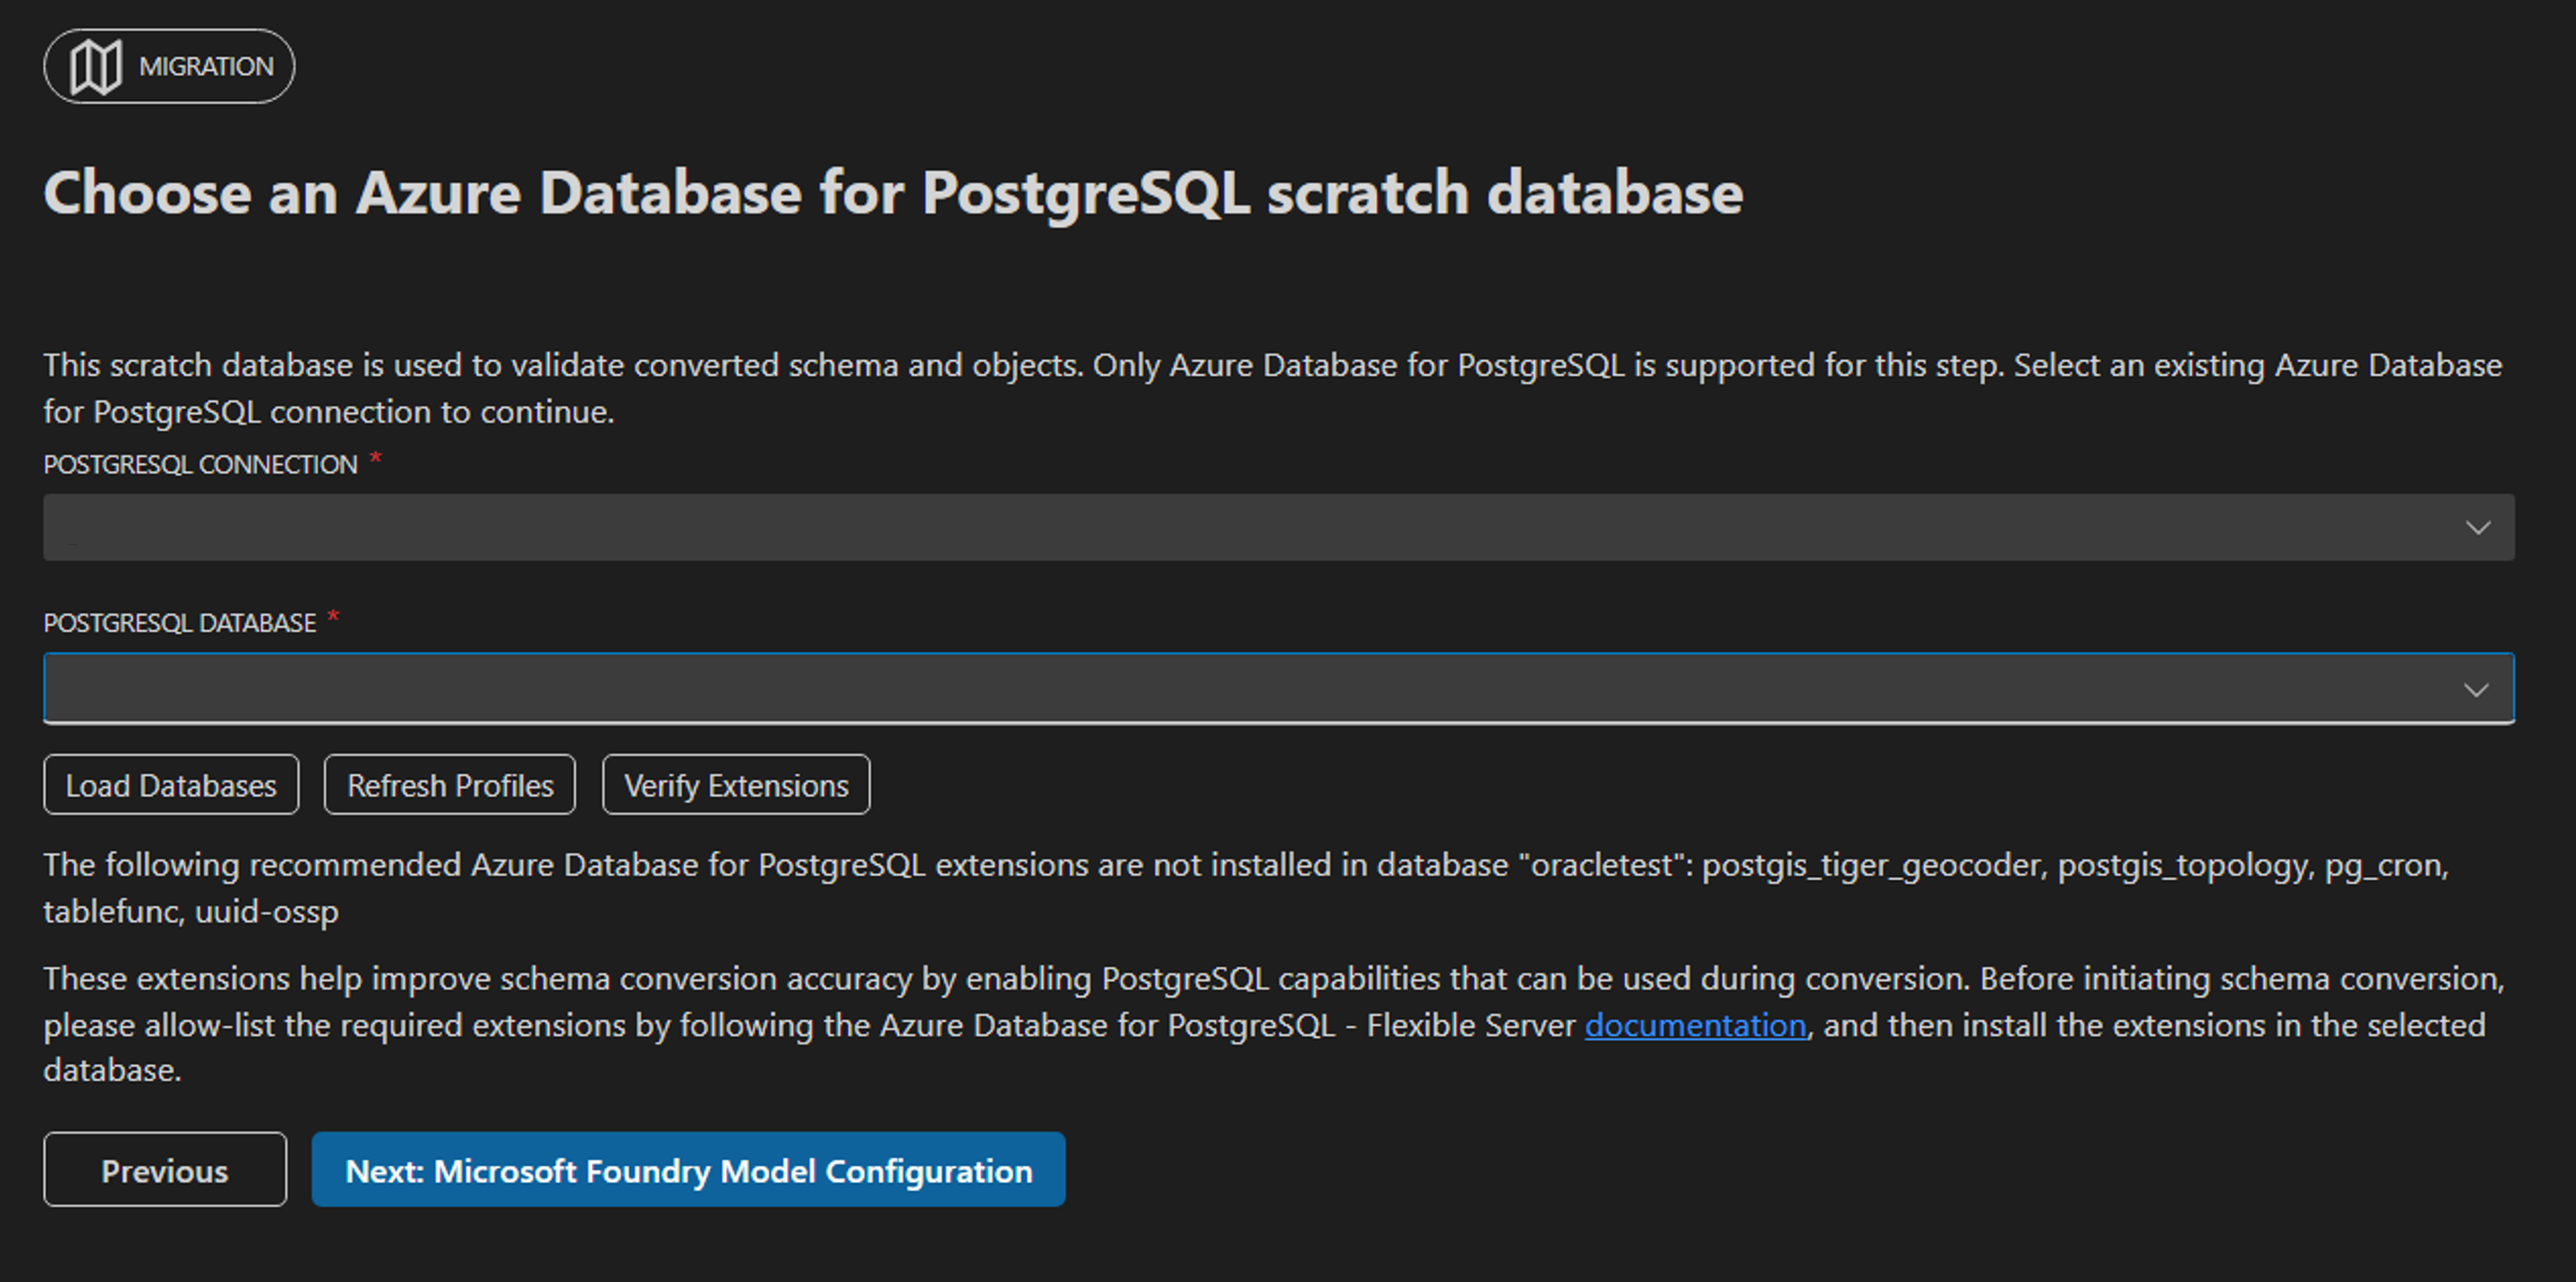
Select the checkbox acknowledging that scratch schemas matching the selected Oracle schemas are dropped and recreated during conversion, deleting their existing objects and data.
Select Next: Microsoft Foundry Model Configuration.
Step 9: Configure the Microsoft Foundry language model
In Microsoft Foundry, allocate a deployment quota greater than 1,000,000 tokens per minute (TPM). The following deployment example is configured for 2.3 million TPM; the available quota shown is specific to that environment.

Return to the migration wizard in Visual Studio Code to configure the model connection:
- Enter your Microsoft Foundry details:
- Endpoint URL.
- Deployment name (the name you assigned to the deployment in Microsoft Foundry; the underlying model must be
gpt-5.2).
- Select the authentication method:
- API key: Enter the API key for your Microsoft Foundry deployment.
- Microsoft Entra ID: Sign in with the Azure Account extension. The tool acquires the authentication token automatically. Make sure that the signed-in identity has the Foundry User role (formerly Azure AI User) on the Microsoft Foundry resource. For more information, see Role-based access control for Microsoft Foundry.
- Select Test Microsoft Foundry Connection to verify the configuration.
- After the connection succeeds, select Create Migration Project.
Step 10: Run the schema conversion
The system navigates to the main Migration Wizard.
Select Migrate to start the schema conversion process.
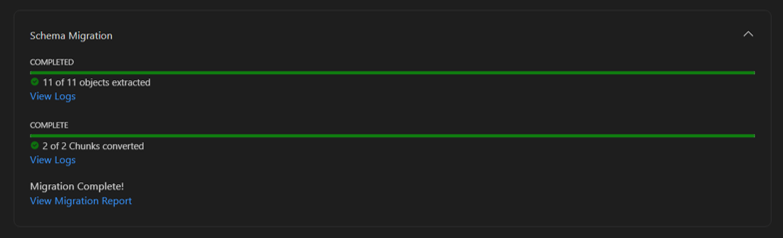
Monitor the conversion progress in the Visual Studio Code interface.
When conversion finishes, the project shows Schema conversion is complete and the Review conversion summary action.
Step 11: Review the schema conversion report
- After schema conversion finishes, the HTML conversion report opens automatically.
- Review the discovery, extraction, and conversion results and object-level notes.
- For guidance on interpreting the report, see View the HTML report for Oracle schema conversion.
Step 12: Review and refine converted objects
From the completed migration project, select Review conversion summary.
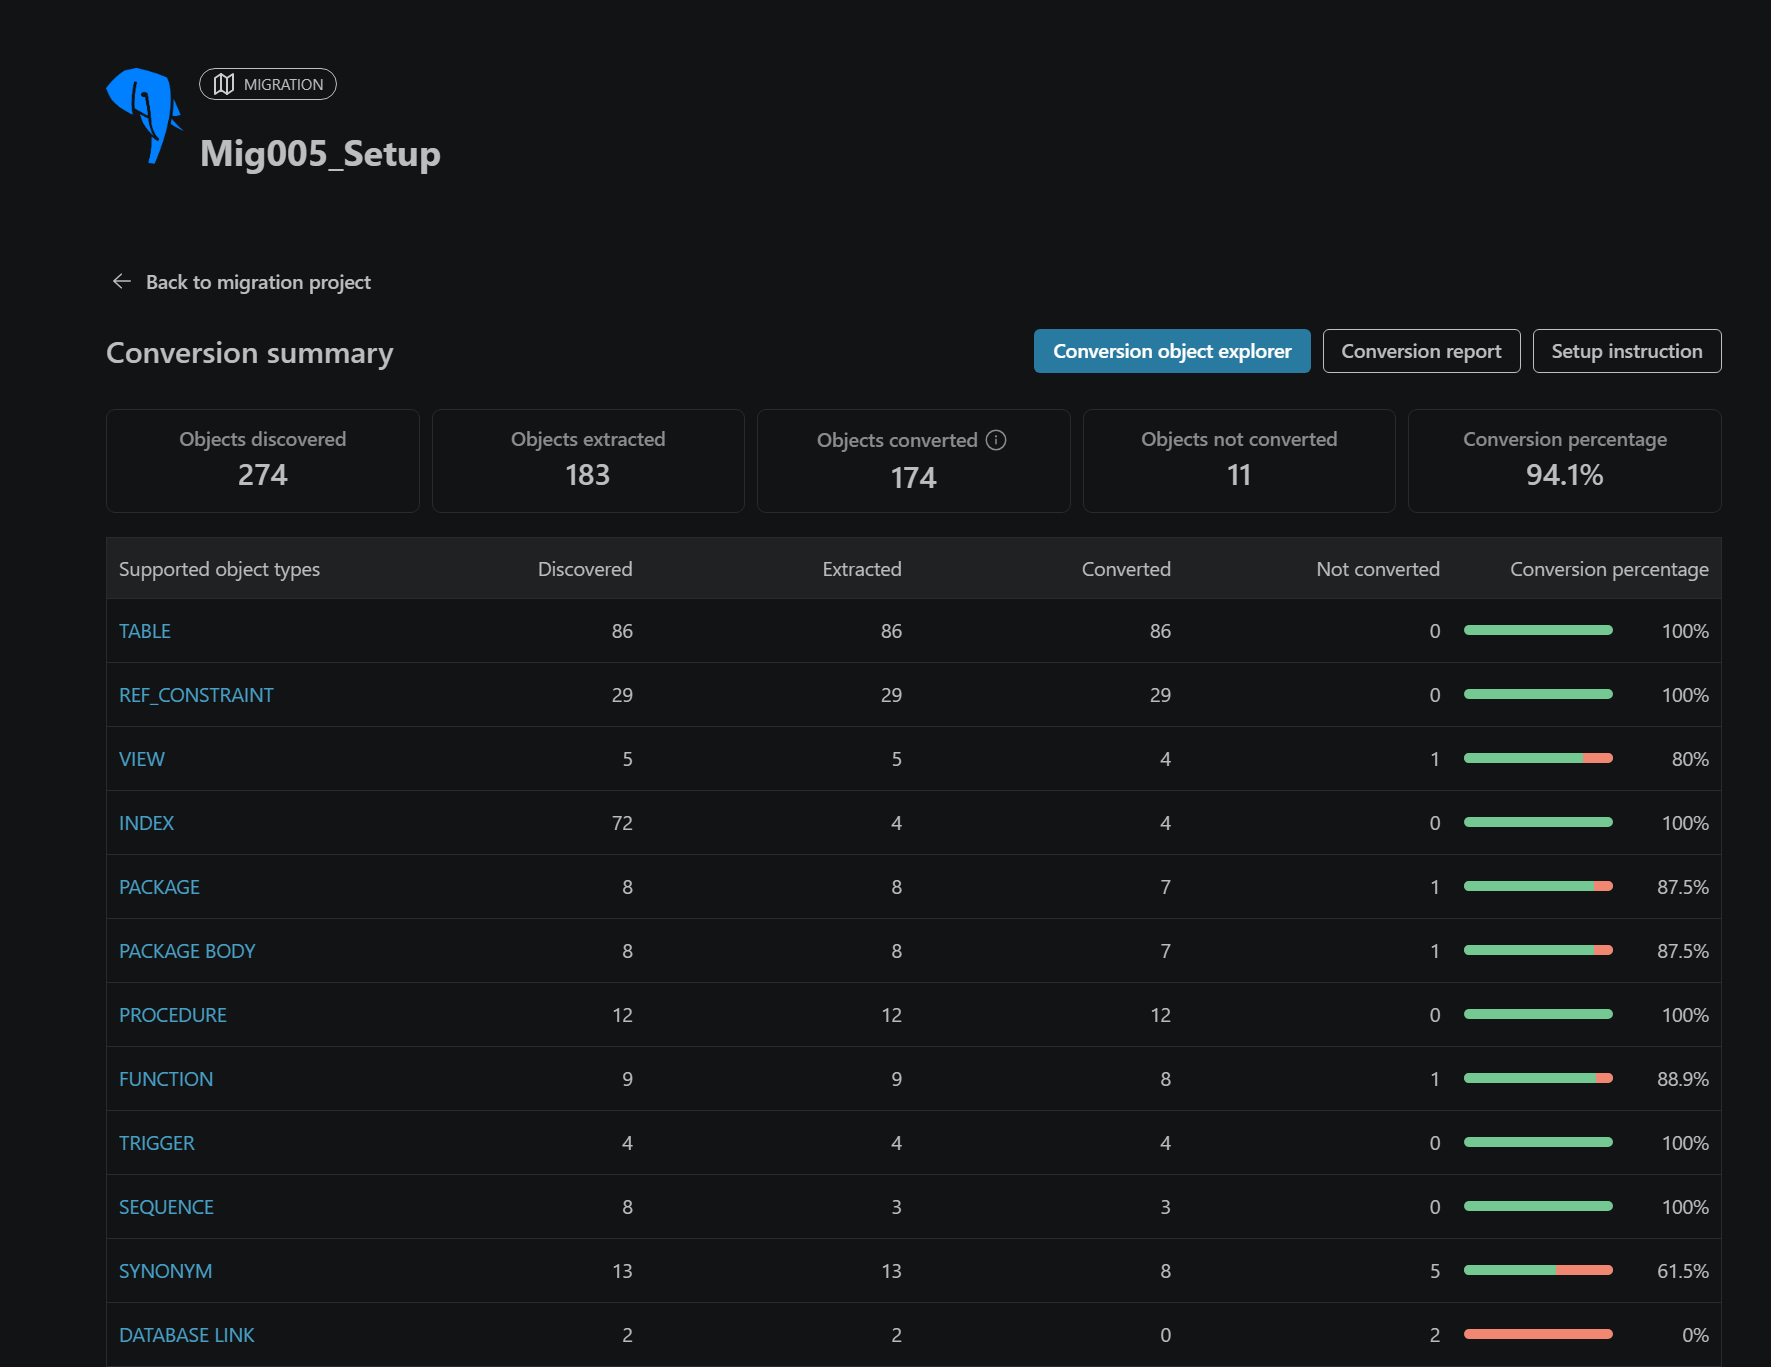
On the Conversion summary page, select Conversion object explorer.
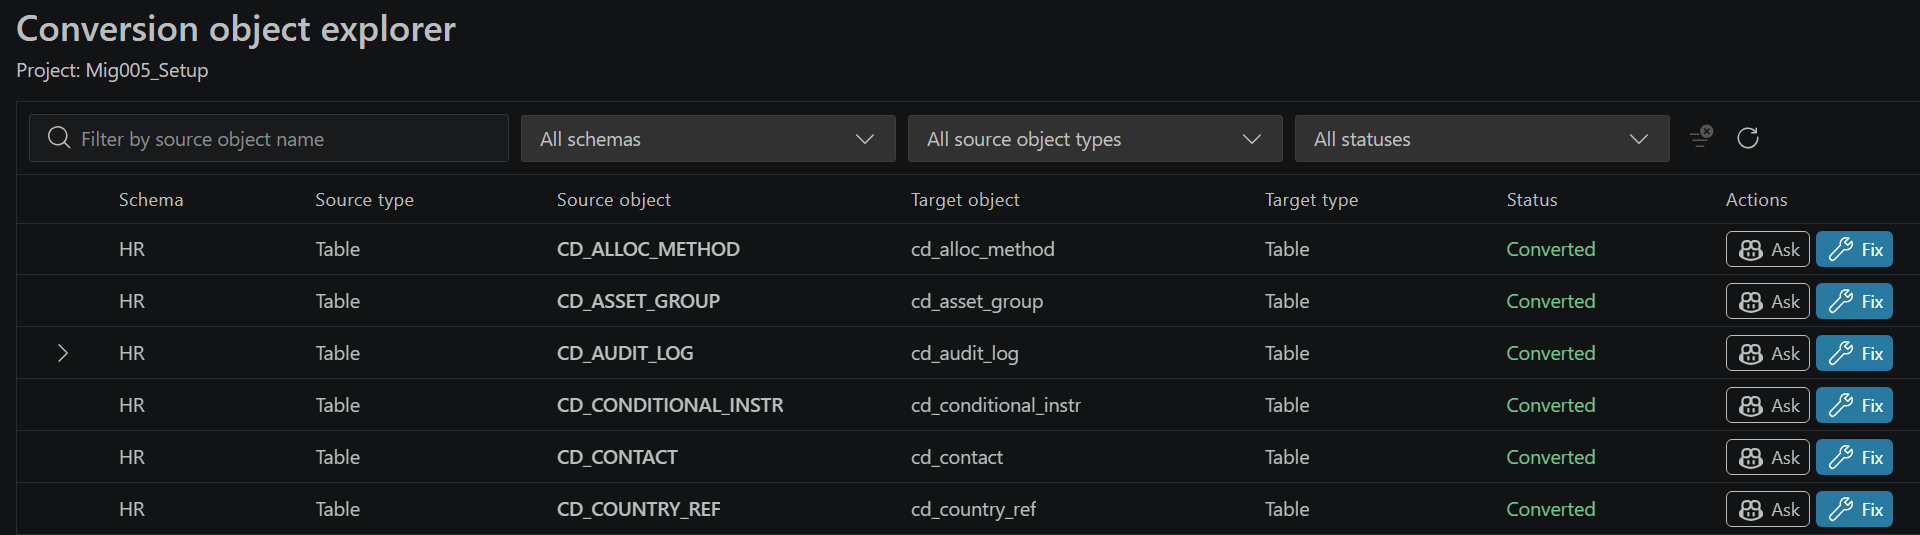
Select an object to compare its Oracle and PostgreSQL definitions and read its conversion notes.
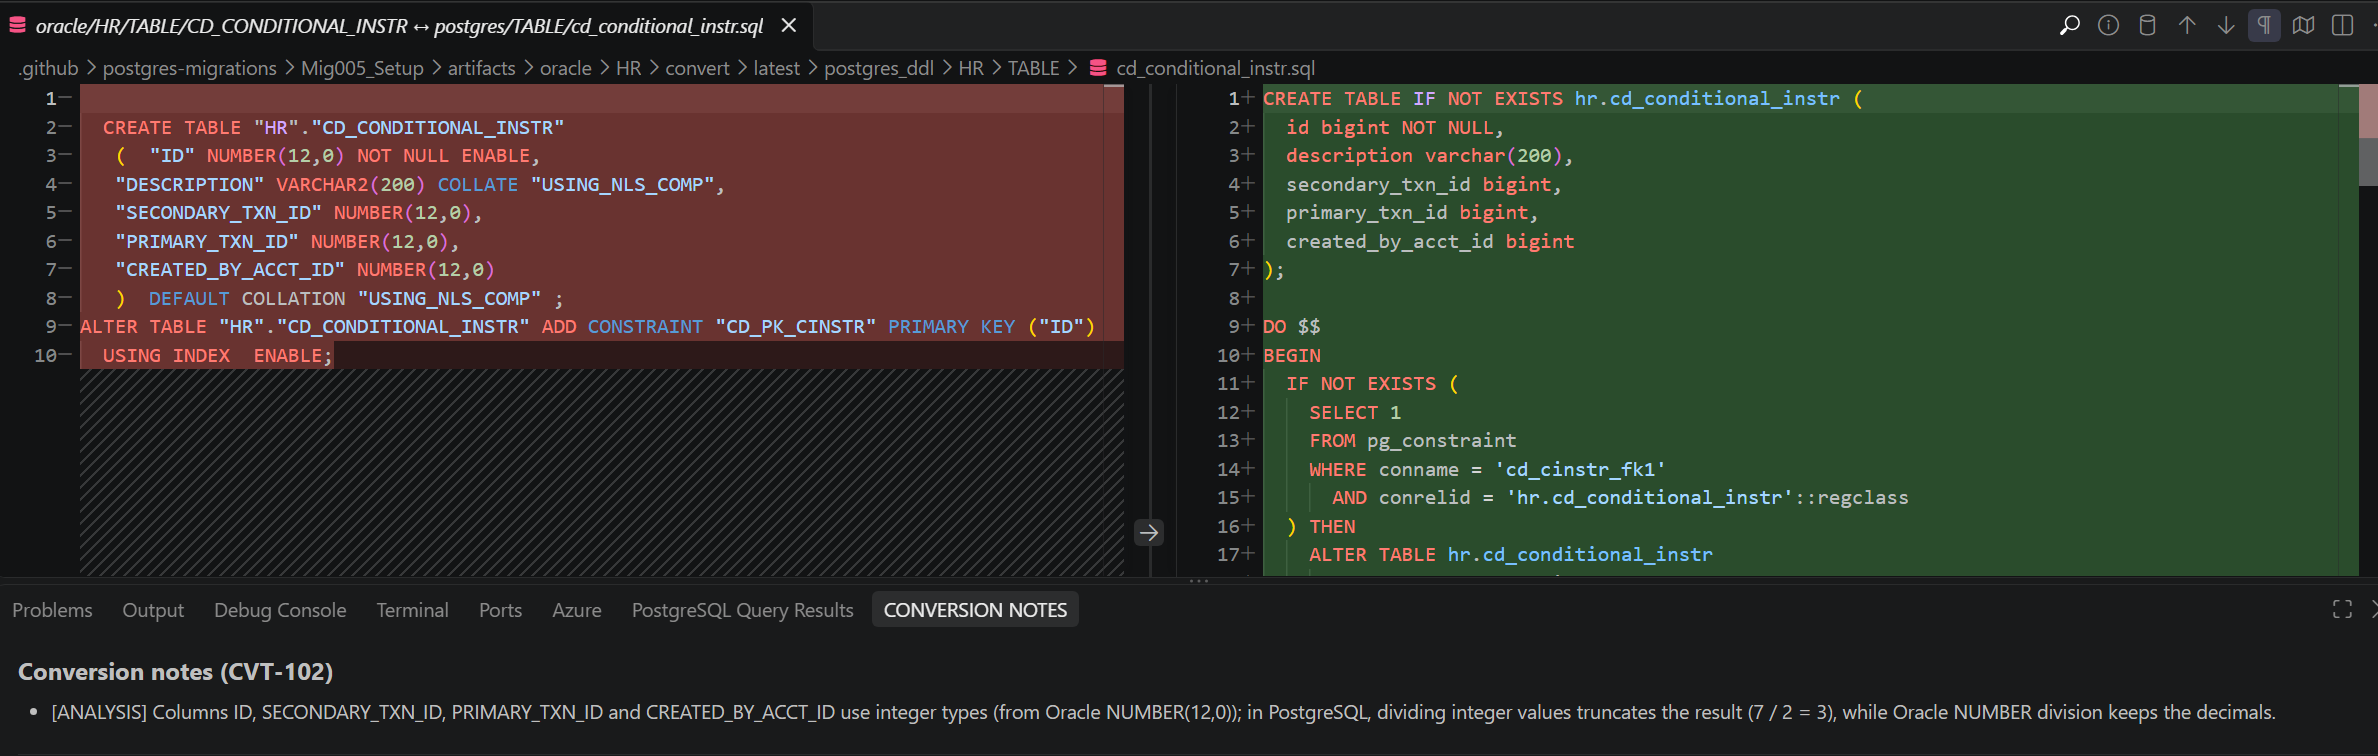
Use Ask to explain the conversion and its dependencies, or Fix to open a Copilot prompt and make changes to the PostgreSQL file.
Review the edits and confirm that the deployment SQL includes the corrections you intend to deploy. Don't assume that editing a per-object file updates the generated
deploy.sql.
For filtering, comparison, and manual compilation steps, see Review converted objects in Conversion Object Explorer.
Step 13: Prepare deployment with the Setup Experience
The conversion workflow automatically generates setup files when it finishes. Opening the setup instructions doesn't start a deployment.
- From the completed migration project, select Review conversion summary.
- On the Conversion summary page, select Setup instruction. This action becomes available when the setup files are ready.
- Review the generated
setup_instructions.mdfile, which opens in the editor. Visual Studio Code also reveals the setup folder in Explorer. - Follow Deploy converted schemas with the Setup Experience to prepare a separate nonproduction destination database, run readiness checks, deploy the converted schemas, and review deployment results.
Step 14: Validate the deployed schema before production use
Use the nonproduction database deployed in the previous step for functional, data, and application validation, not the conversion scratch database.
If you change an object after deployment, apply the correction manually:
- Connect the SQL editor to the nonproduction PostgreSQL server and the database where the converted schema is deployed. Confirm the editor's active database.
- Review schema references and select the complete statement or statements you intend to execute.
- Select the play button to execute only the selected statements. Review the execution output and resolve errors before continuing.
- Confirm that the object files and deployment SQL contain the tested corrections before production deployment. Updating a file, updating a deployed object, and updating
deploy.sqlare separate actions.
Independently validate the deployed schema with representative test data and application workloads. Verify dependencies, constraints, business logic, and result sets against the Oracle source, and retest after corrections. Review any objects that weren't converted or deployed, rather than testing only successful conversions.
Important
Customer validation responsibility: The same AI engine used for schema conversion can also assist with validation and review. AI systems can occasionally confirm their own mistakes. To prevent data loss, functional regressions, or security issues, independently validate all converted objects and object-level corrections before you deploy to production. As part of your controls, consider enabling Microsoft Foundry content filtering to help reduce harmful or undesired outputs. For guidance, see Content filtering for Microsoft Foundry Models.
For more information about the Visual Studio Code extension, visit PostgreSQL extension for Visual Studio Code and Cursor.