หมายเหตุ
การเข้าถึงหน้านี้ต้องได้รับการอนุญาต คุณสามารถลอง ลงชื่อเข้าใช้หรือเปลี่ยนไดเรกทอรีได้
การเข้าถึงหน้านี้ต้องได้รับการอนุญาต คุณสามารถลองเปลี่ยนไดเรกทอรีได้
An assignment identifies a storage account and a subset of objects in that account that the task targets. An assignment also defines when the task runs and where execution reports are stored.
This article helps you create and enable a task assignment, and if necessary stop an in-progress run. To learn more about storage task assignments, see Storage task assignments.
Important
Before you enable storage task assignment, ensure that you grant access to trusted Azure services in the network settings of each target storage account. To learn more, see Grant access to trusted Azure services.
Create and manage an assignment
Create an assignment for each storage account you want to target. A storage task can contain up to 50 assignments.
Note
In the current release, you can target only storage accounts that are in the same region as the storage tasks.
Create an assignment from the storage task menu
You can create an assignment in the context of a storage task. This option can be convenient if you're the task author and you want to target multiple storage accounts. For each assignment, identify the storage account that you want to target.
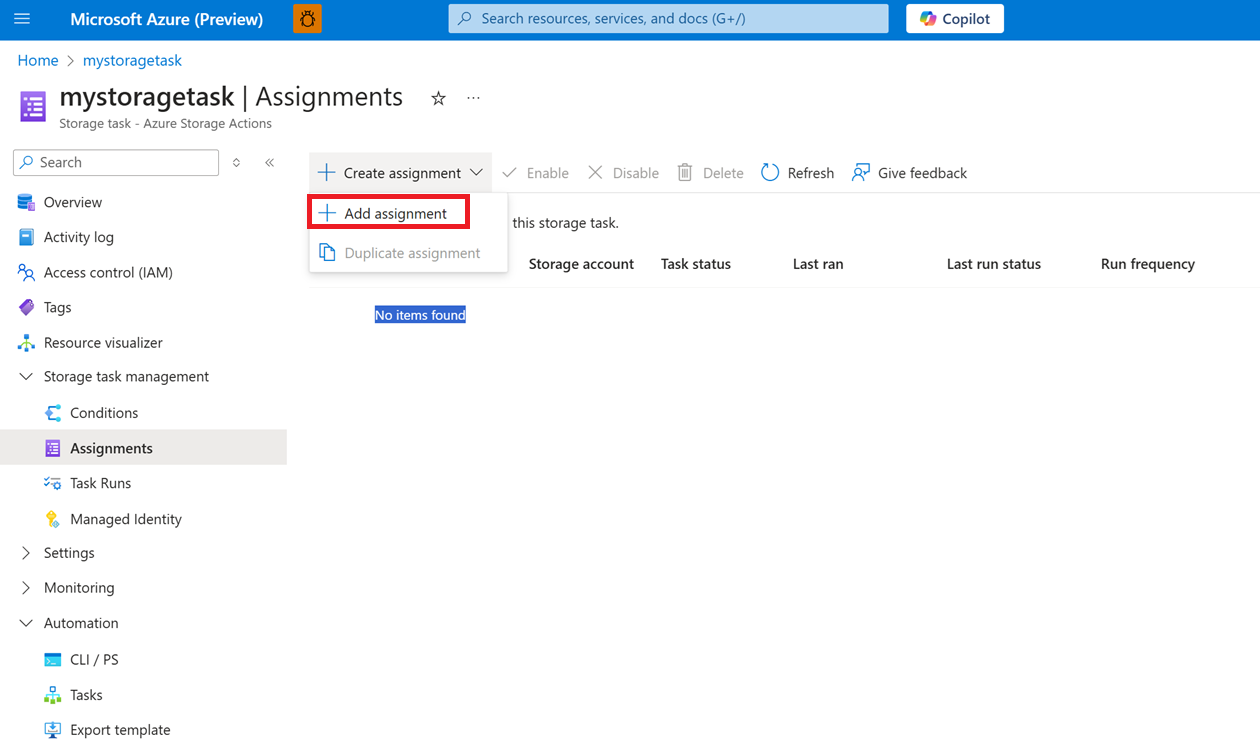
Navigate to the storage task in the Azure portal and then under Storage task management, select Assignments.
In the Assignments page, select + Add assignment and the Add assignment pane appears.
Create an assignment from the storage account menu
You can also create a task assignment from the Storage Actions page in the storage account portal. This option can be convenient if you want to use an existing task to process objects in your storage account. For each assignment, select the storage task that you want to assign to your account.
Go to the storage account in the Azure portal. Under Data management, select Storage Actions.
In Storage Actions, select the Task assignment tab, select + Create assignment, and then select + Add assignment.
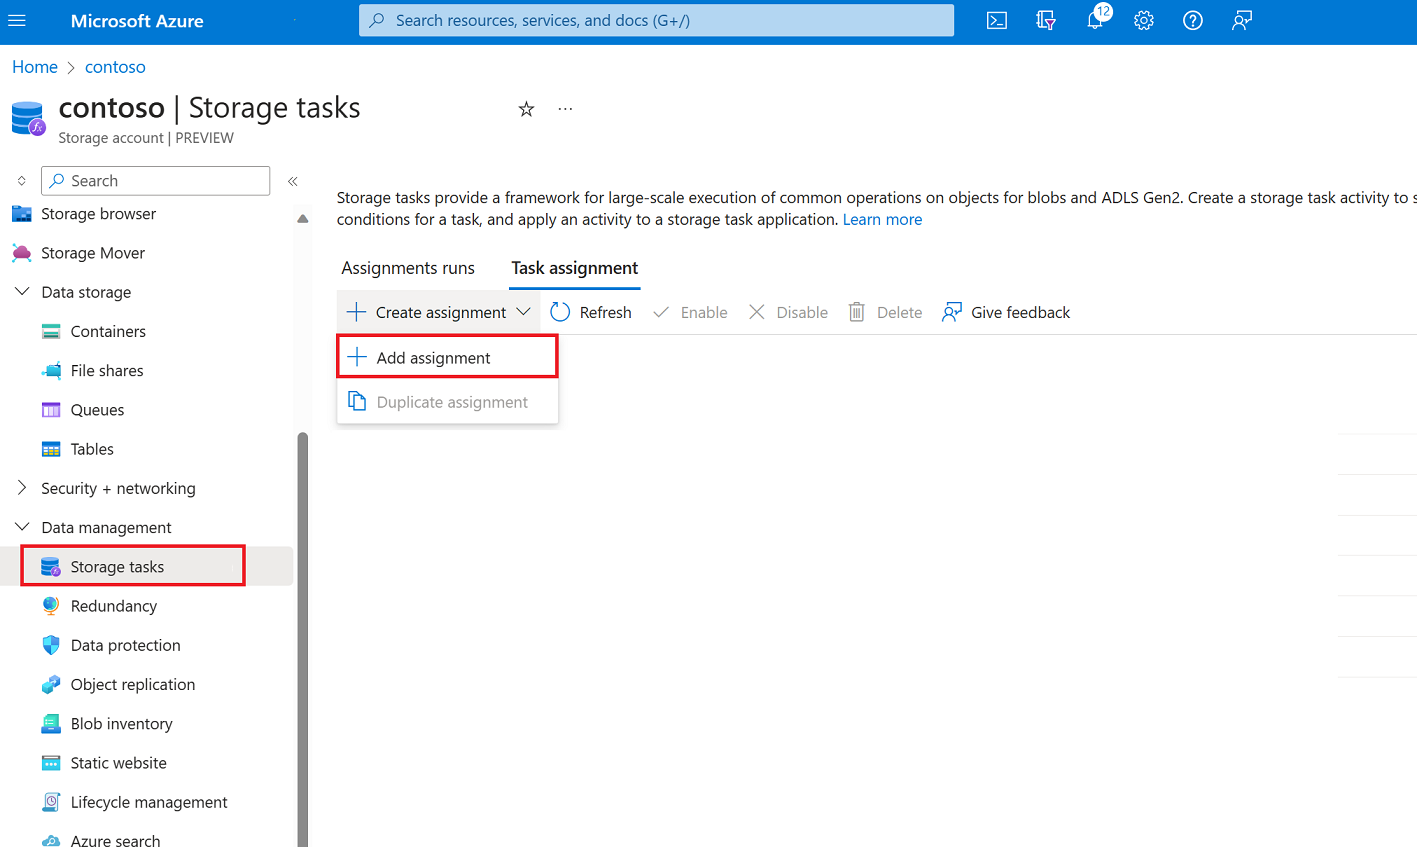
The Add assignment pane appears.
Select a scope
In the Select scope section, select a subscription and name the assignment. Then, select the storage account that you want to target.
If you opened the Add assignment pane in the context of the storage account, select a storage task instead of the storage account.
For a description of each property, see Assignment settings.
Add a role assignment
In the Role assignment section, select the role that you want to assign to the managed identity of the storage task from the Role dropdown list. To ensure a successful task assignment, use roles that have the Blob Data Owner permissions. To learn more, see Azure roles required to assign tasks.
Note
You choose the managed identity type (system-assigned or user-assigned) as part of creating the storage task.

For a description of each property, see Assignment settings.
Add a filter
In the Filter objects section, choose whether you want to target a subset of blobs based on a filter. Filters help you narrow the scope of execution. If you want the task to evaluate all of the containers and blobs in an account, select the Do not filter option. The following example uses a filter to target only blobs that exist in a container named mycontainer.

For a description of each property, see Assignment settings.
Define the trigger
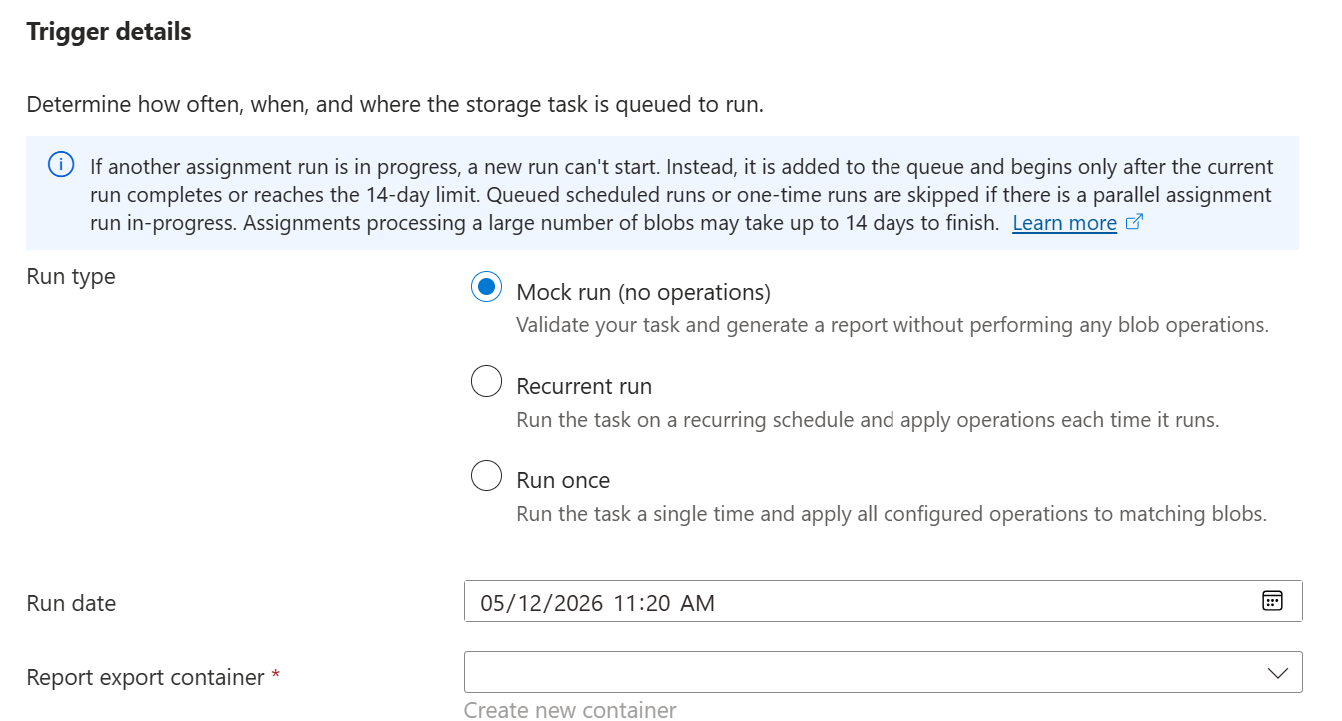
In the Trigger details section, select how you want this task to run. Choose from the following run types:
- Run once: Execute the task a single time.
- Recurrent run: Run the task on a recurring schedule. Choose a start and end time and specify the number of days between each run.
- Mock run: Simulate the task execution without performing any operations on blobs. A mock run scans and evaluates blobs against the task conditions and produces a detailed report showing which blobs matched and what operations would have been performed. No data is modified. For more information, see Create and use a mock run.
For all run types, specify where you want to store the execution reports.
For a description of each property, see Assignment settings.
Save the assignment
Select the Add button to create the assignment.
The Add assignment pane closes. When deployment is complete, the assignment appears in the Assignments page. If you don't see the assignment in that page, select the Refresh button.

Enable an assignment
The assignment is disabled by default. To enable the assignment and schedule it to run, select the checkbox next to the assignment, and then select Enable.

After the task runs, it generates an execution report and stores it in the container you specified when you created the assignment. For more information about the report and how to view metrics that capture the number of objects targeted, the number of operations attempted, and the number of operations that succeeded, see Analyze storage task runs.
Edit an assignment
An assignment becomes a subresource of the targeted storage account. Therefore, after you create the assignment, you can only edit its run frequency. The other fields of an assignment become read-only. The Single run (only once) option also becomes read-only.
To edit the run frequency of an assignment in the context of a storage task, navigate to the storage task in the Azure portal. Under Storage task management, select Assignments.
To edit the run frequency of an assignment in the context of a storage account, go to the storage account in the Azure portal. Under Data management, select Storage Actions.
Stop an in-progress run
You can stop an in-progress run of an Azure Storage Actions task assignment. You can target a single assignment on a storage account, or request that in-progress runs be stopped for all task assignments associated with a storage task.
Before submitting the request, verify that your identity has permission for the scope you're targeting. See Permission to manage storage task assignments.
Stopping a run is asynchronous. An accepted stop request doesn't mean that processing already stopped.
For REST requests, a 202 Accepted response includes an Azure-AsyncOperation header. Use the URL in that header to monitor the stop operation. Check the affected task run status separately to determine whether execution ended. When targeting multiple assignments, review the results for every assignment rather than assuming that all runs stopped.
For information about checking run status and reviewing reports, see Monitor a stop request.