หมายเหตุ
การเข้าถึงหน้านี้ต้องได้รับการอนุญาต คุณสามารถลอง ลงชื่อเข้าใช้หรือเปลี่ยนไดเรกทอรีได้
การเข้าถึงหน้านี้ต้องได้รับการอนุญาต คุณสามารถลองเปลี่ยนไดเรกทอรีได้
Deploy your local development database to a free-tier Azure SQL Database with the MSSQL extension for Visual Studio Code. The guided workflow lets you select a local database, choose whether to copy its schema or its schema and data, check Azure SQL compatibility, and create the cloud database without leaving the editor.
Your local database and container aren't changed or removed. The deployment creates a separate copy in Azure SQL Database.
Note
Local-to-cloud database deployment is in public preview.
Prerequisites
Before you begin, ensure you have:
- A local database saved as a connection in the MSSQL extension. For example, use a database in a local SQL Server container. Make sure the server or container is running and that you can connect to the database.
- An Azure account and subscription with permission to create the required resources. If you don't have an account, create a free Azure account.
Open the deployment workflow
The workflow has two entry points:
- Connections toolbar: In the MSSQL extension's Connections view, select the New Deployment button in the toolbar. On the deployment page, select Local database to Azure SQL Database (Preview).
- Object Explorer: Right click a local database node and select Deploy database to Azure SQL (Preview) next to the database name.
Deploy your database
Follow the wizard to select your source, check compatibility, configure a free-tier Azure SQL Database, review your choices, and deploy.
Step 1: Select a local database
On the Source page, select your local database. Use Search local connections to find a saved connection, or refresh the list if your connection doesn't appear.
If the connection is to a server rather than a specific database, expand it and select the database to deploy.
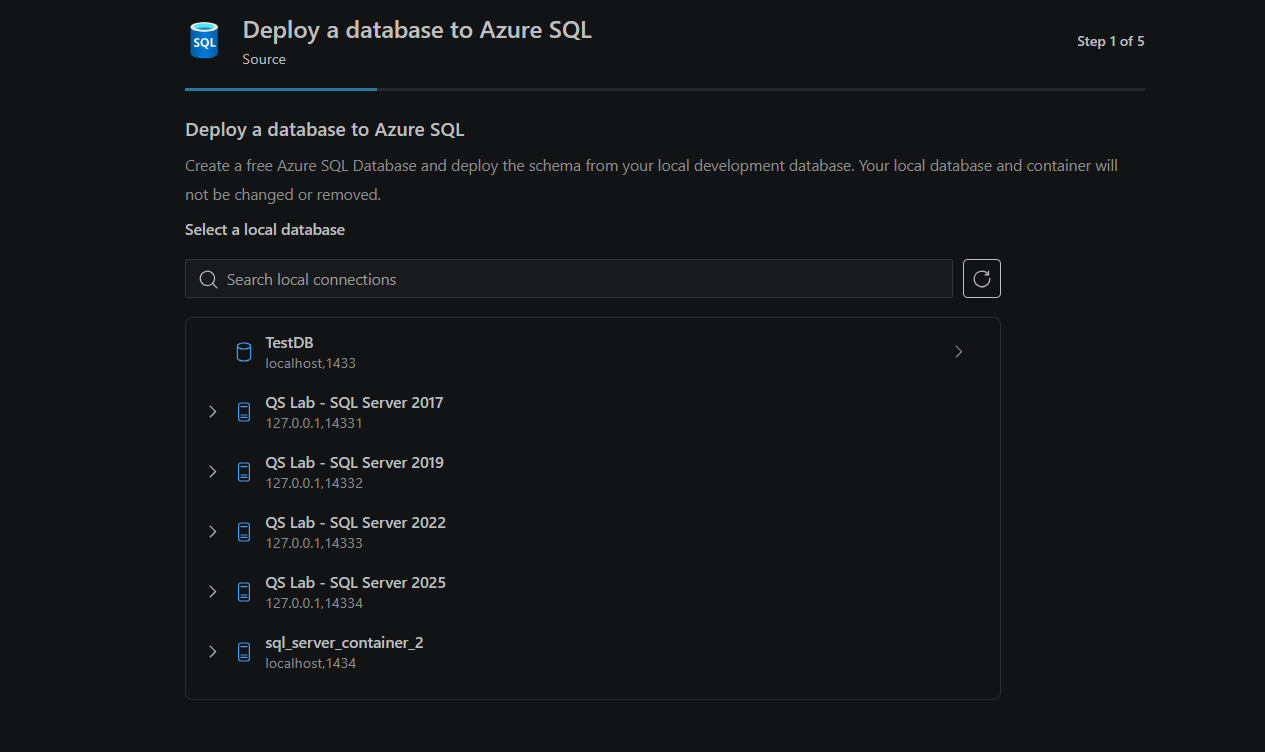
Review the connection, server, database, SQL Server version, and connection status. Select Change to choose a different source.
Under What to deploy, select one of the following options:
Option What it deploys Package used by the extension Schema and data (recommended) Copies the database structure and the rows in its tables. A BACPAC ( .bacpac) file for schema and data.Schema only Deploys database objects, such as tables, views, and stored procedures, without copying table rows. A DACPAC ( .dacpac) file for the schema.The extension creates and deploys the package for you. You don't need to export a DACPAC or BACPAC manually.

Continue to the compatibility check.

Step 2: Check Azure SQL compatibility
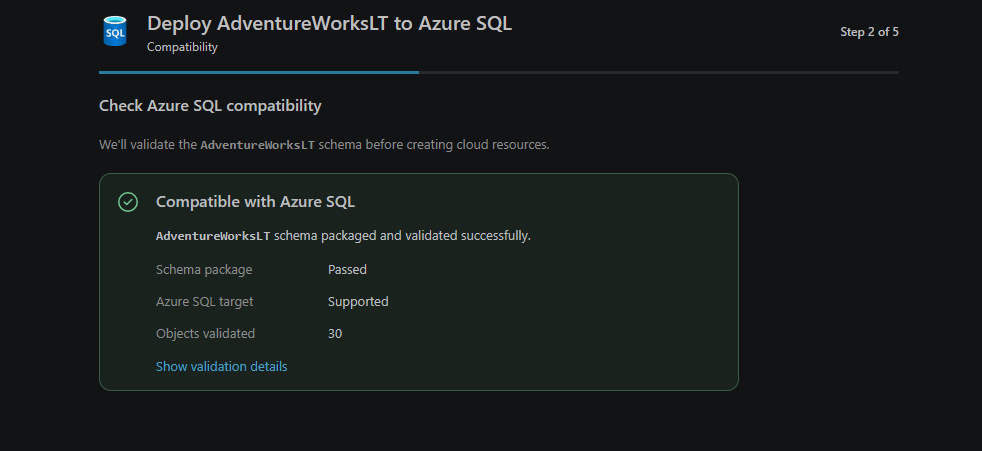
The Compatibility page validates your database schema before the workflow creates cloud resources. The extension extracts the schema into a SQL database project and builds the project for an Azure SQL Database target. This check identifies unsupported schema objects and unresolved dependencies before deployment.
- Wait for the compatibility check to finish.
- Review the result. If validation succeeds, the page shows Compatible with Azure SQL, the schema package status, the Azure SQL target status, and the number of objects validated.
- Select Show validation details to inspect the results. If the check reports errors, resolve the issues in the local database and run the check again before continuing.
Important
A successful schema check doesn't guarantee that every query or application behavior works unchanged in Azure SQL Database. Test your application against the deployed database. For differences from SQL Server, see Azure SQL Database feature comparison.
Step 3: Create a free-tier Azure SQL Database
After compatibility validation succeeds, configure the new Azure SQL Database in the wizard.
- Sign in with your Azure account when prompted.
- Select the target subscription, resource group, and Azure SQL logical server. Create a resource group or server if needed, and enter a name for the new database.
- Complete the authentication and connection settings requested by the wizard.
- Review the free-tier settings, including what happens when you reach the monthly free limit.
The Azure SQL Database free tier provides recurring monthly allowances for the lifetime of your subscription. Each free-tier database includes 100,000 vCore seconds of compute, 32 GB of data storage, and 32 GB of backup storage per month. A subscription can have up to 10 free-tier databases, subject to eligibility and service limits.
Choose Auto-pause at the monthly free limit to keep database usage within the free allowance. If you choose to continue using the database beyond the allowance, additional usage is billed at standard serverless rates, and you can't switch back to the auto-pause-at-limit option. The free tier has no service-level agreement (SLA), and application hosting or other supporting resources can have separate charges. Review the free-tier considerations and limitations before creating resources.
For more information about the provisioning settings, see Create an Azure SQL Database in Visual Studio Code.
Step 4: Review the deployment
Before you start deployment, review the local source database, the Schema only or Schema and data selection, and the destination subscription, resource group, server, and database name. Confirm that you're creating the intended free-tier database.
If you need to change a setting, return to the corresponding page before starting deployment.
Step 5: Deploy and connect
Keep the local database available until deployment finishes. If you selected Schema and data, stop schema changes and data writes before starting deployment, and keep them paused until the export finishes.
Start the deployment from the review page. The extension creates the Azure SQL Database and deploys the selected content:
- For Schema only, it publishes the validated DACPAC to the new database.
- For Schema and data, it exports a BACPAC from your local database and imports it into the new database.
Follow any prompts to allow your client IP address through the Azure SQL server firewall.
Wait for deployment and verification to finish. The extension saves the Azure SQL connection and adds it to Connections.
Connect to the deployed database and inspect its objects. If you selected Schema and data, verify the copied data and test your application against the Azure SQL connection.
The cloud database is a one-time copy, not a continuously synchronized database. Later changes to your local database aren't automatically deployed to Azure SQL Database.
If deployment fails or is canceled after Azure resources are created, inspect the resources in the Azure portal before retrying. Don't assume that canceling deployment deletes the cloud database or other resources.
After deployment
Use the saved Azure SQL connection to query and develop against your deployed database. For connection help, see Connect to a database.
Feedback and support
If you have ideas, feedback, or want to engage with the community, join the discussion at https://aka.ms/vscode-mssql-discussions. To report a bug, visit https://aka.ms/vscode-mssql-bug. To request a new feature, go to https://aka.ms/vscode-mssql-feature-request.