開始使用 .NET 的 Custom Vision 客戶端函式庫。 請依照以下步驟安裝套件,並嘗試建立物件偵測模型的範例程式碼。 你會建立專案、新增標籤、用範例圖片訓練專案,並利用專案的預測端點網址來程式化測試。 請以此範例作為打造自己影像辨識應用程式的範本。
註
如果你想建立並訓練物件偵測模型 而不 寫程式碼,請參考 瀏覽器的指引 。
參考文件 |函式庫原始碼 (訓練)(預測) |套件 (NuGet) (訓練)(預測) | 範例
先決條件
- Azure訂閱 - 免費建立一個
Visual Studio IDE 或目前版本的.NET Core 。- 一旦你有Azure訂閱,在Azure入口網站建立自訂願景資源 ,以建立訓練與預測資源。
- 你可以先用免費價格等級
F0()試用服務,之後再升級到付費等級以進行生產。
- 你可以先用免費價格等級
建立環境變數
在這個例子中,你會把憑證寫入執行該應用程式的本地機器上的環境變數。
前往 Azure 入口網站。 如果您在前置條件區塊中建立的自訂願景資源成功部署,請選擇下一步步驟中的「前往資源」按鈕。 你可以在資源的 「金鑰與端點 」頁面,在 資源管理下找到你的金鑰和端點。 你需要取得訓練資源和預測資源的金鑰,以及 API 端點。
你可以在Azure入口網站預測資源的Properties分頁中找到預測資源 ID,標示為 Resource ID。
提示
您也可以使用 https://www.customvision.ai 來獲取這些數值。 登入後,選擇右上角 的設定 圖示。 在 設定 頁面,你可以查看所有金鑰、資源 ID 和端點。
要設定環境變數,請開啟主控台視窗,並依照作業系統和開發環境的指示操作。
- 若要設定
VISION_TRAINING KEY環境變數,請將<your-training-key>替換為訓練資源的其中一個鍵。 - 要設定
VISION_TRAINING_ENDPOINT環境變數,請將<your-training-endpoint>替換為訓練資源的端點。 - 要設定
VISION_PREDICTION_KEY環境變數,請將預測資源的其中一個鍵值替換<your-prediction-key>。 - 要設定
VISION_PREDICTION_ENDPOINT環境變數,請將<your-prediction-endpoint>替換為你的預測資源端點。 - 要設定
VISION_PREDICTION_RESOURCE_ID環境變數,請將<your-resource-id>替換為你的預測資源的資源 ID。
重要
我們建議使用 Microsoft Entra ID 搭配 Azure 資源的 受控身份 驗證,以避免將憑證儲存在雲端執行的應用程式中。
使用 API 金鑰時要小心。 不要直接把 API 金鑰放進程式碼裡,也絕對不要公開發佈。 如果使用 API 金鑰,請將它們安全存放在 Azure Key Vault,定期更換金鑰,並透過基於角色的存取控制和網路存取限制來限制對 Azure Key Vault 的存取。 欲了解更多如何在應用程式中安全使用 API 金鑰的資訊,請參見 API 金鑰搭配 Azure Key Vault。
如需了解更多有關 AI 服務安全性的資訊,請參閱 驗證對 Azure AI 服務的請求。
setx VISION_TRAINING_KEY <your-training-key>
setx VISION_TRAINING_ENDPOINT <your-training-endpoint>
setx VISION_PREDICTION_KEY <your-prediction-key>
setx VISION_PREDICTION_ENDPOINT <your-prediction-endpoint>
setx VISION_PREDICTION_RESOURCE_ID <your-resource-id>
加入環境變數後,可能需要重新啟動讀取環境變數的執行程式,包括主控台視窗。
設定
建立一個新的 C# 應用程式
使用 Visual Studio,建立一個新的 .NET Core 應用程式。
安裝用戶端函式庫
建立新專案後,請在 方案總管 右鍵點擊專案解決方案,並選擇 Manage NuGet Packages 安裝客戶端函式庫。 在開啟套件管理器時,選擇 Browse,勾選 Include prerelease,並搜尋 Microsoft.Azure.CognitiveServices.Vision.CustomVision.Training 和 Microsoft.Azure.CognitiveServices.Vision.CustomVision.Prediction。 選擇最新版本,然後 安裝。
提示
想一次查看整個快速啟動程式碼檔案嗎? 你可以在 GitHub 找到它,裡面包含了這個快速入門的程式碼範例。
從專案目錄開啟 program.cs 檔案並新增以下 using 指令:
using Microsoft.Azure.CognitiveServices.Vision.CustomVision.Prediction;
using Microsoft.Azure.CognitiveServices.Vision.CustomVision.Training;
using Microsoft.Azure.CognitiveServices.Vision.CustomVision.Training.Models;
using System;
using System.Collections.Generic;
using System.IO;
using System.Linq;
using System.Threading;
在應用程式的 Main 方法中,建立變數,從環境變數中擷取資源的鍵和端點。 您也會宣告一些基本物件來留待後用。
    string trainingEndpoint = Environment.GetEnvironmentVariable("VISION_TRAINING_ENDPOINT");

    string trainingKey = Environment.GetEnvironmentVariable("VISION_TRAINING_KEY");
    string predictionEndpoint = Environment.GetEnvironmentVariable("VISION_PREDICTION_ENDPOINT");
    string predictionKey = Environment.GetEnvironmentVariable("VISION_PREDICTION_KEY");

    private static Iteration iteration;
    private static string publishedModelName = "CustomODModel";
在應用程式的 Main 方法中,新增此快速入門中所用方法的呼叫。 稍後執行這些步驟。
CustomVisionTrainingClient trainingApi = AuthenticateTraining(trainingEndpoint, trainingKey);
CustomVisionPredictionClient predictionApi = AuthenticatePrediction(predictionEndpoint, predictionKey);

Project project = CreateProject(trainingApi);
AddTags(trainingApi, project);
UploadImages(trainingApi, project);
TrainProject(trainingApi, project);
PublishIteration(trainingApi, project);
TestIteration(predictionApi, project);
驗證客戶端
用新方法,利用你的端點和金鑰實例化訓練與預測客戶端。
private CustomVisionTrainingClient AuthenticateTraining(string endpoint, string trainingKey, string predictionKey)
{
    // Create the Api, passing in the training key
    CustomVisionTrainingClient trainingApi = new CustomVisionTrainingClient(new Microsoft.Azure.CognitiveServices.Vision.CustomVision.Training.ApiKeyServiceClientCredentials(trainingKey))
    {
        Endpoint = endpoint
    };
    return trainingApi;
}
private CustomVisionPredictionClient AuthenticatePrediction(string endpoint, string predictionKey)
{
    // Create a prediction endpoint, passing in the obtained prediction key
    CustomVisionPredictionClient predictionApi = new CustomVisionPredictionClient(new Microsoft.Azure.CognitiveServices.Vision.CustomVision.Prediction.ApiKeyServiceClientCredentials(predictionKey))
    {
        Endpoint = endpoint
    };
    return predictionApi;
}
建立新的客製化願景專案
接下來的方法會建立一個物件偵測專案。 所建立的專案會顯示在 Custom Vision 網站上。 請參閱 CreateProject 建立專案時指定其他選項的方法(詳見 《建立偵測器 網頁入口指南》)。
private Project CreateProject(CustomVisionTrainingClient trainingApi)
{
    // Find the object detection domain
    var domains = trainingApi.GetDomains();
    var objDetectionDomain = domains.FirstOrDefault(d => d.Type == "ObjectDetection");

    // Create a new project
    Console.WriteLine("Creating new project:");
    project = trainingApi.CreateProject("My New Project", null, objDetectionDomain.Id);

    return project;
}
為專案新增標籤
這個方法定義了你要用來訓練模型的標籤。
private void AddTags(CustomVisionTrainingClient trainingApi, Project project)
{
    // Make two tags in the new project
    var forkTag = trainingApi.CreateTag(project.Id, "fork");
    var scissorsTag = trainingApi.CreateTag(project.Id, "scissors");
}
上傳與標籤圖片
首先,下載本專案的範例圖片。 將 sample Images 資料夾 的內容儲存到本地裝置。
在物件偵測專案中標記影像時,你需要用正規化座標指定每個標記物件的區域。 以下程式碼將每個範例影像與其標記區域關聯起來。
private void UploadImages(CustomVisionTrainingClient trainingApi, Project project)
{
    Dictionary<string, double[]> fileToRegionMap = new Dictionary<string, double[]>()
    {
        // FileName, Left, Top, Width, Height
        {"scissors_1", new double[] { 0.4007353, 0.194068655, 0.259803921, 0.6617647 } },
        {"scissors_2", new double[] { 0.426470578, 0.185898721, 0.172794119, 0.5539216 } },
        {"scissors_3", new double[] { 0.289215684, 0.259428144, 0.403186262, 0.421568632 } },
        {"scissors_4", new double[] { 0.343137264, 0.105833367, 0.332107842, 0.8055556 } },
        {"scissors_5", new double[] { 0.3125, 0.09766343, 0.435049027, 0.71405226 } },
        {"scissors_6", new double[] { 0.379901975, 0.24308826, 0.32107842, 0.5718954 } },
        {"scissors_7", new double[] { 0.341911763, 0.20714055, 0.3137255, 0.6356209 } },
        {"scissors_8", new double[] { 0.231617644, 0.08459154, 0.504901946, 0.8480392 } },
        {"scissors_9", new double[] { 0.170343131, 0.332957536, 0.767156839, 0.403594762 } },
        {"scissors_10", new double[] { 0.204656869, 0.120539248, 0.5245098, 0.743464053 } },
        {"scissors_11", new double[] { 0.05514706, 0.159754932, 0.799019635, 0.730392158 } },
        {"scissors_12", new double[] { 0.265931368, 0.169558853, 0.5061275, 0.606209159 } },
        {"scissors_13", new double[] { 0.241421565, 0.184264734, 0.448529422, 0.6830065 } },
        {"scissors_14", new double[] { 0.05759804, 0.05027781, 0.75, 0.882352948 } },
        {"scissors_15", new double[] { 0.191176474, 0.169558853, 0.6936275, 0.6748366 } },
        {"scissors_16", new double[] { 0.1004902, 0.279036, 0.6911765, 0.477124184 } },
        {"scissors_17", new double[] { 0.2720588, 0.131977156, 0.4987745, 0.6911765 } },
        {"scissors_18", new double[] { 0.180147052, 0.112369314, 0.6262255, 0.6666667 } },
        {"scissors_19", new double[] { 0.333333343, 0.0274019931, 0.443627447, 0.852941155 } },
        {"scissors_20", new double[] { 0.158088237, 0.04047389, 0.6691176, 0.843137264 } },
        {"fork_1", new double[] { 0.145833328, 0.3509314, 0.5894608, 0.238562092 } },
        {"fork_2", new double[] { 0.294117659, 0.216944471, 0.534313738, 0.5980392 } },
        {"fork_3", new double[] { 0.09191177, 0.0682516545, 0.757352948, 0.6143791 } },
        {"fork_4", new double[] { 0.254901975, 0.185898721, 0.5232843, 0.594771266 } },
        {"fork_5", new double[] { 0.2365196, 0.128709182, 0.5845588, 0.71405226 } },
        {"fork_6", new double[] { 0.115196079, 0.133611143, 0.676470637, 0.6993464 } },
        {"fork_7", new double[] { 0.164215669, 0.31008172, 0.767156839, 0.410130739 } },
        {"fork_8", new double[] { 0.118872553, 0.318251669, 0.817401946, 0.225490168 } },
        {"fork_9", new double[] { 0.18259804, 0.2136765, 0.6335784, 0.643790841 } },
        {"fork_10", new double[] { 0.05269608, 0.282303959, 0.8088235, 0.452614367 } },
        {"fork_11", new double[] { 0.05759804, 0.0894935, 0.9007353, 0.3251634 } },
        {"fork_12", new double[] { 0.3345588, 0.07315363, 0.375, 0.9150327 } },
        {"fork_13", new double[] { 0.269607842, 0.194068655, 0.4093137, 0.6732026 } },
        {"fork_14", new double[] { 0.143382356, 0.218578458, 0.7977941, 0.295751631 } },
        {"fork_15", new double[] { 0.19240196, 0.0633497, 0.5710784, 0.8398692 } },
        {"fork_16", new double[] { 0.140931368, 0.480016381, 0.6838235, 0.240196079 } },
        {"fork_17", new double[] { 0.305147052, 0.2512582, 0.4791667, 0.5408496 } },
        {"fork_18", new double[] { 0.234068632, 0.445702642, 0.6127451, 0.344771236 } },
        {"fork_19", new double[] { 0.219362751, 0.141781077, 0.5919118, 0.6683006 } },
        {"fork_20", new double[] { 0.180147052, 0.239820287, 0.6887255, 0.235294119 } }
    };
註
如果你自己的專案沒有點擊拖曳工具來標記區域座標,可以使用 Custom Vision 網站上的網頁介面。 在本例中,已提供座標。
接著,利用這張關聯圖上傳每張樣本影像及其區域座標。 一次最多可以上傳 64 張圖片。 你可能需要調整 imagePath 值,讓它指向正確的資料夾位置。
    // Add all images for fork
    var imagePath = Path.Combine("Images", "fork");
    var imageFileEntries = new List<ImageFileCreateEntry>();
    foreach (var fileName in Directory.EnumerateFiles(imagePath))
    {
        var region = fileToRegionMap[Path.GetFileNameWithoutExtension(fileName)];
        imageFileEntries.Add(new ImageFileCreateEntry(fileName, File.ReadAllBytes(fileName), null, new List<Region>(new Region[] { new Region(forkTag.Id, region[0], region[1], region[2], region[3]) })));
    }
    trainingApi.CreateImagesFromFiles(project.Id, new ImageFileCreateBatch(imageFileEntries));

    // Add all images for scissors
    imagePath = Path.Combine("Images", "scissors");
    imageFileEntries = new List<ImageFileCreateEntry>();
    foreach (var fileName in Directory.EnumerateFiles(imagePath))
    {
        var region = fileToRegionMap[Path.GetFileNameWithoutExtension(fileName)];
        imageFileEntries.Add(new ImageFileCreateEntry(fileName, File.ReadAllBytes(fileName), null, new List<Region>(new Region[] { new Region(scissorsTag.Id, region[0], region[1], region[2], region[3]) })));
    }
    trainingApi.CreateImagesFromFiles(project.Id, new ImageFileCreateBatch(imageFileEntries));
}
此時,你已經上傳了所有範例圖片,並為每張圖片(叉 形或 剪刀)標記一個對應的像素矩形。
對專案進行訓練
此方法會產生專案中的第一個訓練迭代。 它會持續查詢服務直到訓練完成。
private void TrainProject(CustomVisionTrainingClient trainingApi, Project project)
{

    // Now there are images with tags start training the project
    Console.WriteLine("\tTraining");
    iteration = trainingApi.TrainProject(project.Id);

    // The returned iteration will be in progress, and can be queried periodically to see when it has completed
    while (iteration.Status == "Training")
    {
        Thread.Sleep(1000);

        // Re-query the iteration to get its updated status
        iteration = trainingApi.GetIteration(project.Id, iteration.Id);
    }
}
提示
使用選定的標籤訓練
您可以選擇只在已套用的標記子集上進行訓練。 如果您尚未套用足夠的特定標記,但已套用足夠的其他標記,則您可能需要執行此動作。 在 TrainProject 呼叫中,使用 trainingParameters 參數。 建構一個 TrainingParameters ,並將它的 SelectedTags 屬性設為你想使用的標籤的 ID 清單。 模型會訓練只辨識該清單上的標籤。
發佈目前版本
此方法使模型的當前迭代可供查詢。 你可以用模型名稱作為參考,來發送預測請求。 你需要為 predictionResourceId 輸入自己的值。 你可以在Azure入口網站的資源Properties標籤中找到預測資源 ID,標示為 Resource ID。
private void PublishIteration(CustomVisionTrainingClient trainingApi, Project project)
{

    // The iteration is now trained. Publish it to the prediction end point.
    var predictionResourceId = Environment.GetEnvironmentVariable("VISION_PREDICTION_RESOURCE_ID");
    trainingApi.PublishIteration(project.Id, iteration.Id, publishedModelName, predictionResourceId);
    Console.WriteLine("Done!\n");
}
測試預測端點
此方法載入測試影像,查詢模型端點,並將預測資料輸出至主控台。
private void TestIteration(CustomVisionPredictionClient predictionApi, Project project)
{

    // Make a prediction against the new project
    Console.WriteLine("Making a prediction:");
    var imageFile = Path.Combine("Images", "test", "test_image.jpg");
    using (var stream = File.OpenRead(imageFile))
    {
        var result = predictionApi.DetectImage(project.Id, publishedModelName, stream);

        // Loop over each prediction and write out the results
        foreach (var c in result.Predictions)
        {
            Console.WriteLine($"\t{c.TagName}: {c.Probability:P1} [ {c.BoundingBox.Left}, {c.BoundingBox.Top}, {c.BoundingBox.Width}, {c.BoundingBox.Height} ]");
        }
    }
    Console.ReadKey();
}
執行應用程式
請點擊 IDE 視窗頂端的 除錯 按鈕來執行應用程式。
當應用程式執行時,應該會開啟一個主控台視窗並寫入以下輸出:
Creating new project:
        Training
Done!

Making a prediction:
        fork: 98.2% [ 0.111609578, 0.184719115, 0.6607002, 0.6637112 ]
        scissors: 1.2% [ 0.112389535, 0.119195729, 0.658031344, 0.7023591 ]
接著你可以驗證測試影像(在 Images/Test/ 中)是否正確標註,且偵測區域正確。 此時你可以按任意鍵退出應用程式。
清理資源
如果你想實作自己的物件偵測專案(或嘗試影像分類專案),可以考慮刪除這個範例中的叉子/剪刀偵測專案。 免費訂閱最多可進行兩個自訂視覺專案。
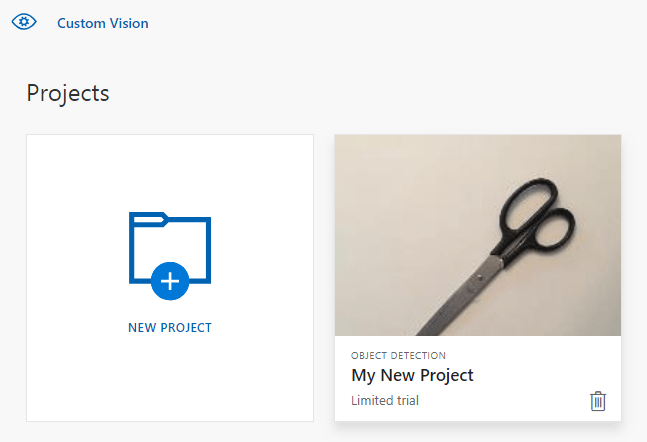
在 Custom Vision 網站,前往 Projects,選擇「我的新Project」下的垃圾桶。
下一步
現在你已經用程式碼完成了物體偵測的每一步。 這個範例執行一次訓練迭代,但通常你需要多次訓練和測試模型,才能讓它更準確。 以下指南探討影像分類,但其原理與物體偵測相似。
本指南提供說明與範例程式碼,幫助您開始使用 Go 的 Custom Vision 用戶端函式庫來建立物件偵測模型。 你會建立專案、加入標籤、訓練專案,並利用專案的預測端點網址來程式化測試。 請以此範例作為打造自己影像辨識應用程式的範本。
註
如果你想建立並訓練物件偵測模型 而不 寫程式碼,請參考 瀏覽器的指引 。
先決條件
- Azure訂閱 - 免費建立一個
- Go 1.8+
- 一旦你擁有Azure訂閱,在Azure入口建立自訂視覺資源 ,以建立訓練與預測資源。
- 你可以先用免費價格等級
F0()試用服務,之後再升級到付費等級以進行生產。
- 你可以先用免費價格等級
建立環境變數
在這個例子中,你會把憑證寫入執行該應用程式的本地機器上的環境變數。
前往 Azure 入口網站。 如果您在前置條件區塊中建立的自訂願景資源成功部署,請選擇下一步步驟中的「前往資源」按鈕。 你可以在資源的 「金鑰與端點 」頁面,在 資源管理下找到你的金鑰和端點。 你需要取得訓練資源和預測資源的金鑰,以及 API 端點。
你可以在Azure入口網站預測資源的Properties分頁中找到預測資源 ID,標示為 Resource ID。
提示
您也可以使用 https://www.customvision.ai 來獲取這些數值。 登入後,選擇右上角 的設定 圖示。 在 設定 頁面,你可以查看所有金鑰、資源 ID 和端點。
要設定環境變數,請開啟主控台視窗,並依照作業系統和開發環境的指示操作。
- 若要設定
VISION_TRAINING KEY環境變數,請將<your-training-key>替換為訓練資源的其中一個鍵。 - 要設定
VISION_TRAINING_ENDPOINT環境變數,請將<your-training-endpoint>替換為訓練資源的端點。 - 要設定
VISION_PREDICTION_KEY環境變數,請將預測資源的其中一個鍵值替換<your-prediction-key>。 - 要設定
VISION_PREDICTION_ENDPOINT環境變數,請將<your-prediction-endpoint>替換為你的預測資源端點。 - 要設定
VISION_PREDICTION_RESOURCE_ID環境變數,請將<your-resource-id>替換為你的預測資源的資源 ID。
重要
我們建議使用 Microsoft Entra ID 搭配 Azure 資源的 受控身份 驗證,以避免將憑證儲存在雲端執行的應用程式中。
使用 API 金鑰時要小心。 不要直接把 API 金鑰放進程式碼裡,也絕對不要公開發佈。 如果使用 API 金鑰,請將它們安全存放在 Azure Key Vault,定期更換金鑰,並透過基於角色的存取控制和網路存取限制來限制對 Azure Key Vault 的存取。 欲了解更多如何在應用程式中安全使用 API 金鑰的資訊,請參見 API 金鑰搭配 Azure Key Vault。
如需了解更多有關 AI 服務安全性的資訊,請參閱 驗證對 Azure AI 服務的請求。
setx VISION_TRAINING_KEY <your-training-key>
setx VISION_TRAINING_ENDPOINT <your-training-endpoint>
setx VISION_PREDICTION_KEY <your-prediction-key>
setx VISION_PREDICTION_ENDPOINT <your-prediction-endpoint>
setx VISION_PREDICTION_RESOURCE_ID <your-resource-id>
加入環境變數後,可能需要重新啟動讀取環境變數的執行程式,包括主控台視窗。
設定
安裝 Custom Vision 用戶端函式庫
要用 Custom Vision for Go 撰寫影像分析應用程式,你需要 Custom Vision 服務客戶端函式庫。 請在 PowerShell 中執行以下指令:
go get -u github.com/Azure/azure-sdk-for-go/...
或者,如果您使用 dep,請在存放庫中執行:
dep ensure -add github.com/Azure/azure-sdk-for-go
取得範例圖片
此範例使用了 Foundry Tools Python SDK Samples 倉庫中的圖片,該資料庫位於 GitHub。 將此儲存庫複製或下載到您的開發環境中。 記得它的資料夾位置,方便後續步驟使用。
創建自訂願景專案
在你偏好的專案目錄中建立一個名為 sample.go 的新檔案,然後在你偏好的程式碼編輯器中開啟它。
將以下程式碼加入您的腳本,建立新的自訂視覺服務專案。
請參考 CreateProject 方法,在建立專案時指定其他選項(詳見 《建立偵測器 網頁入口網站指南》)。
import(
    "context"
    "bytes"
    "fmt"
    "io/ioutil"
    "path"
    "log"
    "time"
    "github.com/Azure/azure-sdk-for-go/services/cognitiveservices/v3.0/customvision/training"
    "github.com/Azure/azure-sdk-for-go/services/cognitiveservices/v3.0/customvision/prediction"
)

// retrieve environment variables:
var (
    training_key string = os.Getenv("VISION_TRAINING_KEY")
    prediction_key string = os.Getenv("VISION_PREDICTION_KEY")
    prediction_resource_id = os.Getenv("VISION_PREDICTION_RESOURCE_ID")
    endpoint string = os.Getenv("VISION_ENDPOINT")

    project_name string = "Go Sample OD Project"
    iteration_publish_name = "detectModel"
    sampleDataDirectory = "<path to sample images>"
)

func main() {
    fmt.Println("Creating project...")

    ctx = context.Background()

    trainer := training.New(training_key, endpoint)

    var objectDetectDomain training.Domain
    domains, _ := trainer.GetDomains(ctx)

    for _, domain := range *domains.Value {
        fmt.Println(domain, domain.Type)
        if domain.Type == "ObjectDetection" && *domain.Name == "General" {
            objectDetectDomain = domain
            break
        }
    }
    fmt.Println("Creating project...")
    project, _ := trainer.CreateProject(ctx, project_name, "", objectDetectDomain.ID, "")
在專案中建立標籤
要為你的專案建立分類標籤,請在 sample.go 的末尾加上以下程式碼:
# Make two tags in the new project
forkTag, _ := trainer.CreateTag(ctx, *project.ID, "fork", "A fork", string(training.Regular))
scissorsTag, _ := trainer.CreateTag(ctx, *project.ID, "scissors", "Pair of scissors", string(training.Regular))
上傳與標籤圖片
在物件偵測專案中標記影像時,你需要用正規化座標指定每個標記物件的區域。
註
如果你沒有點擊拖曳工具來標記區域座標,也可以在 Customvision.ai 使用網頁介面。 在本例中,已提供座標。
要將圖片、標籤和區域加入專案,請在標籤建立後插入以下程式碼。 請注意,在這個教學課程中,區域是使用內嵌硬式編碼。 區域以正規化座標指定邊界框,座標順序為:左、上、寬、高。
forkImageRegions := map[string][4]float64{
    "fork_1.jpg": [4]float64{ 0.145833328, 0.3509314, 0.5894608, 0.238562092 },
    "fork_2.jpg": [4]float64{ 0.294117659, 0.216944471, 0.534313738, 0.5980392 },
    "fork_3.jpg": [4]float64{ 0.09191177, 0.0682516545, 0.757352948, 0.6143791 },
    "fork_4.jpg": [4]float64{ 0.254901975, 0.185898721, 0.5232843, 0.594771266 },
    "fork_5.jpg": [4]float64{ 0.2365196, 0.128709182, 0.5845588, 0.71405226 },
    "fork_6.jpg": [4]float64{ 0.115196079, 0.133611143, 0.676470637, 0.6993464 },
    "fork_7.jpg": [4]float64{ 0.164215669, 0.31008172, 0.767156839, 0.410130739 },
    "fork_8.jpg": [4]float64{ 0.118872553, 0.318251669, 0.817401946, 0.225490168 },
    "fork_9.jpg": [4]float64{ 0.18259804, 0.2136765, 0.6335784, 0.643790841 },
    "fork_10.jpg": [4]float64{ 0.05269608, 0.282303959, 0.8088235, 0.452614367 },
    "fork_11.jpg": [4]float64{ 0.05759804, 0.0894935, 0.9007353, 0.3251634 },
    "fork_12.jpg": [4]float64{ 0.3345588, 0.07315363, 0.375, 0.9150327 },
    "fork_13.jpg": [4]float64{ 0.269607842, 0.194068655, 0.4093137, 0.6732026 },
    "fork_14.jpg": [4]float64{ 0.143382356, 0.218578458, 0.7977941, 0.295751631 },
    "fork_15.jpg": [4]float64{ 0.19240196, 0.0633497, 0.5710784, 0.8398692 },
    "fork_16.jpg": [4]float64{ 0.140931368, 0.480016381, 0.6838235, 0.240196079 },
    "fork_17.jpg": [4]float64{ 0.305147052, 0.2512582, 0.4791667, 0.5408496 },
    "fork_18.jpg": [4]float64{ 0.234068632, 0.445702642, 0.6127451, 0.344771236 },
    "fork_19.jpg": [4]float64{ 0.219362751, 0.141781077, 0.5919118, 0.6683006 },
    "fork_20.jpg": [4]float64{ 0.180147052, 0.239820287, 0.6887255, 0.235294119 },
}

scissorsImageRegions := map[string][4]float64{
    "scissors_1.jpg": [4]float64{ 0.4007353, 0.194068655, 0.259803921, 0.6617647 },
    "scissors_2.jpg": [4]float64{ 0.426470578, 0.185898721, 0.172794119, 0.5539216 },
    "scissors_3.jpg": [4]float64{ 0.289215684, 0.259428144, 0.403186262, 0.421568632 },
    "scissors_4.jpg": [4]float64{ 0.343137264, 0.105833367, 0.332107842, 0.8055556 },
    "scissors_5.jpg": [4]float64{ 0.3125, 0.09766343, 0.435049027, 0.71405226 },
    "scissors_6.jpg": [4]float64{ 0.379901975, 0.24308826, 0.32107842, 0.5718954 },
    "scissors_7.jpg": [4]float64{ 0.341911763, 0.20714055, 0.3137255, 0.6356209 },
    "scissors_8.jpg": [4]float64{ 0.231617644, 0.08459154, 0.504901946, 0.8480392 },
    "scissors_9.jpg": [4]float64{ 0.170343131, 0.332957536, 0.767156839, 0.403594762 },
    "scissors_10.jpg": [4]float64{ 0.204656869, 0.120539248, 0.5245098, 0.743464053 },
    "scissors_11.jpg": [4]float64{ 0.05514706, 0.159754932, 0.799019635, 0.730392158 },
    "scissors_12.jpg": [4]float64{ 0.265931368, 0.169558853, 0.5061275, 0.606209159 },
    "scissors_13.jpg": [4]float64{ 0.241421565, 0.184264734, 0.448529422, 0.6830065 },
    "scissors_14.jpg": [4]float64{ 0.05759804, 0.05027781, 0.75, 0.882352948 },
    "scissors_15.jpg": [4]float64{ 0.191176474, 0.169558853, 0.6936275, 0.6748366 },
    "scissors_16.jpg": [4]float64{ 0.1004902, 0.279036, 0.6911765, 0.477124184 },
    "scissors_17.jpg": [4]float64{ 0.2720588, 0.131977156, 0.4987745, 0.6911765 },
    "scissors_18.jpg": [4]float64{ 0.180147052, 0.112369314, 0.6262255, 0.6666667 },
    "scissors_19.jpg": [4]float64{ 0.333333343, 0.0274019931, 0.443627447, 0.852941155 },
    "scissors_20.jpg": [4]float64{ 0.158088237, 0.04047389, 0.6691176, 0.843137264 },
}
接著,利用這張關聯圖上傳每張帶有區域座標的樣本圖片(一次最多可上傳64張圖片)。 請加上以下程式碼。
註
你需要根據你之前下載的 Foundry Tools Go SDK 範例專案,改變圖片的路徑。
// Go through the data table above and create the images
fmt.Println("Adding images...")
var fork_images []training.ImageFileCreateEntry
for file, region := range forkImageRegions {
imageFile, _ := ioutil.ReadFile(path.Join(sampleDataDirectory, "fork", file))
regiontest := forkImageRegions[file]
imageRegion := training.Region{
TagID: forkTag.ID,
Left: ®iontest[0],
Top: ®iontest[1],
Width: ®iontest[2],
Height: ®iontest[3],
}
var fileName string = file
fork_images = append(fork_images, training.ImageFileCreateEntry{
Name: &fileName,
Contents: &imageFile,
Regions: &[]training.Region{imageRegion}
})
}
fork_batch, _ := trainer.CreateImagesFromFiles(ctx, *project.ID, training.ImageFileCreateBatch{
Images: &fork_images,
})
if (!*fork_batch.IsBatchSuccessful) {
fmt.Println("Batch upload failed.")
}
var scissor_images []training.ImageFileCreateEntry
for file, region := range scissorsImageRegions {
imageFile, _ := ioutil.ReadFile(path.Join(sampleDataDirectory, "scissors", file))
imageRegion := training.Region {
TagID:scissorsTag.ID,
Left:®ion[0],
Top:®ion[1],
Width:®ion[2],
Height:®ion[3],
}
scissor_images = append(scissor_images, training.ImageFileCreateEntry {
Name: &file,
Contents: &imageFile,
Regions: &[]training.Region{ imageRegion },
})
}
scissor_batch, _ := trainer.CreateImagesFromFiles(ctx, *project.ID, training.ImageFileCreateBatch{
Images: &scissor_images,
})
if (!*scissor_batch.IsBatchSuccessful) {
fmt.Println("Batch upload failed.")
}
培訓並發佈專案
此程式碼建立預測模型的第一次迭代,然後將該迭代發佈給預測端點。 已發表迭代的名稱可用於發送預測請求。 在預測端點發佈之前,無法使用迭代。
iteration, _ := trainer.TrainProject(ctx, *project.ID)
fmt.Println("Training status:", *iteration.Status)
for {
    if *iteration.Status != "Training" {
        break
    }
    time.Sleep(5 * time.Second)
    iteration, _ = trainer.GetIteration(ctx, *project.ID, *iteration.ID)
    fmt.Println("Training status:", *iteration.Status)
}

trainer.PublishIteration(ctx, *project.ID, *iteration.ID, iteration_publish_name, prediction_resource_id))
使用預測端點
若要將影像傳送到預測端點並取得預測結果,請在檔案末尾加上以下程式碼:
    fmt.Println("Predicting...")
    predictor := prediction.New(prediction_key, endpoint)

    testImageData, _ := ioutil.ReadFile(path.Join(sampleDataDirectory, "Test", "test_od_image.jpg"))
    results, _ := predictor.DetectImage(ctx, *project.ID, iteration_publish_name, ioutil.NopCloser(bytes.NewReader(testImageData)), "")

    for _, prediction := range *results.Predictions    {
        boundingBox := *prediction.BoundingBox

        fmt.Printf("\t%s: %.2f%% (%.2f, %.2f, %.2f, %.2f)",
            *prediction.TagName,
            *prediction.Probability * 100,
            *boundingBox.Left,
            *boundingBox.Top,
            *boundingBox.Width,
            *boundingBox.Height)
        fmt.Println("")
    }
}
執行應用程式
執行 sample.go。
go run sample.go
應用程式的輸出應該會出現在主控台上。 接著你可以驗證測試影像(在 樣本/視力/影像/測試中取得)是否標記正確,且偵測區域正確。
清理資源
如果你想實作自己的物件偵測專案(或嘗試影像分類專案),可以考慮刪除這個範例中的叉子/剪刀偵測專案。 免費訂閱最多可進行兩個自訂視覺專案。
在 Custom Vision 網站,前往 Projects,選擇「我的新Project」下的垃圾桶。
下一步
現在你已經用程式碼完成了物體偵測的每一步。 這個範例執行一次訓練迭代,但通常你需要多次訓練和測試模型,才能讓它更準確。 以下指南探討影像分類,但其原理與物體偵測相似。
開始使用 Custom Vision 的 Java 客戶端函式庫來建立物件偵測模型。 請依照以下步驟安裝套件,並嘗試範例程式碼來執行基本任務。 請以此範例作為打造自己影像辨識應用程式的範本。
註
如果你想建立並訓練物件偵測模型 而不 寫程式碼,請參考 瀏覽器的指引 。
參考文件 | 函式庫原始碼 (訓練)(預測)| 工件(Maven) (訓練)(預測) | 範例
先決條件
- Azure訂閱 - 免費建立
- 目前版本的 Java 開發套件(JDK)
- Gradle 建置工具,或其他相依管理工具。
- 一旦你有Azure訂閱,在Azure入口網站建立自訂願景資源 ,以建立訓練與預測資源。
- 你可以先用免費價格等級
F0()試用服務,之後再升級到付費等級以進行生產。
- 你可以先用免費價格等級
建立環境變數
在這個例子中,你會把憑證寫入執行該應用程式的本地機器上的環境變數。
前往 Azure 入口網站。 如果您在前置條件區塊中建立的自訂願景資源成功部署,請選擇下一步步驟中的「前往資源」按鈕。 你可以在資源的 「金鑰與端點 」頁面,在 資源管理下找到你的金鑰和端點。 你需要取得訓練資源和預測資源的金鑰,以及 API 端點。
你可以在Azure入口網站預測資源的Properties分頁中找到預測資源 ID,標示為 Resource ID。
提示
您也可以使用 https://www.customvision.ai 來獲取這些數值。 登入後,選擇右上角 的設定 圖示。 在 設定 頁面,你可以查看所有金鑰、資源 ID 和端點。
要設定環境變數,請開啟主控台視窗,並依照作業系統和開發環境的指示操作。
- 若要設定
VISION_TRAINING KEY環境變數,請將<your-training-key>替換為訓練資源的其中一個鍵。 - 要設定
VISION_TRAINING_ENDPOINT環境變數,請將<your-training-endpoint>替換為訓練資源的端點。 - 要設定
VISION_PREDICTION_KEY環境變數,請將預測資源的其中一個鍵值替換<your-prediction-key>。 - 要設定
VISION_PREDICTION_ENDPOINT環境變數,請將<your-prediction-endpoint>替換為你的預測資源端點。 - 要設定
VISION_PREDICTION_RESOURCE_ID環境變數,請將<your-resource-id>替換為你的預測資源的資源 ID。
重要
我們建議使用 Microsoft Entra ID 搭配 Azure 資源的 受控身份 驗證,以避免將憑證儲存在雲端執行的應用程式中。
使用 API 金鑰時要小心。 不要直接把 API 金鑰放進程式碼裡,也絕對不要公開發佈。 如果使用 API 金鑰,請將它們安全存放在 Azure Key Vault,定期更換金鑰,並透過基於角色的存取控制和網路存取限制來限制對 Azure Key Vault 的存取。 欲了解更多如何在應用程式中安全使用 API 金鑰的資訊,請參見 API 金鑰搭配 Azure Key Vault。
如需了解更多有關 AI 服務安全性的資訊,請參閱 驗證對 Azure AI 服務的請求。
setx VISION_TRAINING_KEY <your-training-key>
setx VISION_TRAINING_ENDPOINT <your-training-endpoint>
setx VISION_PREDICTION_KEY <your-prediction-key>
setx VISION_PREDICTION_ENDPOINT <your-prediction-endpoint>
setx VISION_PREDICTION_RESOURCE_ID <your-resource-id>
加入環境變數後,可能需要重新啟動讀取環境變數的執行程式,包括主控台視窗。
設定
建立一個新的 Gradle 專案
在主控台視窗(例如 cmd、PowerShell 或 Bash)中,建立一個新的應用程式目錄,然後導覽到裡面。
mkdir myapp && cd myapp
從你的工作目錄執行這個 gradle init 指令。 此指令會建立 Gradle 的重要建置檔案,包括 build.gradle.kts,該檔案在執行時用於建立與配置您的應用程式。
gradle init --type basic
當被要求選擇 DSL 時,請選擇 Kotlin。
安裝用戶端函式庫
找到 build.gradle.kts ,並用你偏好的 IDE 或文字編輯器開啟。 接著複製以下的建置配置。 此配置定義專案為一個Java應用程式,其入口為類別 CustomVisionQuickstart。 它匯入了自訂視覺的函式庫。
plugins {
    java
    application
}
application {
    mainClassName = "CustomVisionQuickstart"
}
repositories {
    mavenCentral()
}
dependencies {
    compile(group = "com.azure", name = "azure-cognitiveservices-customvision-training", version = "1.1.0-preview.2")
    compile(group = "com.azure", name = "azure-cognitiveservices-customvision-prediction", version = "1.1.0-preview.2")
}
建立一個 Java 檔案
從你的工作目錄中,執行以下指令建立專案來源資料夾:
mkdir -p src/main/java
進入新資料夾並建立一個名為 CustomVisionQuickstart.java 的檔案。 在你偏好的編輯器或 IDE 中開啟,並加入以下 import 語句:
import java.util.Collections;
import java.util.HashMap;
import java.util.List;
import java.util.UUID;

import com.google.common.io.ByteStreams;

import com.microsoft.azure.cognitiveservices.vision.customvision.training.models.Classifier;
import com.microsoft.azure.cognitiveservices.vision.customvision.training.models.Domain;
import com.microsoft.azure.cognitiveservices.vision.customvision.training.models.DomainType;
import com.microsoft.azure.cognitiveservices.vision.customvision.training.models.ImageFileCreateBatch;
import com.microsoft.azure.cognitiveservices.vision.customvision.training.models.ImageFileCreateEntry;
import com.microsoft.azure.cognitiveservices.vision.customvision.training.models.Iteration;
import com.microsoft.azure.cognitiveservices.vision.customvision.training.models.Project;
import com.microsoft.azure.cognitiveservices.vision.customvision.training.models.Region;
import com.microsoft.azure.cognitiveservices.vision.customvision.training.models.TrainProjectOptionalParameter;
import com.microsoft.azure.cognitiveservices.vision.customvision.training.CustomVisionTrainingClient;
import com.microsoft.azure.cognitiveservices.vision.customvision.training.Trainings;
import com.microsoft.azure.cognitiveservices.vision.customvision.training.CustomVisionTrainingManager;
import com.microsoft.azure.cognitiveservices.vision.customvision.prediction.models.ImagePrediction;
import com.microsoft.azure.cognitiveservices.vision.customvision.prediction.models.Prediction;
import com.microsoft.azure.cognitiveservices.vision.customvision.prediction.CustomVisionPredictionClient;
import com.microsoft.azure.cognitiveservices.vision.customvision.prediction.CustomVisionPredictionManager;
import com.microsoft.azure.cognitiveservices.vision.customvision.training.models.Tag;
提示
想一次查看整個快速啟動程式碼檔案嗎? 你可以在 GitHub 找到它,裡面包含了這個快速入門的程式碼範例。
在應用程式的 CustomVisionQuickstart 類別中,建立變數,從環境變數中擷取資源的鍵與端點。
// retrieve environment variables
final static String trainingApiKey = System.getenv("VISION_TRAINING_KEY");
final static String trainingEndpoint = System.getenv("VISION_TRAINING_ENDPOINT");
final static String predictionApiKey = System.getenv("VISION_PREDICTION_KEY");
final static String predictionEndpoint = System.getenv("VISION_PREDICTION_ENDPOINT");
final static String predictionResourceId = System.getenv("VISION_PREDICTION_RESOURCE_ID");
在應用程式主方法中,加入此快速入門所使用的方法呼叫。 你之後會定義這些。
Project projectOD = createProjectOD(trainClient);
addTagsOD(trainClient, projectOD);
uploadImagesOD(trainClient, projectOD);
trainProjectOD(trainClient, projectOD);
publishIterationOD(trainClient, project);
testProjectOD(predictor, projectOD);
物件模型
以下的類別與介面處理了 Custom Vision Java 用戶端函式庫的一些主要功能。
| 名稱 | 描述 |
|---|---|
| CustomVisionTrainingClient | 這堂課負責你的模型的創建、訓練與發佈。 |
| CustomVisionPredictionClient | 這門課負責查詢你的模型以進行物件偵測預測。 |
| 影像預測 | 此類別定義單一影像上的單一物件預測。 它包含物件 ID 與名稱、物件的邊界框位置,以及信心分數的屬性。 |
程式碼範例
這些程式碼片段展示了如何使用 Custom Vision 用戶端函式庫執行以下任務Java:
驗證客戶端
在您的主要方法中,使用端點和金鑰具現化訓練與預測用戶端。
// Authenticate
CustomVisionTrainingClient trainClient = CustomVisionTrainingManager
        .authenticate(trainingEndpoint, trainingApiKey)
        .withEndpoint(trainingEndpoint);
CustomVisionPredictionClient predictor = CustomVisionPredictionManager
        .authenticate(predictionEndpoint, predictionApiKey)
        .withEndpoint(predictionEndpoint);
建立新的客製化願景專案
接下來的方法會建立一個物件偵測專案。 建立的專案會出現在你先前造訪的 Custom Vision 網站上 。 請參考 CreateProject 方法的覆載,以便在建立專案時指定其他選項(詳見 《建立偵測器 網頁入口網站指南》)。
public static Project createProjectOD(CustomVisionTrainingClient trainClient) {
    Trainings trainer = trainClient.trainings();

    // find the object detection domain to set the project type
    Domain objectDetectionDomain = null;
    List<Domain> domains = trainer.getDomains();
    for (final Domain domain : domains) {
        if (domain.type() == DomainType.OBJECT_DETECTION) {
            objectDetectionDomain = domain;
            break;
        }
    }

    if (objectDetectionDomain == null) {
        System.out.println("Unexpected result; no objects were detected.");
    }

    System.out.println("Creating project...");
    // create an object detection project
    Project project = trainer.createProject().withName("Sample Java OD Project")
            .withDescription("Sample OD Project").withDomainId(objectDetectionDomain.id())
            .withClassificationType(Classifier.MULTILABEL.toString()).execute();

    return project;
}
為你的專案新增標籤
這個方法定義了你要用來訓練模型的標籤。
public static void addTagsOD(CustomVisionTrainingClient trainClient, Project project) {
    Trainings trainer = trainClient.trainings();
    // create fork tag
    Tag forkTag = trainer.createTag().withProjectId(project.id()).withName("fork").execute();

    // create scissors tag
    Tag scissorsTag = trainer.createTag().withProjectId(project.id()).withName("scissor").execute();
}
上傳與標籤圖片
首先,下載本專案的範例圖片。 將 sample Images 資料夾 的內容儲存到本地裝置。
註
你需要更廣泛的影像組合來完成訓練嗎? Trove 是 Microsoft Garage 的專案,允許你收集並購買圖片集以供訓練用途。 收集完圖片後,你可以下載並以平常方式匯入你的 Custom Vision 專案。 請造訪 Trove 頁面 了解更多資訊。
在物件偵測專案中標記影像時,你需要用正規化座標指定每個標記物件的區域。 以下程式碼將每個範例影像與其標記區域關聯起來。
註
如果你沒有點擊拖曳工具來標記區域座標,也可以在 Customvision.ai 使用網頁介面。 在本例中,已提供座標。
public static void uploadImagesOD(CustomVisionTrainingClient trainClient, Project project) {
    // Mapping of filenames to their respective regions in the image. The
    // coordinates are specified
    // as left, top, width, height in normalized coordinates. I.e. (left is left in
    // pixels / width in pixels)

    // This is a hardcoded mapping of the files we'll upload along with the bounding
    // box of the object in the
    // image. The boudning box is specified as left, top, width, height in
    // normalized coordinates.
    // Normalized Left = Left / Width (in Pixels)
    // Normalized Top = Top / Height (in Pixels)
    // Normalized Bounding Box Width = (Right - Left) / Width (in Pixels)
    // Normalized Bounding Box Height = (Bottom - Top) / Height (in Pixels)
    HashMap<String, double[]> regionMap = new HashMap<String, double[]>();
    regionMap.put("scissors_1.jpg", new double[] { 0.4007353, 0.194068655, 0.259803921, 0.6617647 });
    regionMap.put("scissors_2.jpg", new double[] { 0.426470578, 0.185898721, 0.172794119, 0.5539216 });
    regionMap.put("scissors_3.jpg", new double[] { 0.289215684, 0.259428144, 0.403186262, 0.421568632 });
    regionMap.put("scissors_4.jpg", new double[] { 0.343137264, 0.105833367, 0.332107842, 0.8055556 });
    regionMap.put("scissors_5.jpg", new double[] { 0.3125, 0.09766343, 0.435049027, 0.71405226 });
    regionMap.put("scissors_6.jpg", new double[] { 0.379901975, 0.24308826, 0.32107842, 0.5718954 });
    regionMap.put("scissors_7.jpg", new double[] { 0.341911763, 0.20714055, 0.3137255, 0.6356209 });
    regionMap.put("scissors_8.jpg", new double[] { 0.231617644, 0.08459154, 0.504901946, 0.8480392 });
    regionMap.put("scissors_9.jpg", new double[] { 0.170343131, 0.332957536, 0.767156839, 0.403594762 });
    regionMap.put("scissors_10.jpg", new double[] { 0.204656869, 0.120539248, 0.5245098, 0.743464053 });
    regionMap.put("scissors_11.jpg", new double[] { 0.05514706, 0.159754932, 0.799019635, 0.730392158 });
    regionMap.put("scissors_12.jpg", new double[] { 0.265931368, 0.169558853, 0.5061275, 0.606209159 });
    regionMap.put("scissors_13.jpg", new double[] { 0.241421565, 0.184264734, 0.448529422, 0.6830065 });
    regionMap.put("scissors_14.jpg", new double[] { 0.05759804, 0.05027781, 0.75, 0.882352948 });
    regionMap.put("scissors_15.jpg", new double[] { 0.191176474, 0.169558853, 0.6936275, 0.6748366 });
    regionMap.put("scissors_16.jpg", new double[] { 0.1004902, 0.279036, 0.6911765, 0.477124184 });
    regionMap.put("scissors_17.jpg", new double[] { 0.2720588, 0.131977156, 0.4987745, 0.6911765 });
    regionMap.put("scissors_18.jpg", new double[] { 0.180147052, 0.112369314, 0.6262255, 0.6666667 });
    regionMap.put("scissors_19.jpg", new double[] { 0.333333343, 0.0274019931, 0.443627447, 0.852941155 });
    regionMap.put("scissors_20.jpg", new double[] { 0.158088237, 0.04047389, 0.6691176, 0.843137264 });
    regionMap.put("fork_1.jpg", new double[] { 0.145833328, 0.3509314, 0.5894608, 0.238562092 });
    regionMap.put("fork_2.jpg", new double[] { 0.294117659, 0.216944471, 0.534313738, 0.5980392 });
    regionMap.put("fork_3.jpg", new double[] { 0.09191177, 0.0682516545, 0.757352948, 0.6143791 });
    regionMap.put("fork_4.jpg", new double[] { 0.254901975, 0.185898721, 0.5232843, 0.594771266 });
    regionMap.put("fork_5.jpg", new double[] { 0.2365196, 0.128709182, 0.5845588, 0.71405226 });
    regionMap.put("fork_6.jpg", new double[] { 0.115196079, 0.133611143, 0.676470637, 0.6993464 });
    regionMap.put("fork_7.jpg", new double[] { 0.164215669, 0.31008172, 0.767156839, 0.410130739 });
    regionMap.put("fork_8.jpg", new double[] { 0.118872553, 0.318251669, 0.817401946, 0.225490168 });
    regionMap.put("fork_9.jpg", new double[] { 0.18259804, 0.2136765, 0.6335784, 0.643790841 });
    regionMap.put("fork_10.jpg", new double[] { 0.05269608, 0.282303959, 0.8088235, 0.452614367 });
    regionMap.put("fork_11.jpg", new double[] { 0.05759804, 0.0894935, 0.9007353, 0.3251634 });
    regionMap.put("fork_12.jpg", new double[] { 0.3345588, 0.07315363, 0.375, 0.9150327 });
    regionMap.put("fork_13.jpg", new double[] { 0.269607842, 0.194068655, 0.4093137, 0.6732026 });
    regionMap.put("fork_14.jpg", new double[] { 0.143382356, 0.218578458, 0.7977941, 0.295751631 });
    regionMap.put("fork_15.jpg", new double[] { 0.19240196, 0.0633497, 0.5710784, 0.8398692 });
    regionMap.put("fork_16.jpg", new double[] { 0.140931368, 0.480016381, 0.6838235, 0.240196079 });
    regionMap.put("fork_17.jpg", new double[] { 0.305147052, 0.2512582, 0.4791667, 0.5408496 });
    regionMap.put("fork_18.jpg", new double[] { 0.234068632, 0.445702642, 0.6127451, 0.344771236 });
    regionMap.put("fork_19.jpg", new double[] { 0.219362751, 0.141781077, 0.5919118, 0.6683006 });
    regionMap.put("fork_20.jpg", new double[] { 0.180147052, 0.239820287, 0.6887255, 0.235294119 });
下一個程式碼區塊會將影像加入專案。 你需要改變呼叫的 GetImage 參數,指向你下載的 fork 和 scisors 資料夾的位置。
    Trainings trainer = trainClient.trainings();

    System.out.println("Adding images...");
    for (int i = 1; i <= 20; i++) {
        String fileName = "fork_" + i + ".jpg";
        byte[] contents = GetImage("/fork", fileName);
        AddImageToProject(trainer, project, fileName, contents, forkTag.id(), regionMap.get(fileName));
    }

    for (int i = 1; i <= 20; i++) {
        String fileName = "scissors_" + i + ".jpg";
        byte[] contents = GetImage("/scissors", fileName);
        AddImageToProject(trainer, project, fileName, contents, scissorsTag.id(), regionMap.get(fileName));
    }
}
前一個程式碼片段利用兩個輔助函式,將圖片作為資源串流擷取並上傳到服務(一次最多可上傳 64 張圖片)。 請定義這些方法。
private static void AddImageToProject(Trainings trainer, Project project, String fileName, byte[] contents,
        UUID tag, double[] regionValues) {
    System.out.println("Adding image: " + fileName);
    ImageFileCreateEntry file = new ImageFileCreateEntry().withName(fileName).withContents(contents);

    ImageFileCreateBatch batch = new ImageFileCreateBatch().withImages(Collections.singletonList(file));

    // If Optional region is specified, tack it on and place the tag there,
    // otherwise
    // add it to the batch.
    if (regionValues != null) {
        Region region = new Region().withTagId(tag).withLeft(regionValues[0]).withTop(regionValues[1])
                .withWidth(regionValues[2]).withHeight(regionValues[3]);
        file = file.withRegions(Collections.singletonList(region));
    } else {
        batch = batch.withTagIds(Collections.singletonList(tag));
    }

    trainer.createImagesFromFiles(project.id(), batch);
}

private static byte[] GetImage(String folder, String fileName) {
    try {
        return ByteStreams.toByteArray(CustomVisionSamples.class.getResourceAsStream(folder + "/" + fileName));
    } catch (Exception e) {
        System.out.println(e.getMessage());
        e.printStackTrace();
    }
    return null;
}
對專案進行訓練
此方法會產生專案中的第一個訓練迭代。 它會持續查詢服務直到訓練完成。
public static String trainProjectOD(CustomVisionTrainingClient trainClient, Project project) {
    Trainings trainer = trainClient.trainings();
    System.out.println("Training...");
    Iteration iteration = trainer.trainProject(project.id(), new TrainProjectOptionalParameter());

    while (iteration.status().equals("Training")) {
        System.out.println("Training Status: " + iteration.status());
        Thread.sleep(5000);
        iteration = trainer.getIteration(project.id(), iteration.id());
    }
    System.out.println("Training Status: " + iteration.status());
}
發佈目前版本
此方法使模型的當前迭代可供查詢。 你可以用模型名稱作為參考,來發送預測請求。 你需要為 predictionResourceId 輸入自己的值。 你可以在Azure入口網站的資源Properties標籤中找到預測資源 ID,標示為 Resource ID。
public static String publishIterationOD(CustomVisionTrainingClient trainClient, Project project) {
    Trainings trainer = trainClient.trainings();

    // The iteration is now trained. Publish it to the prediction endpoint.
    String publishedModelName = "myModel";
    String predictionID = "<your-prediction-resource-ID>";
    trainer.publishIteration(project.id(), iteration.id(), publishedModelName, predictionID);
    return publishedModelName;
}
測試預測端點
此方法載入測試影像,查詢模型端點,並將預測資料輸出至主控台。
public static void testProjectOD(CustomVisionPredictionClient predictor, Project project) {

    // load test image
    byte[] testImage = GetImage("/ObjectTest", "test_image.jpg");

    // predict
    ImagePrediction results = predictor.predictions().detectImage().withProjectId(project.id())
            .withPublishedName(publishedModelName).withImageData(testImage).execute();

    for (Prediction prediction : results.predictions()) {
        System.out.println(String.format("\t%s: %.2f%% at: %.2f, %.2f, %.2f, %.2f", prediction.tagName(),
                prediction.probability() * 100.0f, prediction.boundingBox().left(), prediction.boundingBox().top(),
                prediction.boundingBox().width(), prediction.boundingBox().height()));
    }
}
執行應用程式
你可以用以下方式來建立這個應用程式:
gradle build
執行應用程式時,指令如下 gradle run :
gradle run
清理資源
如果你想清理並移除 Azure AI 服務 訂閱,可以刪除該資源或資源群組。 刪除資源群組也會刪除與之相關的其他資源。
如果你想實作自己的物件偵測專案(或嘗試影像分類專案),可以考慮刪除這個範例中的叉子/剪刀偵測專案。 免費訂閱最多可進行兩個自訂視覺專案。
在 Custom Vision 網站,前往 Projects,選擇「我的新Project」下的垃圾桶。
下一步
現在你已經用程式碼完成了物體偵測的每一步。 這個範例執行一次訓練迭代,但通常你需要多次訓練和測試模型,才能讓它更準確。 以下指南探討影像分類,但其原理與物體偵測相似。
- 什麼是客製化視覺?
- 此範例的原始碼可在
GitHub
本指南提供說明與範例程式碼,幫助您開始使用 Custom Vision 用戶端函式庫 Node.js 建立物件偵測模型。 你建立專案、新增標籤、訓練專案,並使用專案的預測端點網址來程式化測試。 請以此範例作為打造自己影像辨識應用程式的範本。
註
如果你想建立並訓練物件偵測模型 而不 寫程式碼,請參考 瀏覽器的指引 。
參考文件 (訓練)(預測) | 套件(npm)(訓練)(預測) | 範例
先決條件
- Azure訂閱 - 免費建立一個
- 現行版本的Node.js
- 一旦你有Azure訂閱,在Azure入口網站建立自訂願景資源 ,以建立訓練與預測資源。
- 你可以先用免費價格等級
F0()試用服務,之後再升級到付費等級以進行生產。
- 你可以先用免費價格等級
建立環境變數
在這個例子中,你會把憑證寫入執行該應用程式的本地機器上的環境變數。
前往 Azure 入口網站。 如果您在前置條件區塊中建立的自訂願景資源成功部署,請選擇下一步步驟中的「前往資源」按鈕。 你可以在資源的 「金鑰與端點 」頁面,在 資源管理下找到你的金鑰和端點。 你需要取得訓練資源和預測資源的金鑰,以及 API 端點。
你可以在Azure入口網站預測資源的Properties分頁中找到預測資源 ID,標示為 Resource ID。
提示
您也可以使用 https://www.customvision.ai 來獲取這些數值。 登入後,選擇右上角 的設定 圖示。 在 設定 頁面,你可以查看所有金鑰、資源 ID 和端點。
要設定環境變數,請開啟主控台視窗,並依照作業系統和開發環境的指示操作。
- 若要設定
VISION_TRAINING KEY環境變數,請將<your-training-key>替換為訓練資源的其中一個鍵。 - 要設定
VISION_TRAINING_ENDPOINT環境變數,請將<your-training-endpoint>替換為訓練資源的端點。 - 要設定
VISION_PREDICTION_KEY環境變數,請將預測資源的其中一個鍵值替換<your-prediction-key>。 - 要設定
VISION_PREDICTION_ENDPOINT環境變數,請將<your-prediction-endpoint>替換為你的預測資源端點。 - 要設定
VISION_PREDICTION_RESOURCE_ID環境變數,請將<your-resource-id>替換為你的預測資源的資源 ID。
重要
我們建議使用 Microsoft Entra ID 搭配 Azure 資源的 受控身份 驗證,以避免將憑證儲存在雲端執行的應用程式中。
使用 API 金鑰時要小心。 不要直接把 API 金鑰放進程式碼裡,也絕對不要公開發佈。 如果使用 API 金鑰,請將它們安全存放在 Azure Key Vault,定期更換金鑰,並透過基於角色的存取控制和網路存取限制來限制對 Azure Key Vault 的存取。 欲了解更多如何在應用程式中安全使用 API 金鑰的資訊,請參見 API 金鑰搭配 Azure Key Vault。
如需了解更多有關 AI 服務安全性的資訊,請參閱 驗證對 Azure AI 服務的請求。
setx VISION_TRAINING_KEY <your-training-key>
setx VISION_TRAINING_ENDPOINT <your-training-endpoint>
setx VISION_PREDICTION_KEY <your-prediction-key>
setx VISION_PREDICTION_ENDPOINT <your-prediction-endpoint>
setx VISION_PREDICTION_RESOURCE_ID <your-resource-id>
加入環境變數後,可能需要重新啟動讀取環境變數的執行程式,包括主控台視窗。
設定
建立新的 Node.js 應用程式
在主控台視窗(例如 cmd、PowerShell 或 Bash)中,建立一個新的應用程式目錄,然後導覽到裡面。
mkdir myapp && cd myapp
執行 npm init 指令建立一個帶有 package.json 檔案的節點應用程式。
npm init
安裝用戶端函式庫
要撰寫帶有 Custom Vision for Node.js的影像分析應用程式,你需要 Custom Vision 的 npm 套件。 要安裝它們,請在 PowerShell 中執行以下指令:
npm install @azure/cognitiveservices-customvision-training
npm install @azure/cognitiveservices-customvision-prediction
你的應用程式 package.json 檔案會更新依賴關係。
建立一個名為 index.js S 的檔案並匯入以下函式庫:
const util = require('util');
const fs = require('fs');
const TrainingApi = require("@azure/cognitiveservices-customvision-training");
const PredictionApi = require("@azure/cognitiveservices-customvision-prediction");
const msRest = require("@azure/ms-rest-js");
提示
想一次查看整個快速啟動程式碼檔案嗎? 你可以在 GitHub 找到它,裡面包含了這個快速入門的程式碼範例。
為你的資源的 Azure 端點和鍵建立變數。
// retrieve environment variables
const trainingKey = process.env["VISION_TRAINING_KEY"];
const trainingEndpoint = process.env["VISION_TRAINING_ENDPOINT"];

const predictionKey = process.env["VISION_PREDICTION_KEY"];
const predictionResourceId = process.env["VISION_PREDICTION_RESOURCE_ID"];
const predictionEndpoint = process.env["VISION_PREDICTION_ENDPOINT"];
另外,請新增專案名稱欄位和非同步呼叫的逾時參數。
const publishIterationName = "detectModel";
const setTimeoutPromise = util.promisify(setTimeout);
物件模型
| 名稱 | 描述 |
|---|---|
| TrainingAPIClient | 這堂課負責你的模型的創建、訓練與發佈。 |
| PredictionAPIClient | 這門課負責查詢你的模型以進行物件偵測預測。 |
| 預測 | 此介面定義單一影像上的單一預測。 它包含物件 ID 與名稱的屬性,以及信心分數。 |
程式碼範例
這些程式碼片段展示了如何使用 JavaScript 的 Custom Vision 用戶端函式庫完成以下任務:
驗證客戶端
用你的端點和金鑰實例化客戶端物件。 用你的金鑰建立一個 ApiKeyCredentials 物件,並搭配端點建立 TrainingAPIClient 和 PredictionAPIClient 物件。
const credentials = new msRest.ApiKeyCredentials({ inHeader: { "Training-key": trainingKey } });
const trainer = new TrainingApi.TrainingAPIClient(credentials, trainingEndpoint);
const predictor_credentials = new msRest.ApiKeyCredentials({ inHeader: { "Prediction-key": predictionKey } });
const predictor = new PredictionApi.PredictionAPIClient(predictor_credentials, predictionEndpoint);
新增輔助功能
新增以下函式以協助進行多個非同步呼叫。 你之後會用到這個。
const credentials = new msRest.ApiKeyCredentials({ inHeader: { "Training-key": trainingKey } });
const trainer = new TrainingApi.TrainingAPIClient(credentials, trainingEndpoint);
const predictor_credentials = new msRest.ApiKeyCredentials({ inHeader: { "Prediction-key": predictionKey } });
const predictor = new PredictionApi.PredictionAPIClient(predictor_credentials, predictionEndpoint);
建立新的客製化願景專案
建立一個新函式來包含您所有的自訂視覺函式呼叫。 新增以下程式碼即可建立新的自訂視覺服務專案。
(async () => {
    console.log("Creating project...");
    const domains = await trainer.getDomains()
    const objDetectDomain = domains.find(domain => domain.type === "ObjectDetection");
    const sampleProject = await trainer.createProject("Sample Obj Detection Project", { domainId: objDetectDomain.id });
為專案新增標籤
要為你的專案建立分類標籤,請在函式中加入以下程式碼:
const forkTag = await trainer.createTag(sampleProject.id, "Fork");
const scissorsTag = await trainer.createTag(sampleProject.id, "Scissors");
上傳與標籤圖片
首先,下載本專案的範例圖片。 將 sample Images 資料夾 的內容儲存到本地裝置。
要將範例圖片加入專案,請在標籤建立後插入以下程式碼。 此程式碼會上傳每張圖片及其對應標籤。 在物件偵測專案中標記影像時,你需要用正規化座標指定每個標記物件的區域。 在這個教學課程中,區域是使用硬式編碼內嵌在程式碼中。 區域以正規化座標指定邊界框,座標順序為:左、上、寬、高。 一次最多可以上傳 64 張圖片。
const sampleDataRoot = "Images";

const forkImageRegions = {
    "fork_1.jpg": [0.145833328, 0.3509314, 0.5894608, 0.238562092],
    "fork_2.jpg": [0.294117659, 0.216944471, 0.534313738, 0.5980392],
    "fork_3.jpg": [0.09191177, 0.0682516545, 0.757352948, 0.6143791],
    "fork_4.jpg": [0.254901975, 0.185898721, 0.5232843, 0.594771266],
    "fork_5.jpg": [0.2365196, 0.128709182, 0.5845588, 0.71405226],
    "fork_6.jpg": [0.115196079, 0.133611143, 0.676470637, 0.6993464],
    "fork_7.jpg": [0.164215669, 0.31008172, 0.767156839, 0.410130739],
    "fork_8.jpg": [0.118872553, 0.318251669, 0.817401946, 0.225490168],
    "fork_9.jpg": [0.18259804, 0.2136765, 0.6335784, 0.643790841],
    "fork_10.jpg": [0.05269608, 0.282303959, 0.8088235, 0.452614367],
    "fork_11.jpg": [0.05759804, 0.0894935, 0.9007353, 0.3251634],
    "fork_12.jpg": [0.3345588, 0.07315363, 0.375, 0.9150327],
    "fork_13.jpg": [0.269607842, 0.194068655, 0.4093137, 0.6732026],
    "fork_14.jpg": [0.143382356, 0.218578458, 0.7977941, 0.295751631],
    "fork_15.jpg": [0.19240196, 0.0633497, 0.5710784, 0.8398692],
    "fork_16.jpg": [0.140931368, 0.480016381, 0.6838235, 0.240196079],
    "fork_17.jpg": [0.305147052, 0.2512582, 0.4791667, 0.5408496],
    "fork_18.jpg": [0.234068632, 0.445702642, 0.6127451, 0.344771236],
    "fork_19.jpg": [0.219362751, 0.141781077, 0.5919118, 0.6683006],
    "fork_20.jpg": [0.180147052, 0.239820287, 0.6887255, 0.235294119]
};

const scissorsImageRegions = {
    "scissors_1.jpg": [0.4007353, 0.194068655, 0.259803921, 0.6617647],
    "scissors_2.jpg": [0.426470578, 0.185898721, 0.172794119, 0.5539216],
    "scissors_3.jpg": [0.289215684, 0.259428144, 0.403186262, 0.421568632],
    "scissors_4.jpg": [0.343137264, 0.105833367, 0.332107842, 0.8055556],
    "scissors_5.jpg": [0.3125, 0.09766343, 0.435049027, 0.71405226],
    "scissors_6.jpg": [0.379901975, 0.24308826, 0.32107842, 0.5718954],
    "scissors_7.jpg": [0.341911763, 0.20714055, 0.3137255, 0.6356209],
    "scissors_8.jpg": [0.231617644, 0.08459154, 0.504901946, 0.8480392],
    "scissors_9.jpg": [0.170343131, 0.332957536, 0.767156839, 0.403594762],
    "scissors_10.jpg": [0.204656869, 0.120539248, 0.5245098, 0.743464053],
    "scissors_11.jpg": [0.05514706, 0.159754932, 0.799019635, 0.730392158],
    "scissors_12.jpg": [0.265931368, 0.169558853, 0.5061275, 0.606209159],
    "scissors_13.jpg": [0.241421565, 0.184264734, 0.448529422, 0.6830065],
    "scissors_14.jpg": [0.05759804, 0.05027781, 0.75, 0.882352948],
    "scissors_15.jpg": [0.191176474, 0.169558853, 0.6936275, 0.6748366],
    "scissors_16.jpg": [0.1004902, 0.279036, 0.6911765, 0.477124184],
    "scissors_17.jpg": [0.2720588, 0.131977156, 0.4987745, 0.6911765],
    "scissors_18.jpg": [0.180147052, 0.112369314, 0.6262255, 0.6666667],
    "scissors_19.jpg": [0.333333343, 0.0274019931, 0.443627447, 0.852941155],
    "scissors_20.jpg": [0.158088237, 0.04047389, 0.6691176, 0.843137264]
};

console.log("Adding images...");
let fileUploadPromises = [];

const forkDir = `${sampleDataRoot}/fork`;
const forkFiles = fs.readdirSync(forkDir);

await asyncForEach(forkFiles, async (file) => {
    const region = { tagId: forkTag.id, left: forkImageRegions[file][0], top: forkImageRegions[file][1], width: forkImageRegions[file][2], height: forkImageRegions[file][3] };
    const entry = { name: file, contents: fs.readFileSync(`${forkDir}/${file}`), regions: [region] };
    const batch = { images: [entry] };
    // Wait one second to accommodate rate limit.
    await setTimeoutPromise(1000, null);
    fileUploadPromises.push(trainer.createImagesFromFiles(sampleProject.id, batch));
});

const scissorsDir = `${sampleDataRoot}/scissors`;
const scissorsFiles = fs.readdirSync(scissorsDir);

await asyncForEach(scissorsFiles, async (file) => {
    const region = { tagId: scissorsTag.id, left: scissorsImageRegions[file][0], top: scissorsImageRegions[file][1], width: scissorsImageRegions[file][2], height: scissorsImageRegions[file][3] };
    const entry = { name: file, contents: fs.readFileSync(`${scissorsDir}/${file}`), regions: [region] };
    const batch = { images: [entry] };
    // Wait one second to accommodate rate limit.
    await setTimeoutPromise(1000, null);
    fileUploadPromises.push(trainer.createImagesFromFiles(sampleProject.id, batch));
});

await Promise.all(fileUploadPromises);
重要
你需要根據你下載 Foundry Tools Python SDK Samples 倉庫的位置,更改圖片的路徑(sampleDataRoot)。
註
如果你沒有點擊拖曳工具來標記區域座標,也可以在 Customvision.ai 使用網頁介面。 在本例中,已提供座標。
對專案進行訓練
此程式碼建立預測模型的第一個迭代。
console.log("Training...");
let trainingIteration = await trainer.trainProject(sampleProject.id);

// Wait for training to complete
console.log("Training started...");
while (trainingIteration.status == "Training") {
    console.log("Training status: " + trainingIteration.status);
    // wait for ten seconds
    await setTimeoutPromise(10000, null);
    trainingIteration = await trainer.getIteration(sampleProject.id, trainingIteration.id)
}
console.log("Training status: " + trainingIteration.status);
發佈目前版本
此程式碼將訓練過的迭代發佈給預測端點。 已發表迭代的名稱可用於發送預測請求。 一個迭代在發佈之前不會在預測端點中可用。
// Publish the iteration to the end point
await trainer.publishIteration(sampleProject.id, trainingIteration.id, publishIterationName, predictionResourceId);
測試預測端點
若要將影像傳送到預測端點並取得預測結果,請在函式中加入以下程式碼。
const testFile = fs.readFileSync(`${sampleDataRoot}/test/test_image.jpg`);
const results = await predictor.detectImage(sampleProject.id, publishIterationName, testFile)

// Show results
console.log("Results:");
results.predictions.forEach(predictedResult => {
    console.log(`\t ${predictedResult.tagName}: ${(predictedResult.probability * 100.0).toFixed(2)}% ${predictedResult.boundingBox.left},${predictedResult.boundingBox.top},${predictedResult.boundingBox.width},${predictedResult.boundingBox.height}`);
});
然後關閉你的自訂視覺功能並呼叫它。
})()
執行應用程式
用快速啟動檔上的指令執行應用程式 node 。
node index.js
應用程式的輸出應該會出現在主控台上。 接著你可以驗證測試影像(在 sampleDataRoot</Test/ 中>)是否被正確標記,且偵測區域正確。 你也可以回到 Custom Vision 網站 ,查看你新建立專案的現況。
清理資源
如果你想實作自己的物件偵測專案(或嘗試影像分類專案),可以考慮刪除這個範例中的叉子/剪刀偵測專案。 免費訂閱最多可進行兩個自訂視覺專案。
在 Custom Vision 網站,前往 Projects,選擇「我的新Project」下的垃圾桶。
下一步
現在你已經用程式碼完成了物體偵測的每一步。 這個範例執行一次訓練迭代,但通常你需要多次訓練和測試模型,才能讓它更準確。 以下指南探討影像分類,但其原理與物體偵測相似。
- 什麼是客製化視覺?
- 此範例的原始碼可在
GitHub - SDK 參考文件(training)
- SDK 參考文件(預測)
開始使用 Python 的 Custom Vision 客戶端函式庫。 請依照以下步驟安裝套件,並嘗試建立物件偵測模型的範例程式碼。 你建立專案、新增標籤、訓練專案,並使用專案的預測端點網址來程式化測試。 請以此範例作為打造自己影像辨識應用程式的範本。
註
如果你想建立並訓練物件偵測模型 而不 寫程式碼,請參考 瀏覽器的指引 。
參考文件 | 函式庫原始碼 | 套件(PyPI) | Samples
先決條件
- Azure訂閱 - 免費建立一個
-
Python 3.x
- 你的Python安裝應該包含pip。 你可以透過命令列執行
pip --version來確認你有沒有安裝 PIP。 安裝最新版本的 Python 來取得 PIP。
- 你的Python安裝應該包含pip。 你可以透過命令列執行
- 一旦你擁有Azure訂閱,在Azure入口網站建立自訂視覺資源,以建立訓練與預測資源。
- 你可以先用免費價格等級
F0()試用服務,之後再升級到付費等級以進行生產。
- 你可以先用免費價格等級
建立環境變數
在這個例子中,你會把憑證寫入執行該應用程式的本地機器上的環境變數。
前往 Azure 入口網站。 如果您在前置條件區塊中建立的自訂願景資源成功部署,請選擇下一步步驟中的「前往資源」按鈕。 你可以在資源的 「金鑰與端點 」頁面,在 資源管理下找到你的金鑰和端點。 你需要取得訓練資源和預測資源的金鑰,以及 API 端點。
你可以在Azure入口網站預測資源的Properties分頁中找到預測資源 ID,標示為 Resource ID。
提示
您也可以使用 https://www.customvision.ai 來獲取這些數值。 登入後,選擇右上角 的設定 圖示。 在 設定 頁面,你可以查看所有金鑰、資源 ID 和端點。
要設定環境變數,請開啟主控台視窗,並依照作業系統和開發環境的指示操作。
- 若要設定
VISION_TRAINING KEY環境變數,請將<your-training-key>替換為訓練資源的其中一個鍵。 - 要設定
VISION_TRAINING_ENDPOINT環境變數,請將<your-training-endpoint>替換為訓練資源的端點。 - 要設定
VISION_PREDICTION_KEY環境變數,請將預測資源的其中一個鍵值替換<your-prediction-key>。 - 要設定
VISION_PREDICTION_ENDPOINT環境變數,請將<your-prediction-endpoint>替換為你的預測資源端點。 - 要設定
VISION_PREDICTION_RESOURCE_ID環境變數,請將<your-resource-id>替換為你的預測資源的資源 ID。
重要
我們建議使用 Microsoft Entra ID 搭配 Azure 資源的 受控身份 驗證,以避免將憑證儲存在雲端執行的應用程式中。
使用 API 金鑰時要小心。 不要直接把 API 金鑰放進程式碼裡,也絕對不要公開發佈。 如果使用 API 金鑰,請將它們安全存放在 Azure Key Vault,定期更換金鑰,並透過基於角色的存取控制和網路存取限制來限制對 Azure Key Vault 的存取。 欲了解更多如何在應用程式中安全使用 API 金鑰的資訊,請參見 API 金鑰搭配 Azure Key Vault。
如需了解更多有關 AI 服務安全性的資訊,請參閱 驗證對 Azure AI 服務的請求。
setx VISION_TRAINING_KEY <your-training-key>
setx VISION_TRAINING_ENDPOINT <your-training-endpoint>
setx VISION_PREDICTION_KEY <your-prediction-key>
setx VISION_PREDICTION_ENDPOINT <your-prediction-endpoint>
setx VISION_PREDICTION_RESOURCE_ID <your-resource-id>
加入環境變數後,可能需要重新啟動讀取環境變數的執行程式,包括主控台視窗。
設定
安裝用戶端函式庫
要用 Custom Vision for Python 撰寫影像分析應用程式,你需要 Custom Vision 客戶端函式庫。 安裝 Python 後,請在 PowerShell 或主控台視窗執行以下指令:
pip install azure-cognitiveservices-vision-customvision
建立一個新的 Python 應用程式
建立一個新的 Python 檔案並匯入以下函式庫。
from azure.cognitiveservices.vision.customvision.training import CustomVisionTrainingClient
from azure.cognitiveservices.vision.customvision.prediction import CustomVisionPredictionClient
from azure.cognitiveservices.vision.customvision.training.models import ImageFileCreateBatch, ImageFileCreateEntry, Region
from msrest.authentication import ApiKeyCredentials
import os, time, uuid
提示
想一次查看整個快速啟動程式碼檔案嗎? 你可以在 GitHub 找到它,裡面包含了這個快速入門的程式碼範例。
為你的資源的 Azure 端點和鍵建立變數。
# Replace with vprediction_endpointalid values
ENDPOINT = os.environ["VISION_TRAINING_ENDPOINT"]
prediction_endpoint = os.environ["VISION_PREDICTION_ENDPOINT"]
training_key = os.environ["VISION_TRAINING_KEY"]
prediction_key = os.environ["VISION_PREDICTION_KEY"]
prediction_resource_id = os.environ["VISION_PREDICTION_RESOURCE_ID"]
物件模型
| 名稱 | 描述 |
|---|---|
| CustomVisionTrainingClient | 這堂課負責你的模型的創建、訓練與發佈。 |
| CustomVisionPredictionClient | 這門課負責查詢你的模型以進行物件偵測預測。 |
| 影像預測 | 此類別定義單一影像上的單一物件預測。 它包含物件 ID 與名稱、物件的邊界框位置,以及信心分數的屬性。 |
程式碼範例
這些程式碼片段展示了如何使用 Python 的 Custom Vision 用戶端函式庫來完成以下操作:
驗證客戶端
使用您的端點和金鑰將訓練具現化並預測用戶端。 用你的金鑰建立 ApiKeyServiceClientCredentials 物件,並搭配端點建立 CustomVisionTrainingClient 和 CustomVisionPredictionClient 物件。
credentials = ApiKeyCredentials(in_headers={"Training-key": training_key})
trainer = CustomVisionTrainingClient(ENDPOINT, credentials)
prediction_credentials = ApiKeyCredentials(in_headers={"Prediction-key": prediction_key})
predictor = CustomVisionPredictionClient(prediction_endpoint, prediction_credentials)
建立新的客製化願景專案
將以下程式碼加入您的腳本,建立新的自訂視覺服務專案。
請參考 create_project 方法,在建立專案時指定其他選項(詳見 《建置探測器 網頁入口指南》)。
publish_iteration_name = "detectModel"

# Find the object detection domain
obj_detection_domain = next(domain for domain in trainer.get_domains() if domain.type == "ObjectDetection" and domain.name == "General")

# Create a new project
print ("Creating project...")
# Use uuid to avoid project name collisions.
project = trainer.create_project(str(uuid.uuid4()), domain_id=obj_detection_domain.id)
為專案新增標籤
要在專案中建立物件標籤,請加入以下程式碼:
# Make two tags in the new project
fork_tag = trainer.create_tag(project.id, "fork")
scissors_tag = trainer.create_tag(project.id, "scissors")
上傳與標籤圖片
首先,下載本專案的範例圖片。 將 sample Images 資料夾 的內容儲存到本地裝置。
在物件偵測專案中標記影像時,你需要用正規化座標指定每個標記物件的區域。 以下程式碼將每個範例影像與其標記區域關聯起來。 區域以正規化座標指定邊界框,座標順序為:左、上、寬、高。
fork_image_regions = {
    "fork_1": [ 0.145833328, 0.3509314, 0.5894608, 0.238562092 ],
    "fork_2": [ 0.294117659, 0.216944471, 0.534313738, 0.5980392 ],
    "fork_3": [ 0.09191177, 0.0682516545, 0.757352948, 0.6143791 ],
    "fork_4": [ 0.254901975, 0.185898721, 0.5232843, 0.594771266 ],
    "fork_5": [ 0.2365196, 0.128709182, 0.5845588, 0.71405226 ],
    "fork_6": [ 0.115196079, 0.133611143, 0.676470637, 0.6993464 ],
    "fork_7": [ 0.164215669, 0.31008172, 0.767156839, 0.410130739 ],
    "fork_8": [ 0.118872553, 0.318251669, 0.817401946, 0.225490168 ],
    "fork_9": [ 0.18259804, 0.2136765, 0.6335784, 0.643790841 ],
    "fork_10": [ 0.05269608, 0.282303959, 0.8088235, 0.452614367 ],
    "fork_11": [ 0.05759804, 0.0894935, 0.9007353, 0.3251634 ],
    "fork_12": [ 0.3345588, 0.07315363, 0.375, 0.9150327 ],
    "fork_13": [ 0.269607842, 0.194068655, 0.4093137, 0.6732026 ],
    "fork_14": [ 0.143382356, 0.218578458, 0.7977941, 0.295751631 ],
    "fork_15": [ 0.19240196, 0.0633497, 0.5710784, 0.8398692 ],
    "fork_16": [ 0.140931368, 0.480016381, 0.6838235, 0.240196079 ],
    "fork_17": [ 0.305147052, 0.2512582, 0.4791667, 0.5408496 ],
    "fork_18": [ 0.234068632, 0.445702642, 0.6127451, 0.344771236 ],
    "fork_19": [ 0.219362751, 0.141781077, 0.5919118, 0.6683006 ],
    "fork_20": [ 0.180147052, 0.239820287, 0.6887255, 0.235294119 ]
}

scissors_image_regions = {
    "scissors_1": [ 0.4007353, 0.194068655, 0.259803921, 0.6617647 ],
    "scissors_2": [ 0.426470578, 0.185898721, 0.172794119, 0.5539216 ],
    "scissors_3": [ 0.289215684, 0.259428144, 0.403186262, 0.421568632 ],
    "scissors_4": [ 0.343137264, 0.105833367, 0.332107842, 0.8055556 ],
    "scissors_5": [ 0.3125, 0.09766343, 0.435049027, 0.71405226 ],
    "scissors_6": [ 0.379901975, 0.24308826, 0.32107842, 0.5718954 ],
    "scissors_7": [ 0.341911763, 0.20714055, 0.3137255, 0.6356209 ],
    "scissors_8": [ 0.231617644, 0.08459154, 0.504901946, 0.8480392 ],
    "scissors_9": [ 0.170343131, 0.332957536, 0.767156839, 0.403594762 ],
    "scissors_10": [ 0.204656869, 0.120539248, 0.5245098, 0.743464053 ],
    "scissors_11": [ 0.05514706, 0.159754932, 0.799019635, 0.730392158 ],
    "scissors_12": [ 0.265931368, 0.169558853, 0.5061275, 0.606209159 ],
    "scissors_13": [ 0.241421565, 0.184264734, 0.448529422, 0.6830065 ],
    "scissors_14": [ 0.05759804, 0.05027781, 0.75, 0.882352948 ],
    "scissors_15": [ 0.191176474, 0.169558853, 0.6936275, 0.6748366 ],
    "scissors_16": [ 0.1004902, 0.279036, 0.6911765, 0.477124184 ],
    "scissors_17": [ 0.2720588, 0.131977156, 0.4987745, 0.6911765 ],
    "scissors_18": [ 0.180147052, 0.112369314, 0.6262255, 0.6666667 ],
    "scissors_19": [ 0.333333343, 0.0274019931, 0.443627447, 0.852941155 ],
    "scissors_20": [ 0.158088237, 0.04047389, 0.6691176, 0.843137264 ]
}
註
如果你沒有點擊拖曳工具來標記區域座標,也可以在 Customvision.ai 使用網頁介面。 在本例中,已提供座標。
接著,利用這張關聯圖上傳每張帶有區域座標的樣本圖片(一次最多可上傳64張圖片)。 請加上以下程式碼。
base_image_location = os.path.join (os.path.dirname(__file__), "Images")

# Go through the data table above and create the images
print ("Adding images...")
tagged_images_with_regions = []

for file_name in fork_image_regions.keys():
    x,y,w,h = fork_image_regions[file_name]
    regions = [ Region(tag_id=fork_tag.id, left=x,top=y,width=w,height=h) ]

    with open(os.path.join (base_image_location, "fork", file_name + ".jpg"), mode="rb") as image_contents:
        tagged_images_with_regions.append(ImageFileCreateEntry(name=file_name, contents=image_contents.read(), regions=regions))

for file_name in scissors_image_regions.keys():
    x,y,w,h = scissors_image_regions[file_name]
    regions = [ Region(tag_id=scissors_tag.id, left=x,top=y,width=w,height=h) ]

    with open(os.path.join (base_image_location, "scissors", file_name + ".jpg"), mode="rb") as image_contents:
        tagged_images_with_regions.append(ImageFileCreateEntry(name=file_name, contents=image_contents.read(), regions=regions))

upload_result = trainer.create_images_from_files(project.id, ImageFileCreateBatch(images=tagged_images_with_regions))
if not upload_result.is_batch_successful:
    print("Image batch upload failed.")
    for image in upload_result.images:
        print("Image status: ", image.status)
    exit(-1)
註
你需要根據你之前下載的 Foundry Tools Python SDK 範例倉庫的所在路徑來更改圖片路徑。
對專案進行訓練
此程式碼建立預測模型的第一個迭代。
print ("Training...")
iteration = trainer.train_project(project.id)
while (iteration.status != "Completed"):
    iteration = trainer.get_iteration(project.id, iteration.id)
    print ("Training status: " + iteration.status)
    time.sleep(1)
提示
使用選定的標籤訓練
您可以選擇只在已套用的標記子集上進行訓練。 如果您尚未套用足夠的特定標記,但已套用足夠的其他標記,則您可能需要執行此動作。 在 train_project 呼叫中,將可選參數 selected_tags 設為你想使用的標籤 ID 字串清單。 模型列車只會辨識該清單上的標籤。
發佈目前版本
一個迭代在發佈之前不會在預測端點中可用。 以下程式碼使模型的當前迭代可供查詢。
# The iteration is now trained. Publish it to the project endpoint
trainer.publish_iteration(project.id, iteration.id, publish_iteration_name, prediction_resource_id)
print ("Done!")
測試預測端點
若要將影像傳送到預測端點並取得預測結果,請在檔案末尾加上以下程式碼:
# Now there is a trained endpoint that can be used to make a prediction

# Open the sample image and get back the prediction results.
with open(os.path.join (base_image_location, "test", "test_image.jpg"), mode="rb") as test_data:
    results = predictor.detect_image(project.id, publish_iteration_name, test_data)

# Display the results.
for prediction in results.predictions:
    print("\t" + prediction.tag_name + ": {0:.2f}% bbox.left = {1:.2f}, bbox.top = {2:.2f}, bbox.width = {3:.2f}, bbox.height = {4:.2f}".format(prediction.probability * 100, prediction.bounding_box.left, prediction.bounding_box.top, prediction.bounding_box.width, prediction.bounding_box.height))
執行應用程式
執行CustomVisionQuickstart.py。
python CustomVisionQuickstart.py
應用程式的輸出應該會出現在主控台上。 接著你可以確認測試影像(base_image_location<>/images/Test)是否正確標記,且偵測區域正確。 你也可以回到 Custom Vision 網站 ,查看你新建立專案的現況。
清理資源
如果你想實作自己的物件偵測專案(或嘗試影像分類專案),可以考慮刪除這個範例中的叉子/剪刀偵測專案。 免費訂閱最多可進行兩個自訂視覺專案。
在 Custom Vision 網站,前往 Projects,選擇「我的新Project」下的垃圾桶。
下一步
現在你已經用程式碼完成了物體偵測的每一步。 這個範例執行一次訓練迭代,但通常你需要多次訓練和測試模型,才能讓它更準確。 以下指南探討影像分類,但其原理與物體偵測相似。