這個逐步教學展示了如何在「主細節」表單中將 POCO 類型綁定到 Windows Forms(WinForms)控制項。 該應用程式使用 Entity Framework 來填充資料庫中的物件、追蹤變更,並將資料持久化到資料庫中。
該模型定義了參與一對多關係的兩種類型:類別(主要/主控)和產品(依賴/詳細)。 接著,Visual Studio 工具將模型中定義的型別綁定到 WinForms 控制項。 WinForms 資料綁定框架允許在相關物件間的導航:在主檢視中選取列,詳細檢視會更新相應的子資料。
本攻略中的截圖與程式碼列表取自 Visual Studio 2013,但你也可以使用 Visual Studio 2012 或 Visual Studio 2010 完成此攻略。
先決條件
你需要安裝 Visual Studio 2013、Visual Studio 2012 或 Visual Studio 2010 才能完成這個攻略。
如果你用的是 Visual Studio 2010,也必須安裝 NuGet。 欲了解更多資訊,請參閱 安裝 NuGet。
建立應用程式
- 開啟 Visual Studio
- 檔案 -> 新檔 -> 專案....
- 在左側窗格選擇 Windows,在右側窗格選擇 Windows FormsApplication
- 請輸入 WinFormswithEFSample 作為名稱
- 選擇 確定
安裝 Entity Framework NuGet 套件
- 在解決方案總管中,右鍵點擊 WinFormswithEFSample 專案
- 選擇 管理 NuGet 套件......
- 在「管理 NuGet 套件」對話框中,選擇 「線上 」標籤並選擇 EntityFramework 套件
- 按一下 [安裝]
備註
除了 EntityFramework 組合外,還新增了對 System.ComponentModel.DataAnnotations 的參考。 如果專案中有 System.Data.Entity 的參考,安裝 EntityFramework 套件時該參考將會被移除。 System.Data.Entity 組合語言已不再用於 Entity Framework 6 應用程式。
實現 IListSource 介面以應用於集合
集合屬性必須實作 IListSource 介面,以啟用 Windows 表單時的雙向資料綁定與排序。 為此,我們將擴充 ObservableCollection 以加入 IListSource 功能。
- 在專案中新增一個 ObservableListSource 類別:
- 右鍵點擊專案名稱
- 選擇 新增 -> 新項目
- 選擇 類別 並輸入 ObservableListSource 以取得類別名稱
- 將預設產生的程式碼替換為以下程式碼:
此類別支援雙向資料綁定及排序功能。 該類別源自 ObservableCollection<T> ,並新增了 IListSource 的明確實作。 IListSource 的 GetList() 方法實作用來回傳一個與 ObservableCollection 同步的 IBindingList 實作。 由 ToBindingList 產生的 IBindingList 實作支援排序功能。 ToBindingList 擴充方法定義於 EntityFramework 組合語言中。
    using System.Collections;
    using System.Collections.Generic;
    using System.Collections.ObjectModel;
    using System.ComponentModel;
    using System.Diagnostics.CodeAnalysis;
    using System.Data.Entity;

    namespace WinFormswithEFSample
    {
        public class ObservableListSource<T> : ObservableCollection<T>, IListSource
            where T : class
        {
            private IBindingList _bindingList;

            bool IListSource.ContainsListCollection { get { return false; } }

            IList IListSource.GetList()
            {
                return _bindingList ?? (_bindingList = this.ToBindingList());
            }
        }
    }
定義模型
在這個導覽中,你可以選擇使用 Code First 或 EF Designer 實作模型。 完成以下兩個部分之一。
選項一:先用程式碼定義模型
本節將展示如何使用 Code First 建立模型及其相關資料庫。 如果你更願意使用 Database First 方法,利用 EF 設計器從資料庫逆向工程你的模型,可以跳到下一節(選項 2:使用 Database First 定義模型)
使用 Code First 開發時,通常會先撰寫 .NET Framework 類別來定義你的概念(領域)模型。
- 新增一個產品類別到專案
- 將預設產生的程式碼替換為以下程式碼:
    using System;
    using System.Collections.Generic;
    using System.Linq;
    using System.Text;
    using System.Threading.Tasks;

    namespace WinFormswithEFSample
    {
        public class Product
        {
            public int ProductId { get; set; }
            public string Name { get; set; }

            public int CategoryId { get; set; }
            public virtual Category Category { get; set; }
        }
    }
- 在專案中新增一個 Category 類別。
- 將預設產生的程式碼替換為以下程式碼:
    using System;
    using System.Collections.Generic;
    using System.Linq;
    using System.Text;
    using System.Threading.Tasks;

    namespace WinFormswithEFSample
    {
        public class Category
        {
            private readonly ObservableListSource<Product> _products =
                    new ObservableListSource<Product>();

            public int CategoryId { get; set; }
            public string Name { get; set; }
            public virtual ObservableListSource<Product> Products { get { return _products; } }
        }
    }
除了定義實體外,你還需要定義一個從 DbContext 衍生並公開 DbSet<TEntity> 屬性的類別。 DbSet 屬性讓上下文知道你想包含哪些類型。 DbContext 與 DbSet 類型皆在 EntityFramework 組合中定義。
DbContext 衍生型別的實例會在運行時間管理實體物件,其中包括將來自資料庫的數據填入對象、變更追蹤,以及將數據保存至資料庫。
- 新增一個 ProductContext 類別到專案中。
- 將預設產生的程式碼替換為以下程式碼:
    using System;
    using System.Collections.Generic;
    using System.Data.Entity;
    using System.Linq;
    using System.Text;

    namespace WinFormswithEFSample
    {
        public class ProductContext : DbContext
        {
            public DbSet<Category> Categories { get; set; }
            public DbSet<Product> Products { get; set; }
        }
    }
編譯專案。
選項二:使用 Database First 定義模型
本節展示如何使用 Database First 透過 EF 設計器來從資料庫中逆向工程你的模型。 如果你已經完成了前一節(選項一:使用 Code First 定義模型),那就跳過這一段,直接進入 Lazy Loading 章節。
建立現有資料庫
通常當你針對現有資料庫時,資料庫會已經建立好,但這次攻略我們需要建立一個資料庫來存取。
安裝於 Visual Studio 的資料庫伺服器會依你安裝的 Visual Studio 版本而有所不同:
- 如果你用的是 Visual Studio 2010,你會建立一個 SQL Express 資料庫。
- 如果你用的是 Visual Studio 2012,那你就是要建立 一個 LocalDB 資料庫。
我們開始產生資料庫。
檢視 -> 伺服器檔案總管
右鍵點擊 資料連線 -> 新增連線...
如果你之前沒從 Server Explorer 連接過資料庫,你需要選擇 Microsoft SQL Server 作為資料來源

依你安裝的 LocalDB 或 SQL Express 連接,並輸入 Products 作為資料庫名稱


選擇 確定 ,系統會詢問你是否要建立新的資料庫,請選擇 「是」

新資料庫現在會出現在伺服器檔案總管中,右鍵點擊並選擇 新查詢
將以下 SQL 複製到新查詢中,然後右鍵點擊查詢並選擇 執行
    CREATE TABLE [dbo].[Categories] (
        [CategoryId] [int] NOT NULL IDENTITY,
        [Name] [nvarchar](max),
        CONSTRAINT [PK_dbo.Categories] PRIMARY KEY ([CategoryId])
    )

    CREATE TABLE [dbo].[Products] (
        [ProductId] [int] NOT NULL IDENTITY,
        [Name] [nvarchar](max),
        [CategoryId] [int] NOT NULL,
        CONSTRAINT [PK_dbo.Products] PRIMARY KEY ([ProductId])
    )

    CREATE INDEX [IX_CategoryId] ON [dbo].[Products]([CategoryId])

    ALTER TABLE [dbo].[Products] ADD CONSTRAINT [FK_dbo.Products_dbo.Categories_CategoryId] FOREIGN KEY ([CategoryId]) REFERENCES [dbo].[Categories] ([CategoryId]) ON DELETE CASCADE
逆向工程模型
我們將使用 Visual Studio 內建的 Entity Framework Designer,來建立我們的模型。
專案 -> 新增項目...
從左側選單選擇 資料 ,然後 ADO.NET 實體資料模型
輸入 ProductModel 作為名稱並點 選確定
這會啟動 實體資料模型精靈
選擇「從資料庫產生」並點擊「下一步」

選擇你在第一節建立的資料庫連結,輸入 ProductContext 作為連接字串的名稱,然後點擊 「下一步」

點選「表格」旁的勾選框以匯入所有表格,然後點擊「完成」

逆向工程完成後,新模型會加入你的專案,並開放在實體框架設計器中查看。 你的專案中也新增了一個 App.config 檔案,裡面有資料庫的連線細節。
Visual Studio 2010 的額外步驟
如果你是在 Visual Studio 2010 工作,那你需要更新 EF 設計器以使用 EF6 程式碼產生。
- 在 EF Designer 中右鍵點選模型的空白位置,選擇 「新增程式碼產生項目...
- 從左側選單選擇 「線上範本」 並搜尋 DbContext
- 選擇 EF 6.x 的 C# 資料庫上下文產生器, 輸入 ProductsModel 作為名稱,然後點擊新增
更新資料綁定的程式碼產生
EF 會用 T4 範本從你的模型產生程式碼。 隨 Visual Studio 附帶或從 Visual Studio 圖庫下載的範本,皆供一般用途使用。 這表示從這些範本產生的實體具有簡單的 ICollection<T> 屬性。 然而,在進行資料綁定時,最好能有實作 IListSource 的集合屬性。 這就是為什麼我們建立了上述 ObservableListSource 類別,現在我們會修改範本以利用這個類別。
打開 解決方案總管 ,找到 ProductModel.edmx 檔案
找到會被置入 ProductModel.edmx 檔案下方的 ProductModel.tt 檔案

雙擊 ProductModel.tt 檔案即可在 Visual Studio 編輯器中開啟
找出並用「ObservableListSource」替換兩次出現的「ICollection」。 這些列車大約位於296號線和484號線。
找到並替換第一個出現的「HashSet」為「ObservableListSource」。 此現象位於約第50行。 不要 替換程式碼後面第二次出現的 HashSet。
儲存 ProductModel.tt 檔案。 這應該會讓實體的程式碼被重新生成。 如果程式碼沒有自動重新生成,請右鍵點擊 ProductModel.tt 並選擇「執行自訂工具」。
如果你現在打開Category.cs檔案(它位於 ProductModel.tt 下巢狀),你會看到 Products 集合的類型是 ObservableListSource<Product>。
編譯專案。
延遲載入
Product 類別上的 Products 屬性和 Product 類別上的 Category 屬性是導覽屬性。 在 Entity Framework 中,導覽屬性提供一種方式來巡覽兩個實體類型之間的關聯性。
EF 提供一個選項,讓你在第一次存取導航屬性時自動從資料庫載入相關實體。 使用這種類型的負載(稱為延遲載入),第一次存取每個導覽屬性時,請注意,若內容未載入至上下文中,便會對資料庫執行個別查詢。
使用 POCO 實體類型時,EF 透過在執行時建立衍生代理類型實例,然後覆寫類別中的虛擬屬性以附加載入掛鉤來達成延遲載入。 要讓相關物件的 lazy 載入,你必須將導航屬性 getter 宣告為 公開 和 虛擬 (在 Visual Basic 中為 可覆寫),且你的類別不能是 封閉的 (在 Visual Basic 中為 NotOverridable)。 使用 Database First 時,導覽屬性會自動設為虛擬的,以啟用延遲載入。 在「Code First」部分,我們選擇讓導航屬性虛擬化,原因相同
將對象系結至控件
將模型中定義的類別加入為此 WinForms 應用程式的資料來源。
從主選單中,選擇 專案 -> 新增資料來源...... (在 Visual Studio 2010 中,你需要選擇 資料 -> 新增資料來源......)
在「選擇資料來源類型」視窗中,選擇物件並點擊「下一頁」
在「選擇資料物件」對話框中,展開兩次 WinFormswithEFSample 並選擇 「類別 」。不需要選擇「產品」資料來源,因為我們會透過「類別」資料來源上的「產品」屬性進入。

點擊完成。如果資料來源視窗沒有顯示,請選擇「檢視」->「其他視窗->資料來源」
按下針腳圖示,這樣資料來源視窗就不會自動隱藏。 如果視窗已經顯示,您可能需要按下重新整理按鈕。

在解決方案總管中,雙擊 Form1.cs 檔案即可在設計器中開啟主表單。
選擇「 分類 資料來源」並在表單上拖曳。 預設情況下,設計器會新增新的 DataGridView(categoryDataGridView)與導航工具列控制項。 這些控制項綁定於 BindingSource(categoryBindingSource)和 Binding Navigator(categoryBindingNavigator)元件,並同時建立。
編輯 categoryDataGridView 上的欄位。 我們想將 CategoryId 欄位設為唯讀。 CategoryId 屬性的值會在儲存資料後由資料庫產生。
- 右鍵點擊 DataGridView 控制項,選擇編輯欄位...
- 選擇 CategoryId 欄位,並將 ReadOnly 設為 True。
- 按下確定鍵
從分類資料來源下選擇產品,然後在表單中拖曳。 productDataGridView 和 productBindingSource 會被加入表單中。
編輯 productDataGridView 上的欄位。 我們想隱藏 CategoryId 和 Category 欄位,並將 ProductID 設為唯讀。 ProductId 屬性的值會在儲存資料後由資料庫產生。
- 右鍵點選 DataGridView 控制項,選擇 編輯欄位...。
- 選擇 ProductID 欄位,並將 ReadOnly 設 為 true。
- 選擇 CategoryId 欄位並按下 移除 按鈕。 對 分類 欄位也做同樣的處理。
- 按 [確定]。
到目前為止,我們將 DataGridView 控制項與設計器中的 BindingSource 元件關聯起來。 在下一節,我們將為程式碼後續新增程式碼,將 categoryBindingSource.DataSource 設定為目前由 DbContext 追蹤的實體集合。 當我們從 Category 底下拖放 Products 時,WinForms 會幫忙把 productsBindingSource.DataSource 屬性設定到 categoryBindingSource,然後把 productsBindingSource.DataMember 屬性設定成 Products。 由於此綁定,只有屬於目前所選類別的產品會顯示在 productDataGridView 中。
點擊滑鼠右鍵並選擇啟用,啟用導航工具列的儲存按鈕。

雙擊按鈕即可新增存檔按鈕的事件處理程式。 這樣會新增事件處理程序,並帶你進入表單背後的程式碼。 categoryBindingNavigatorSaveItem_Click事件處理程式的程式碼將在下一節加入。
新增處理資料互動的程式碼
我們現在會新增程式碼,讓它使用 ProductContext 來執行資料存取。 請如下所示更新主表單視窗的程式碼。
該程式碼宣告了一個長期執行的 ProductContext 實例。 ProductContext 物件用於查詢並儲存資料到資料庫。 接著,ProductContext 實例上的 Dispose() 方法會從覆寫的 OnClosing 方法中呼叫。 程式碼註解會詳細說明程式碼的功能。
    using System;
    using System.Collections.Generic;
    using System.ComponentModel;
    using System.Data;
    using System.Drawing;
    using System.Linq;
    using System.Text;
    using System.Threading.Tasks;
    using System.Windows.Forms;
    using System.Data.Entity;

    namespace WinFormswithEFSample
    {
        public partial class Form1 : Form
        {
            ProductContext _context;
            public Form1()
            {
                InitializeComponent();
            }

            protected override void OnLoad(EventArgs e)
            {
                base.OnLoad(e);
                _context = new ProductContext();

                // Call the Load method to get the data for the given DbSet
                // from the database.
                // The data is materialized as entities. The entities are managed by
                // the DbContext instance.
                _context.Categories.Load();

                // Bind the categoryBindingSource.DataSource to
                // all the Unchanged, Modified and Added Category objects that
                // are currently tracked by the DbContext.
                // Note that we need to call ToBindingList() on the
                // ObservableCollection<TEntity> returned by
                // the DbSet.Local property to get the BindingList<T>
                // in order to facilitate two-way binding in WinForms.
                this.categoryBindingSource.DataSource =
                    _context.Categories.Local.ToBindingList();
            }

            private void categoryBindingNavigatorSaveItem_Click(object sender, EventArgs e)
            {
                this.Validate();

                // Currently, the Entity Framework doesn’t mark the entities
                // that are removed from a navigation property (in our example the Products)
                // as deleted in the context.
                // The following code uses LINQ to Objects against the Local collection
                // to find all products and marks any that do not have
                // a Category reference as deleted.
                // The ToList call is required because otherwise
                // the collection will be modified
                // by the Remove call while it is being enumerated.
                // In most other situations you can do LINQ to Objects directly
                // against the Local property without using ToList first.
                foreach (var product in _context.Products.Local.ToList())
                {
                    if (product.Category == null)
                    {
                        _context.Products.Remove(product);
                    }
                }

                // Save the changes to the database.
                this._context.SaveChanges();

                // Refresh the controls to show the values
                // that were generated by the database.
                this.categoryDataGridView.Refresh();
                this.productsDataGridView.Refresh();
            }

            protected override void OnClosing(CancelEventArgs e)
            {
                base.OnClosing(e);
                this._context.Dispose();
            }
        }
    }
測試 Windows 表單應用程式
編譯並執行應用程式,你可以測試功能。

儲存商店後,螢幕上會顯示產生的金鑰。

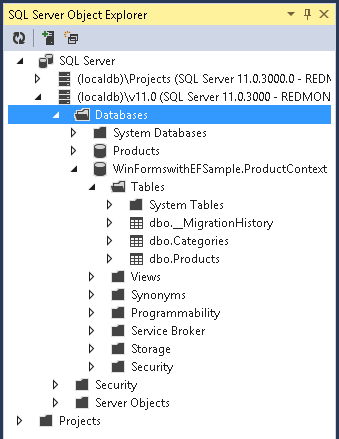
如果你使用 Code First,你也會看到一個 WinFormswithEFSample.ProductContext 資料庫為你建立。